
SNMP
In this tutorial we're going to look at how we can setup snmp for multiple operating systems:
In this tutorial we're going to look at how we can setup snmp for multiple operating systems:
First we need to install the required dependencies:
root@home:~# apt install snmpd snmp
Reading package lists... Done
Building dependency tree
Reading state information... Done
The following additional packages will be installed:
  libmariadb3 libsnmp-base libsnmp30 mariadb-common mysql-common
Suggested packages:
  snmp-mibs-downloader snmptrapd
The following NEW packages will be installed:
  libmariadb3 libsnmp-base libsnmp30 mariadb-common mysql-common snmp snmpd
0 upgraded, 7 newly installed, 0 to remove and 0 not upgraded.
Need to get 4,339 kB of archives.
After this operation, 8,513 kB of additional disk space will be used.
Do you want to continue? [Y/n] y
Then we're going to get a snmp configuration sample along with the distro binary file:
root@home:~# wget https://void.yt/snmp/snmpd.conf -O /etc/snmp/snmpd.conf
--2021-04-30 19:42:15--  https://void.yt/snmp/snmpd.conf
Resolving void.yt (void.yt)... 85.171.172.151
Connecting to void.yt (void.yt)|85.171.172.151|:443... connected.
HTTP request sent, awaiting response... 200 OK
Length: 1522 (1.5K) [application/octet-stream]
Saving to: ‘/etc/snmp/snmpd.conf’

/etc/snmp/snmpd.conf                100%[=================================================================>]   1.49K  --.-KB/s    in 0s

2021-04-30 19:42:16 (11.3 MB/s) - ‘/etc/snmp/snmpd.conf’ saved [1522/1522]

root@home:~# vim /etc/snmp/snmpd.conf
Edit this configuration however you like, then :wq to save and quit out of vim:
#  Listen for connections on all interfaces (both IPv4 *and* IPv6)
agentAddress udp:161,udp6:[::1]:161

#  Full view access
view   all         included   .1

#  system + hrSystem groups only
view   systemonly  included   .1.3.6.1.2.1.1
view   systemonly  included   .1.3.6.1.2.1.25.1

#  Default access to full view
rocommunity void.yt  default    -V all

#  Default access to basic system info
#rocommunity public  default    -V systemonly

#  System contact and location
#syslocation Rack/Room/Building, Street, City, Country [GPSX,Y]
syslocation Nowhere
syscontact Nothing

#  Disk Monitoring
disk       /     10000
disk       /var  5%
includeAllDisks  10%

# Unacceptable 1-, 5-, and 15-minute load averages
load   12 10 5

# This line allows Observium to detect the host OS if the distro script is installed
extend .1.3.6.1.4.1.2021.7890.1 distro /usr/local/bin/distro

# This lines allows Observium to detect hardware, vendor and serial
extend .1.3.6.1.4.1.2021.7890.2 hardware /bin/cat /sys/devices/virtual/dmi/id/product_name
extend .1.3.6.1.4.1.2021.7890.3 vendor   /bin/cat /sys/devices/virtual/dmi/id/sys_vendor
extend .1.3.6.1.4.1.2021.7890.4 serial   /bin/cat /sys/devices/virtual/dmi/id/product_serial

# This line allows Observium to collect an accurate uptime
extend uptime /bin/cat /proc/uptime

# This line enables Observium's ifAlias description injection
#pass_persist .1.3.6.1.2.1.31.1.1.1.18 /usr/local/bin/ifAlias_persist
Make sure you edit the rocommunity line properly, this contains the community string (the password to view the system infos) so replace it with 'rocommunity MyP@$$W0RD default -V all'
After you configured snmp, make sure you have the /usr/bin/distro bashscript:
root@home:~# wget https://void.yt/snmp/distro -O /usr/local/bin/distro
--2021-04-30 19:49:30--  https://void.yt/snmp/distro
Resolving void.yt (void.yt)... 85.171.172.151
Connecting to void.yt (void.yt)|85.171.172.151|:443... connected.
HTTP request sent, awaiting response... 200 OK
Length: 4677 (4.6K) [application/octet-stream]
Saving to: ‘/usr/local/bin/distro’

/usr/local/bin/distro              100%[================================================================>]   4.57K  --.-KB/s    in 0s

2021-04-30 19:49:30 (25.8 MB/s) - ‘/usr/local/bin/distro’ saved [4677/4677]

root@home:~# chmod +x /usr/local/bin/distro
root@home:~# /usr/local/bin/distro
Debian 10.9
Once that's done, simply restart the snmpd systemd service since we changed the default config:
root@home:~# systemctl restart snmpd
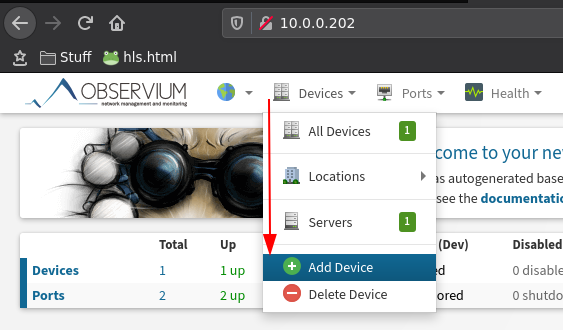
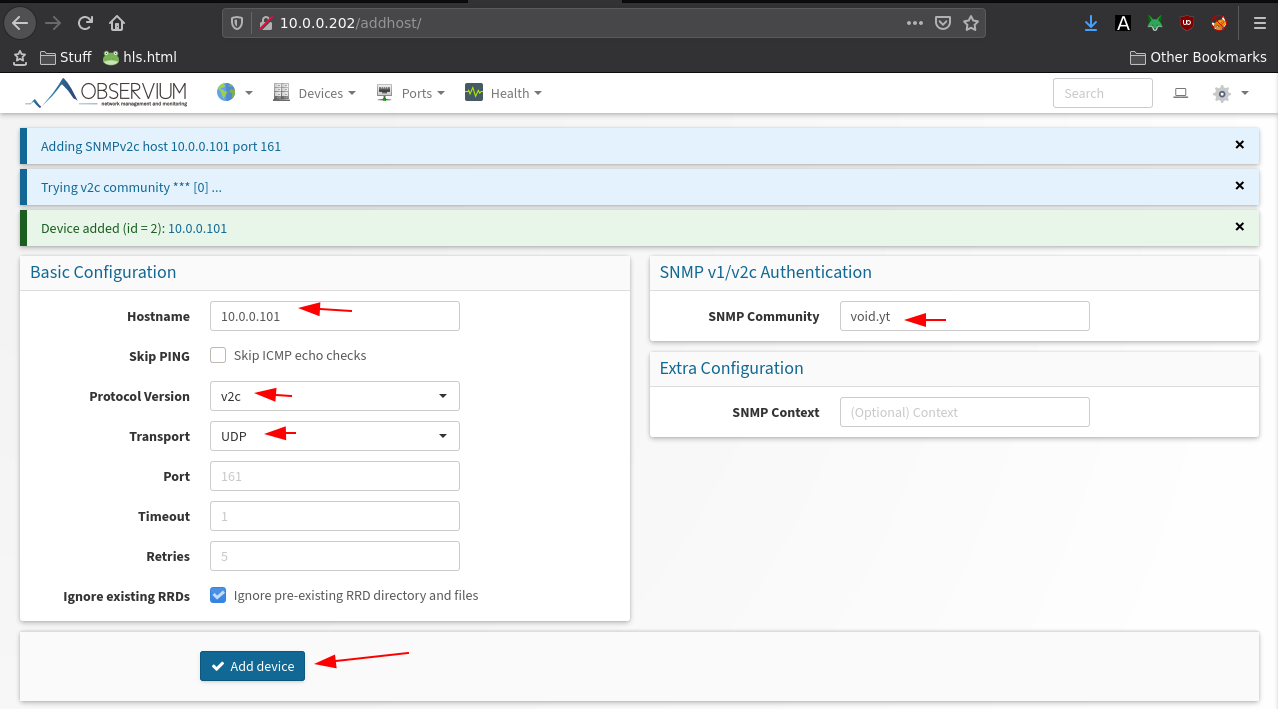
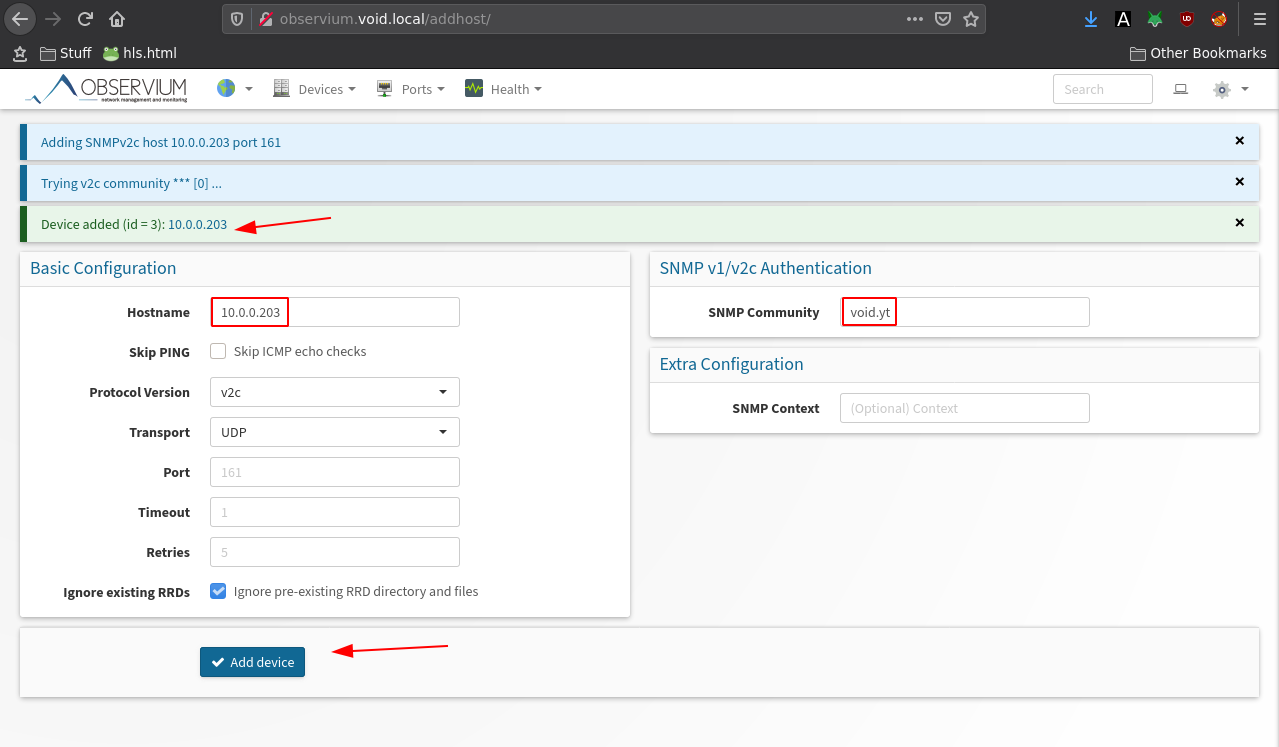
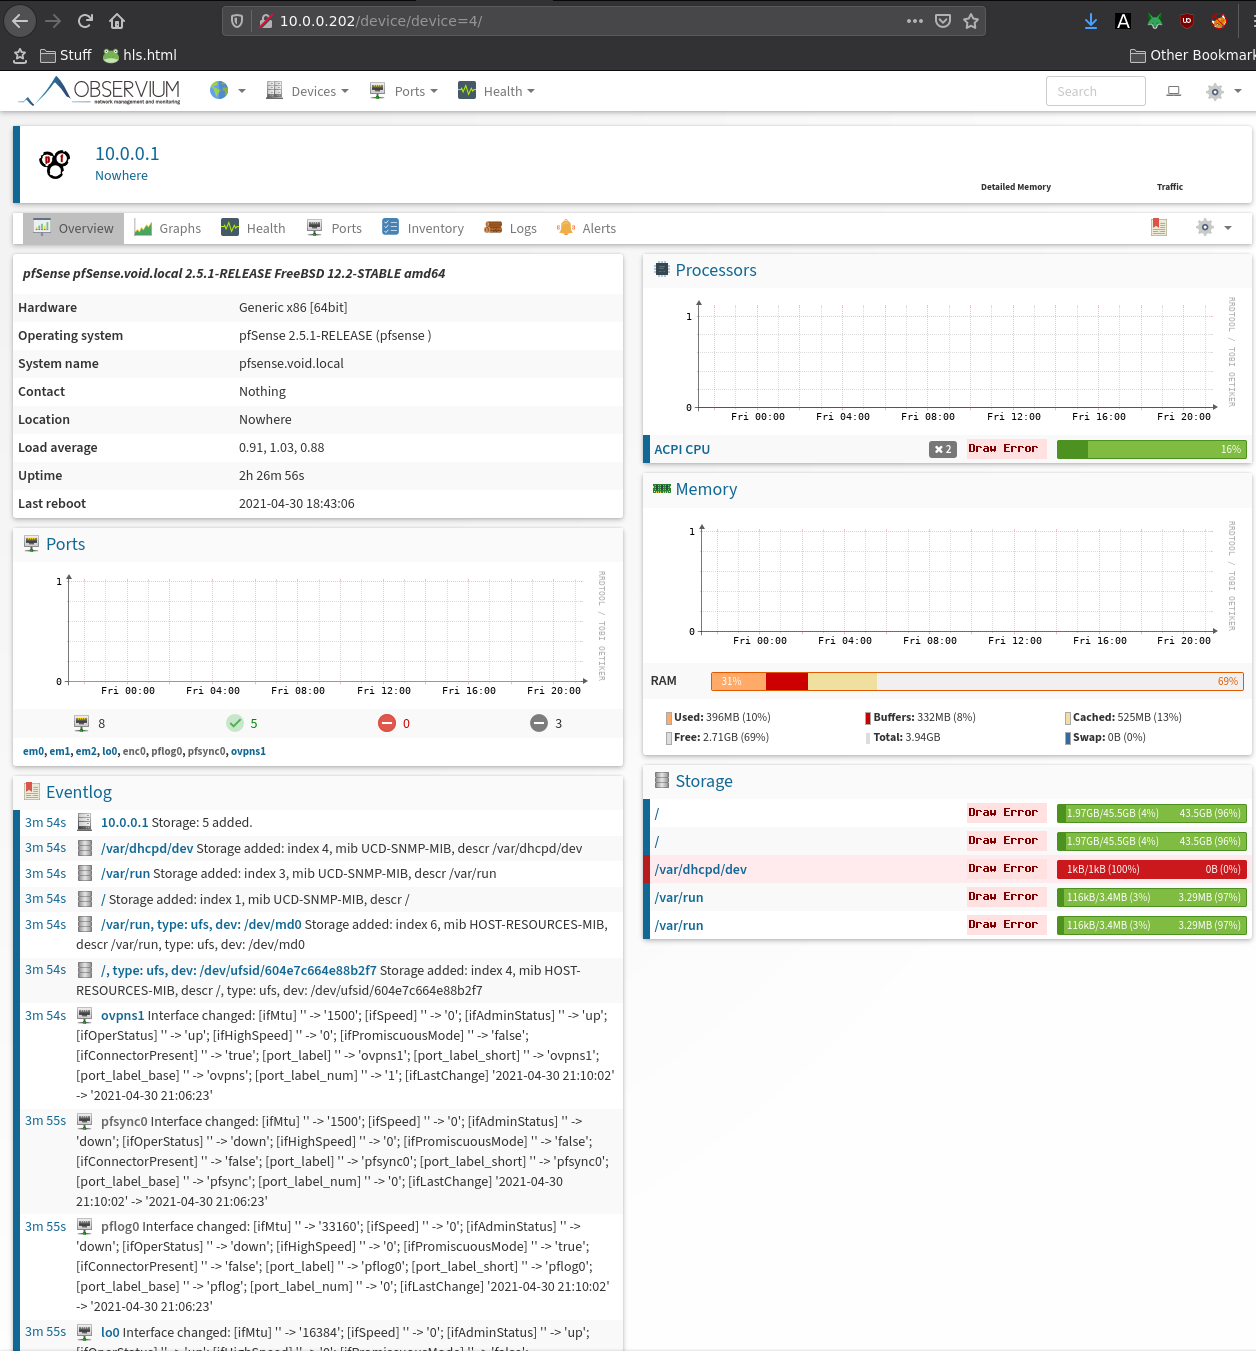
And that's it ! Now add it to your monitoring solution such as Observium:

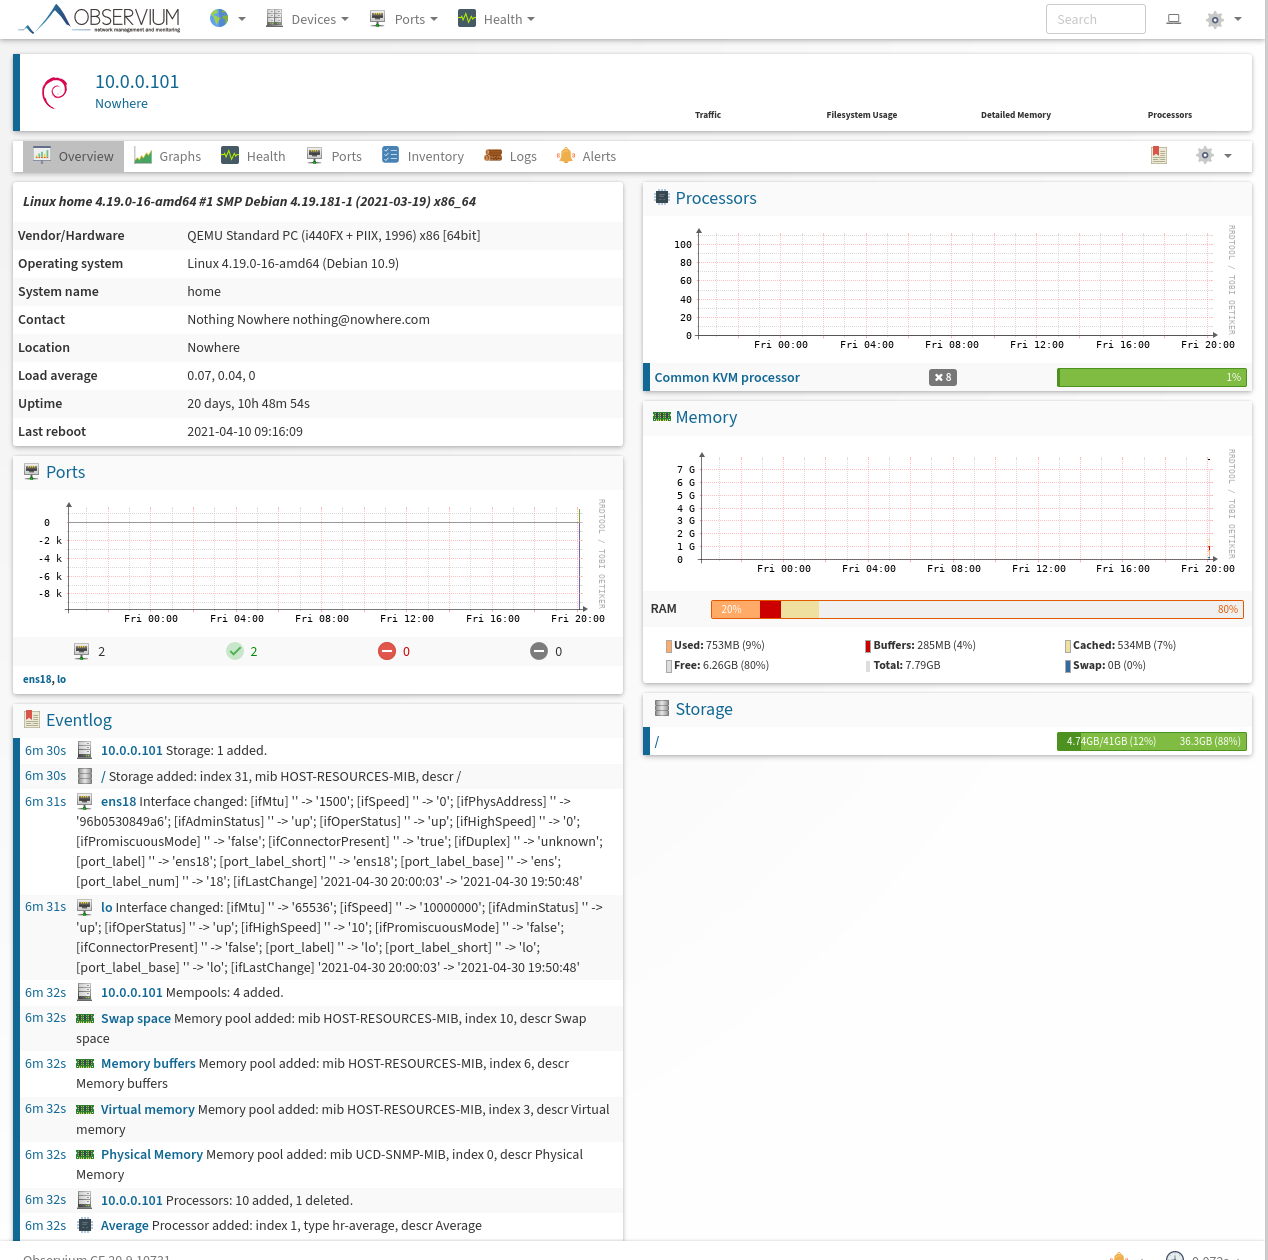
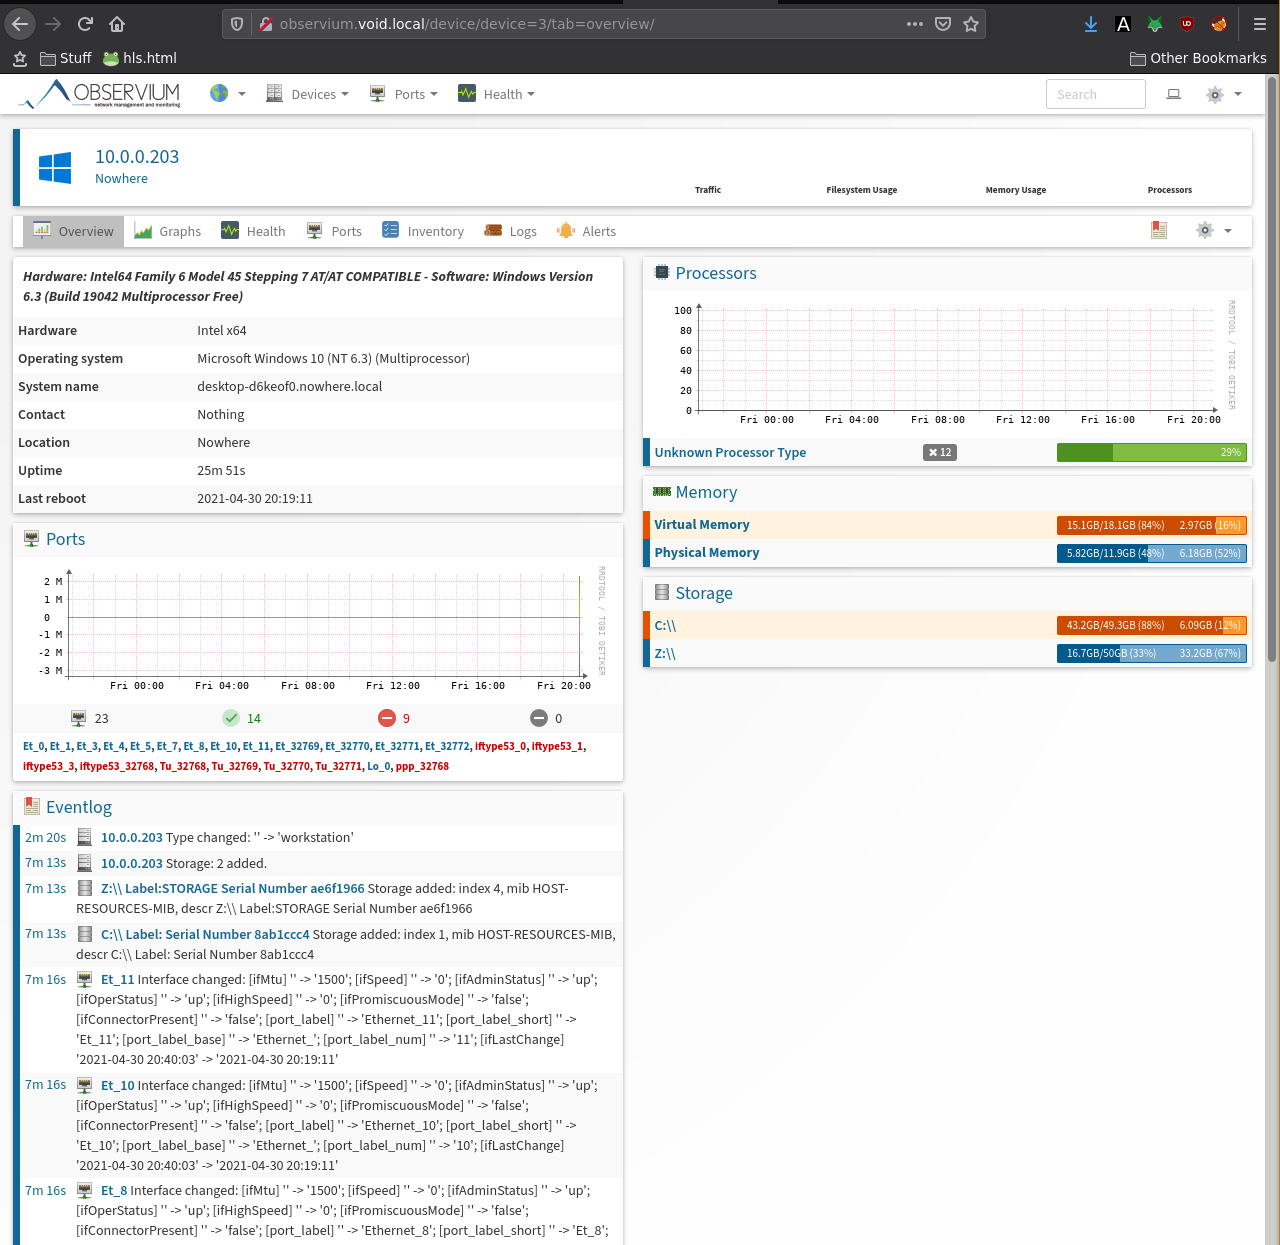
Once the device is added, you need to wait for the device to get automatically polled, which usually takes 5-10 minutes on observium.
Check out my zabbix tutorial on how i setup a snmp OID to monitor the monthly bandwidth usage of my VPS here
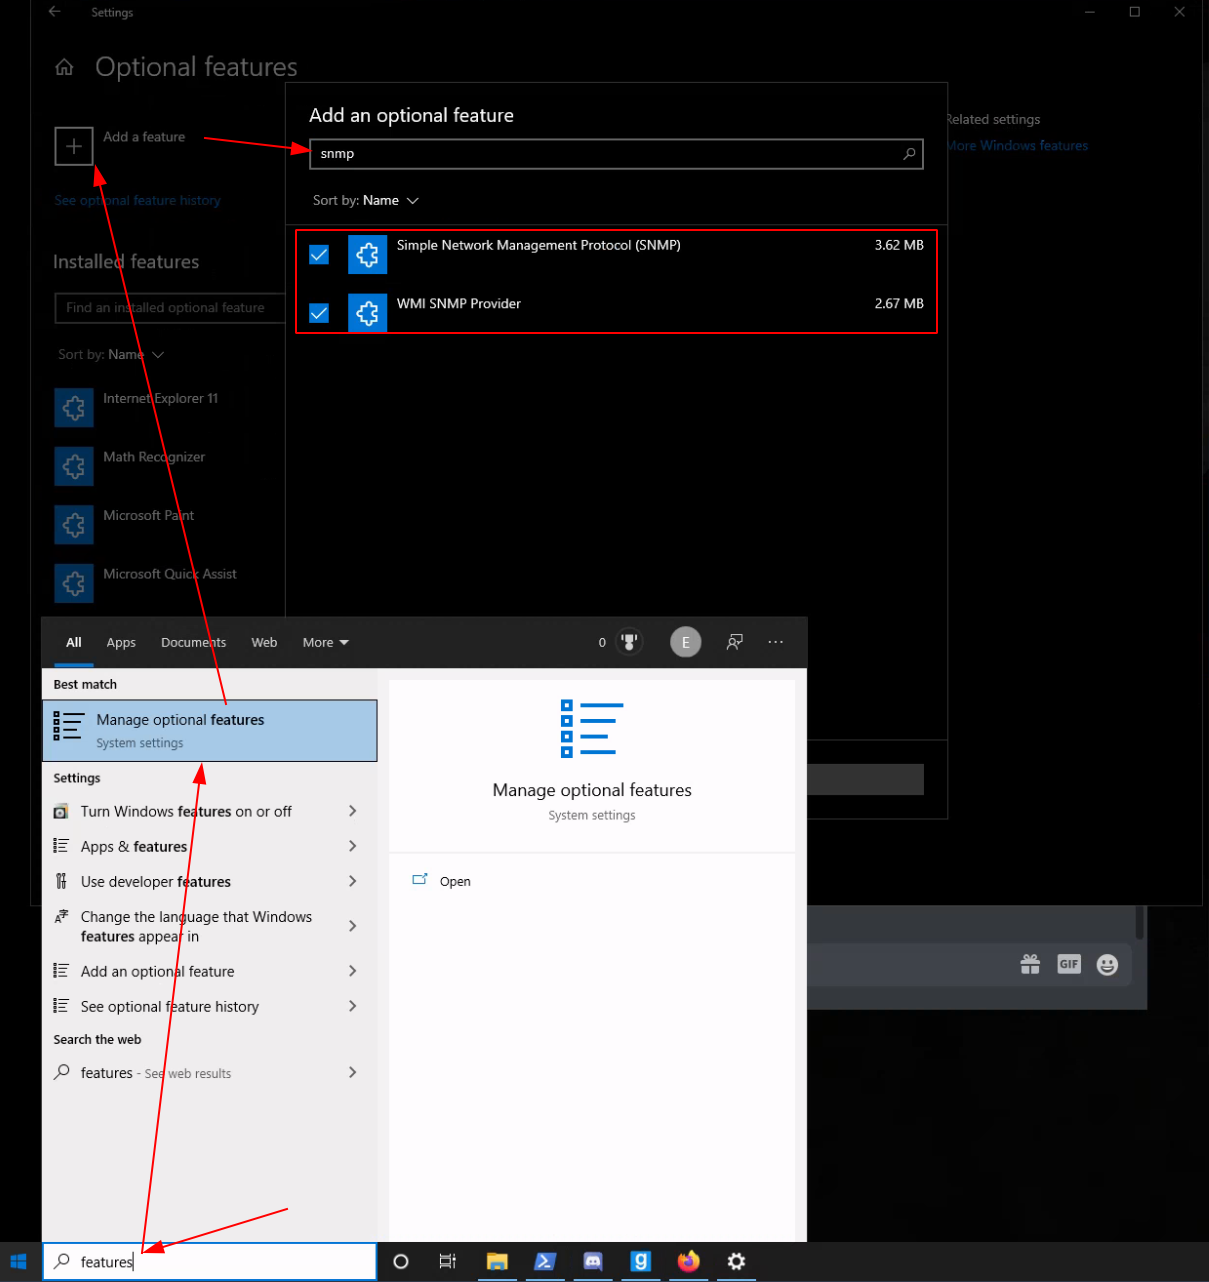
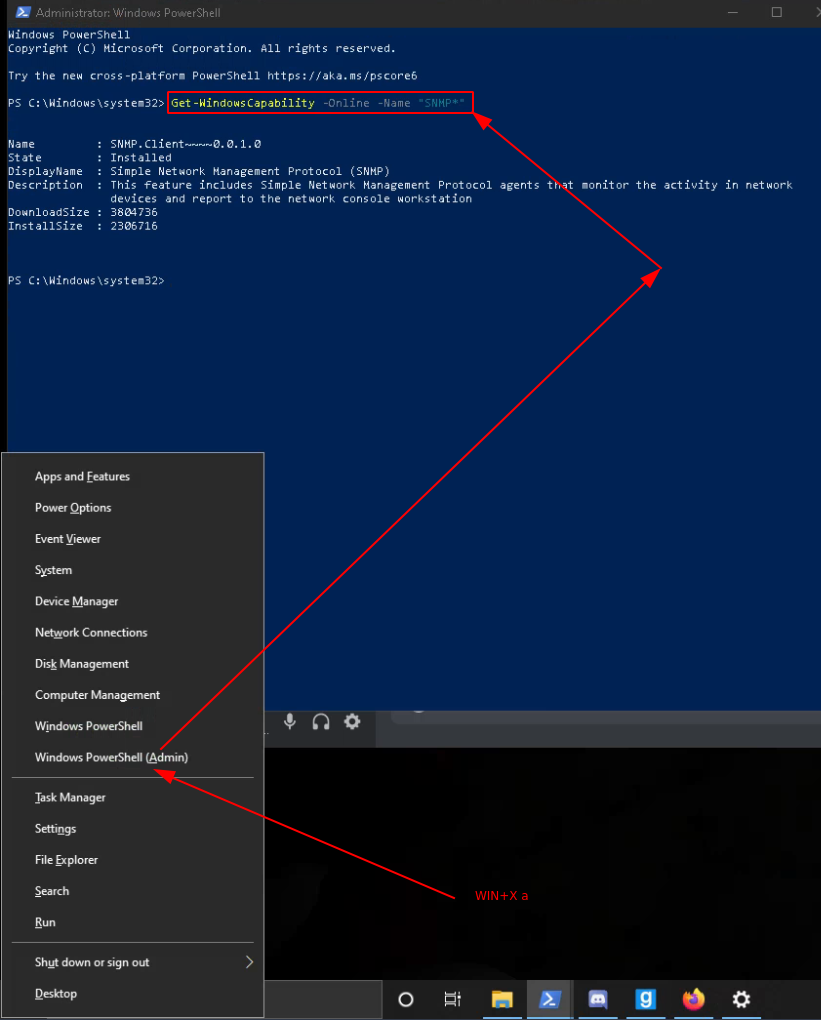
First add the windows10 SNMP feature:
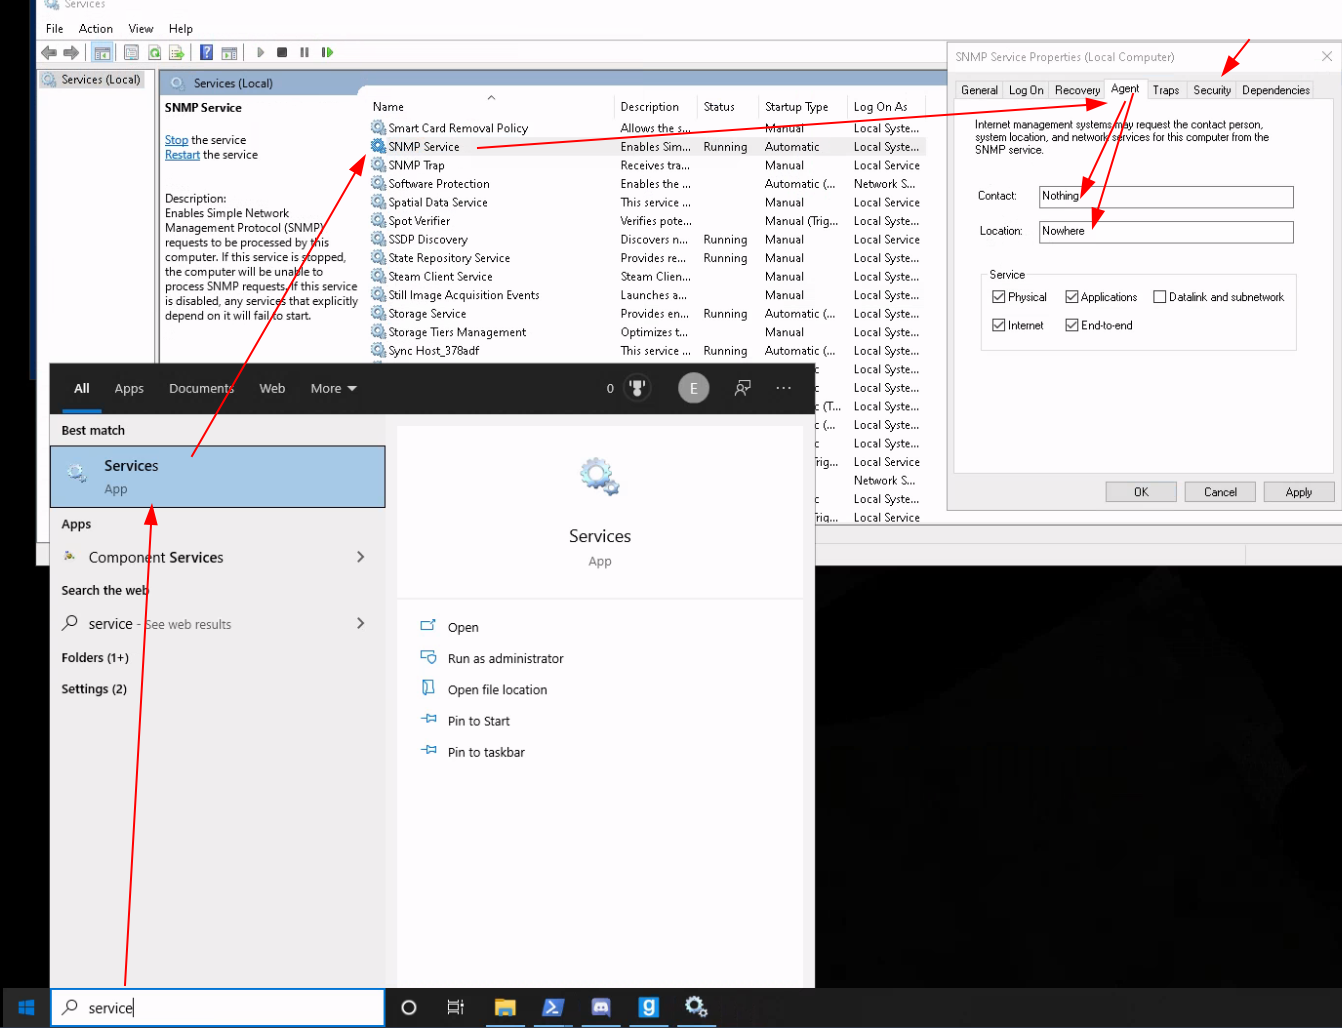
Then configure snmp itself with your readonly (RO) community string:
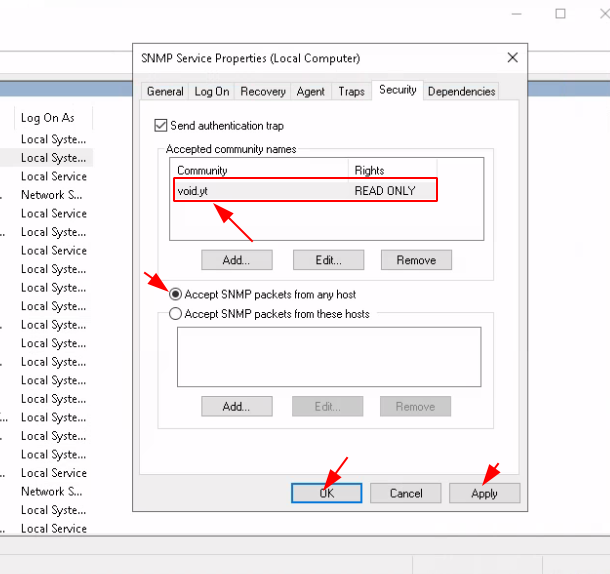
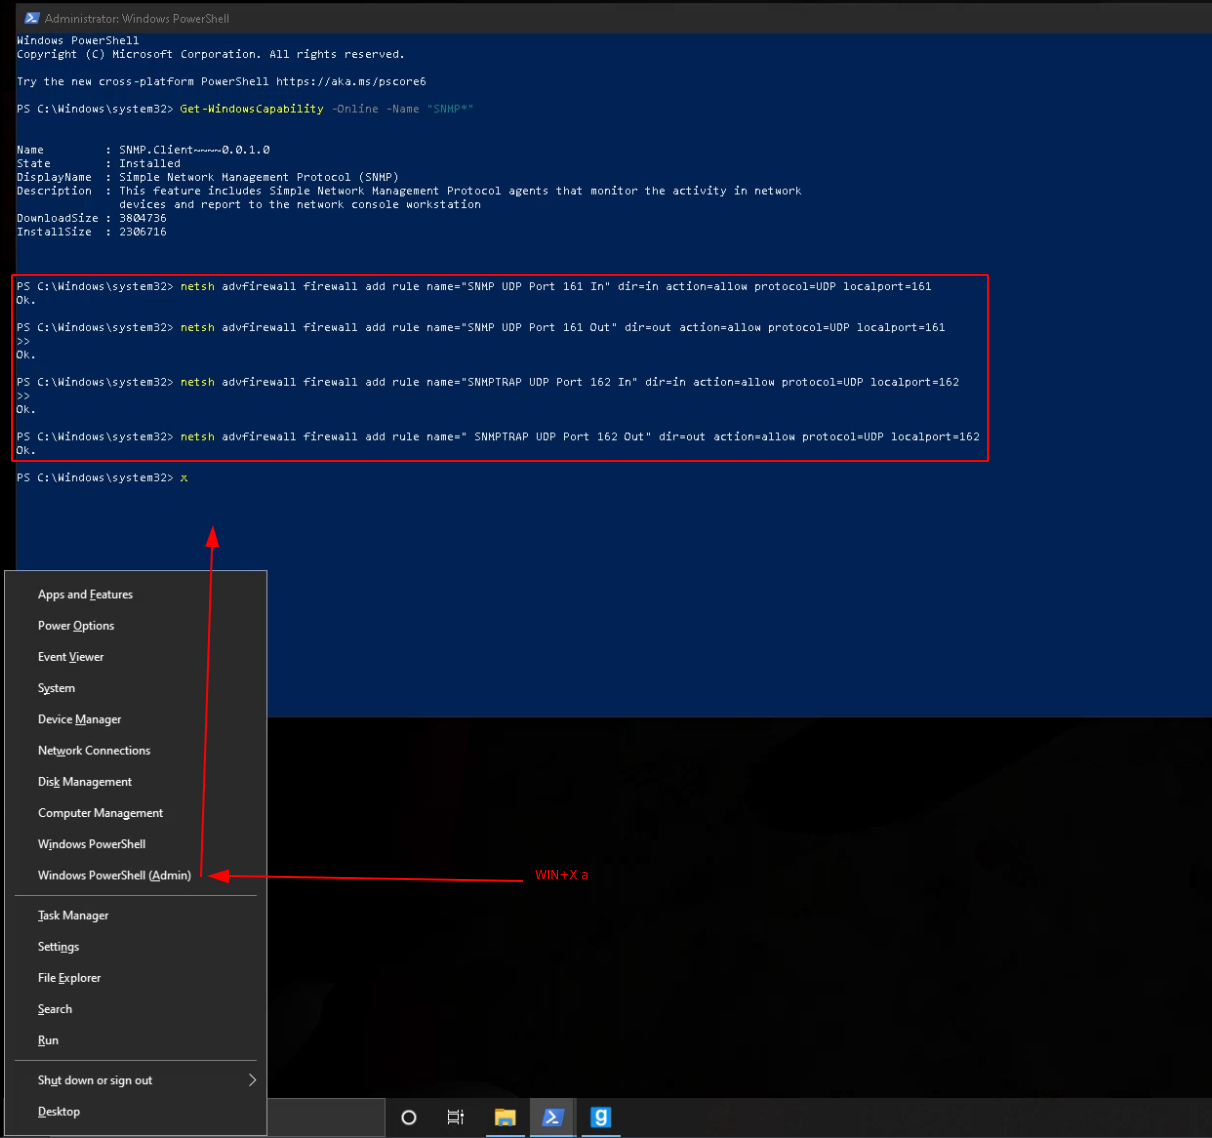
If you want you can select to only accept snmp packets from certain hosts for which you need to specify which IPs to filter. Next you need to go into Windows' firewall to enable the SNMP packets:
netsh advfirewall firewall add rule name="SNMP UDP Port 161 In" dir=in action=allow protocol=UDP localport=161

netsh advfirewall firewall add rule name="SNMP UDP Port 161 Out" dir=out action=allow protocol=UDP localport=161

netsh advfirewall firewall add rule name="SNMPTRAP UDP Port 162 In" dir=in action=allow protocol=UDP localport=162

netsh advfirewall firewall add rule name=" SNMPTRAP UDP Port 162 Out" dir=out action=allow protocol=UDP localport=162
Once that's done, you should be able to add it to your monitoring tool:
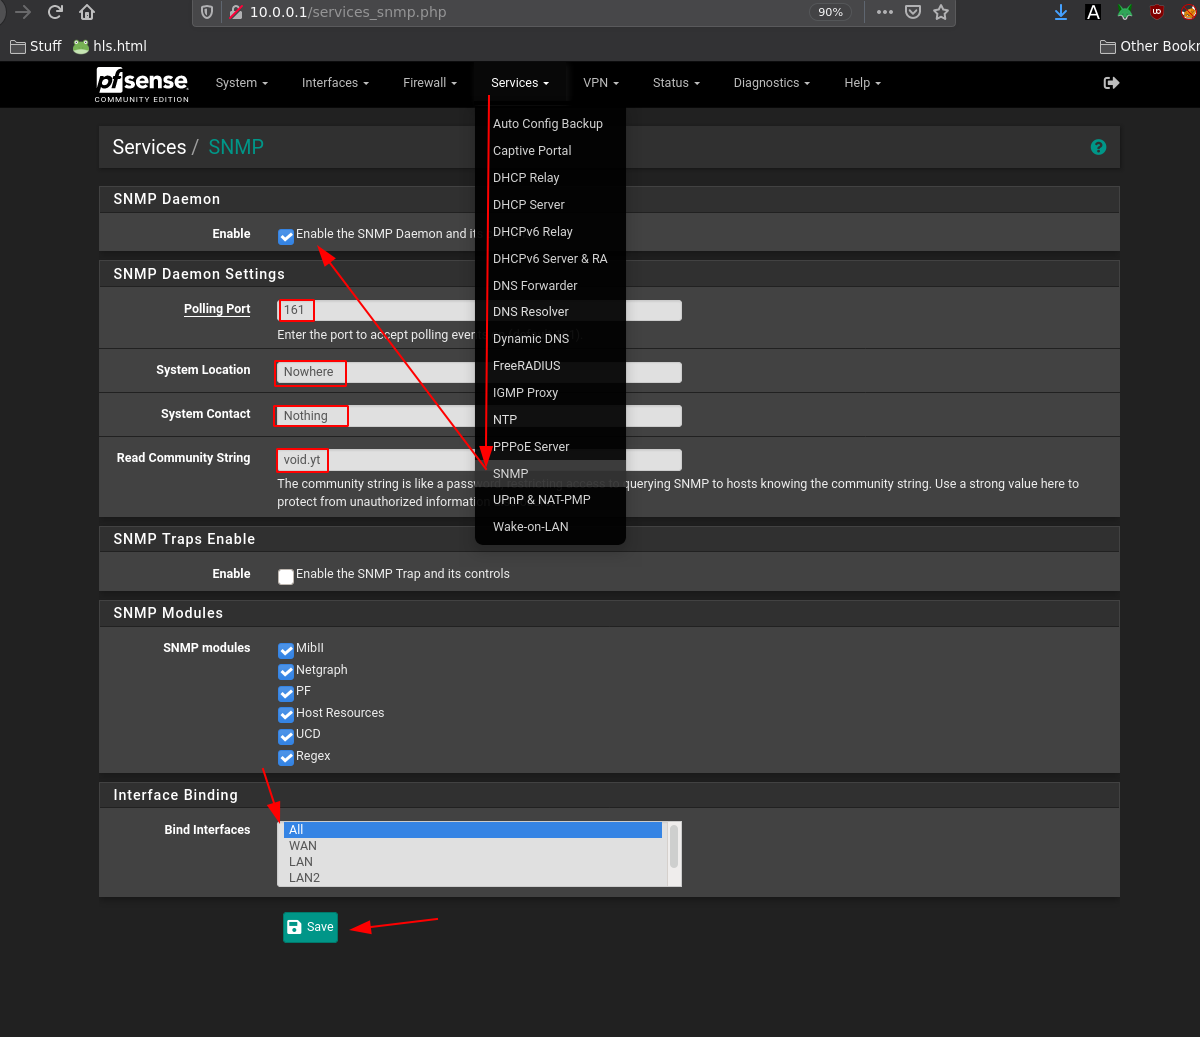
Same thing as our previous 2 examples, let enable and configure snmp:
And then just add the host:
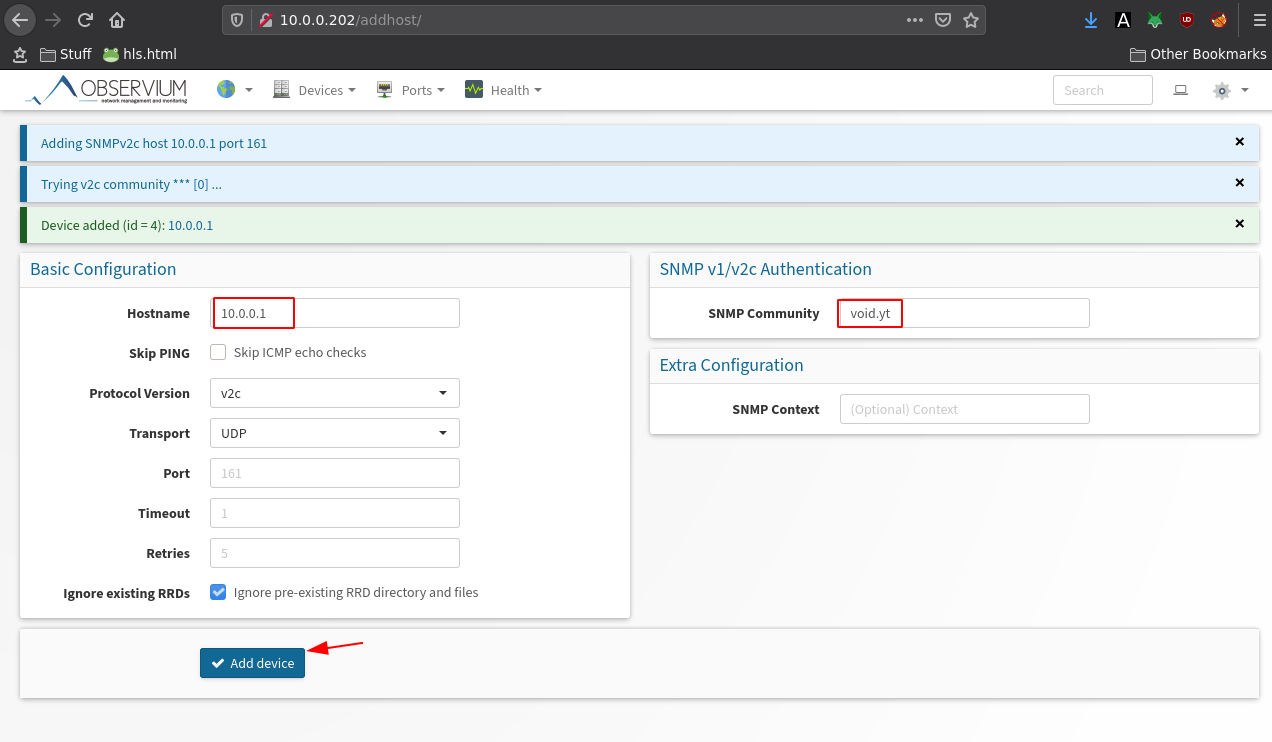
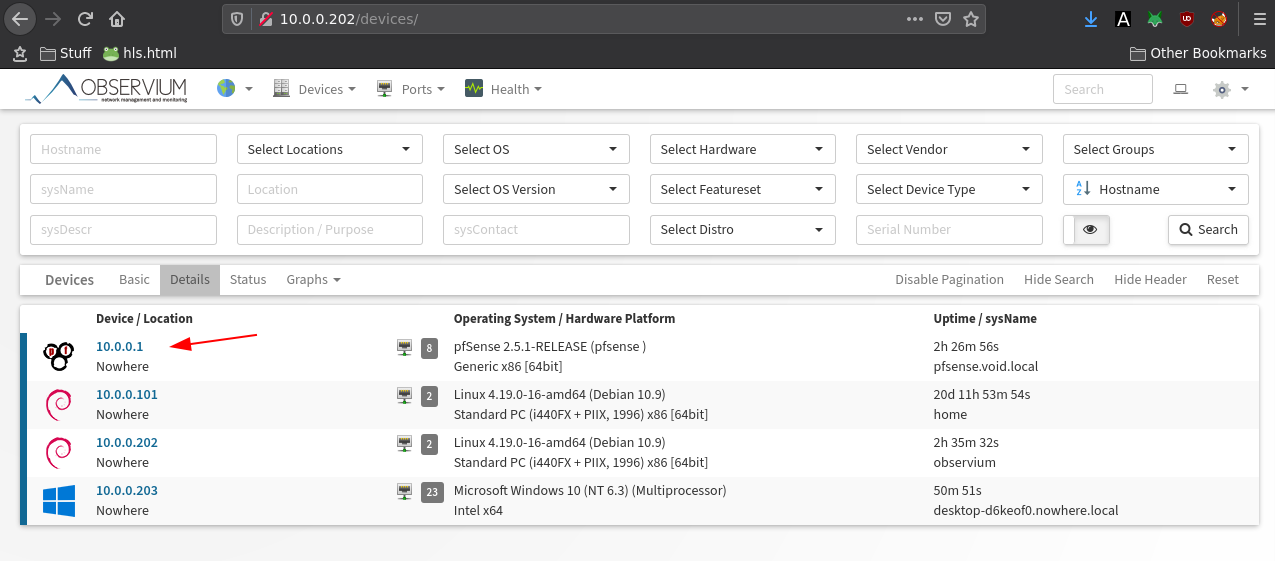
And that's it! We managed to add 3 different hosts to our observium instance to monitor via the SNMP protocol.
Some Address 67120,
Duttlenheim, France.
This cute theme was created to showcase your work in a simple way. Use it wisely.