
hMailServer Setup

In this tutorial we're going to setup hMailServer on a local WS2019 VM with AD-DNS on it, if you don't have it already, please check out this tutorial to get it, then proceed as follows:
In this tutorial we're going to setup hMailServer on a local WS2019 VM with AD-DNS on it, if you don't have it already, please check out this tutorial to get it, then proceed as follows:
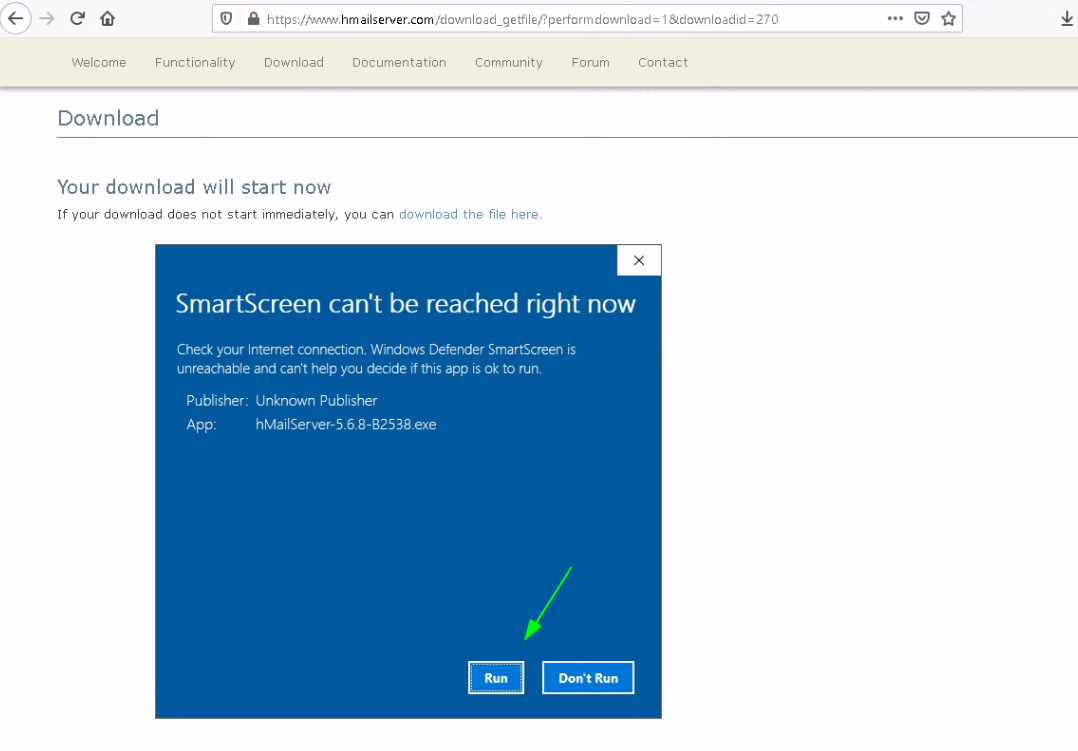
Start off from your WS2019 VM to which you connect to via RDP or via SPICE display, and go there to download the latest release of hMailServer:
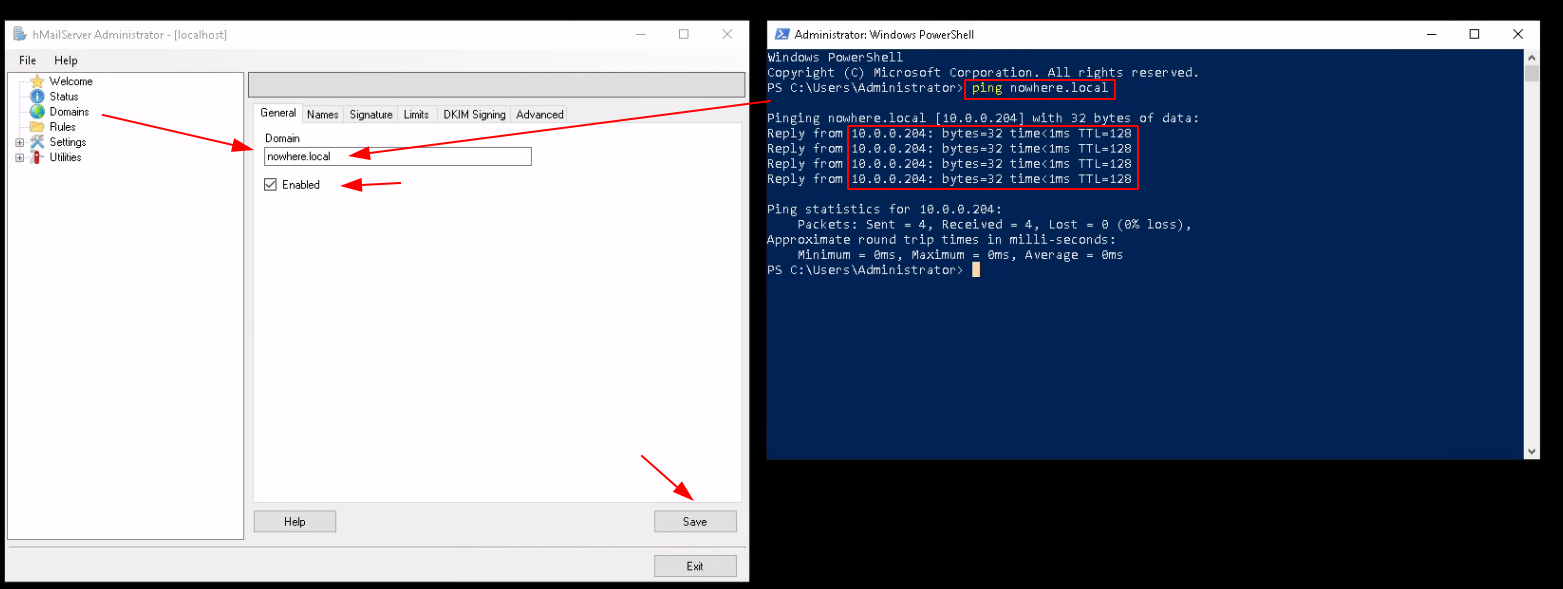
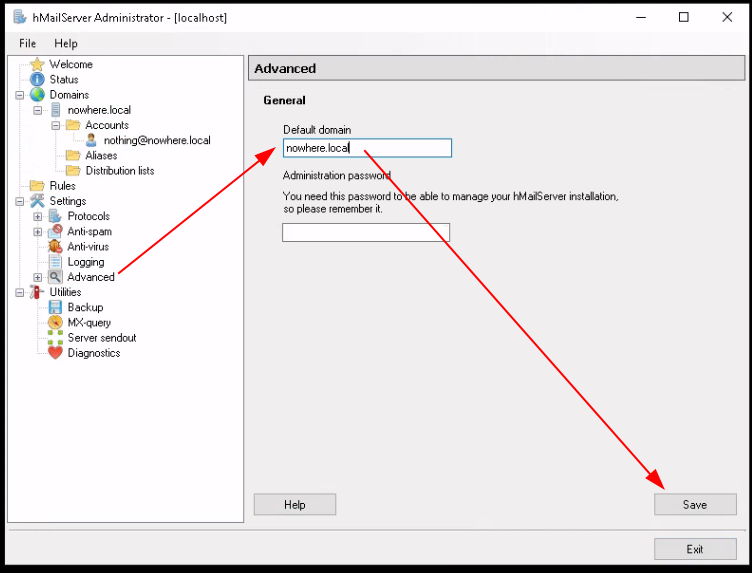
Just add the WS2019 server's local domain name:
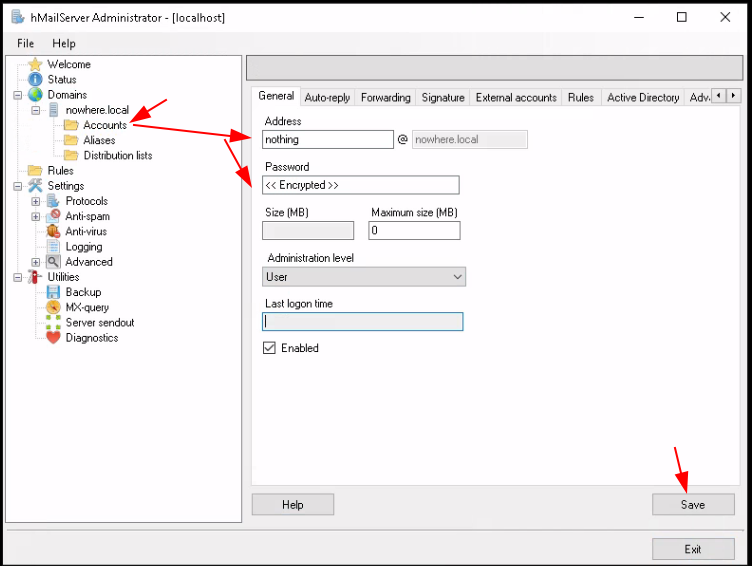
Then create your mail user account:
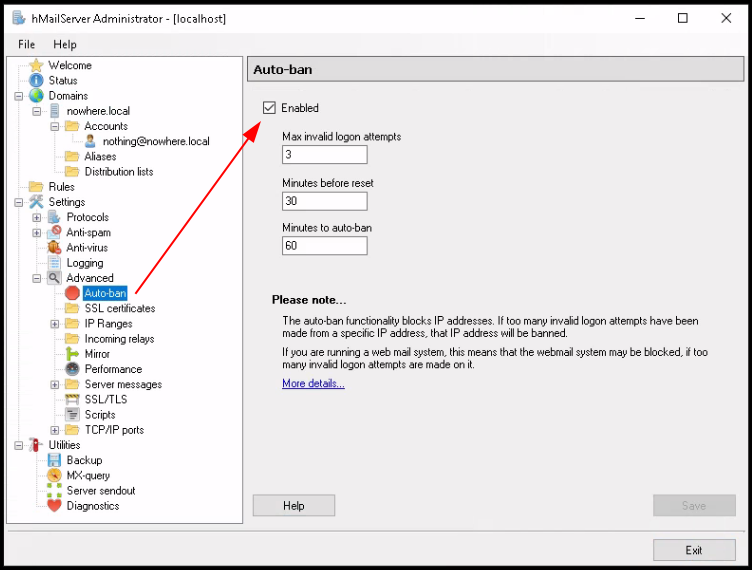
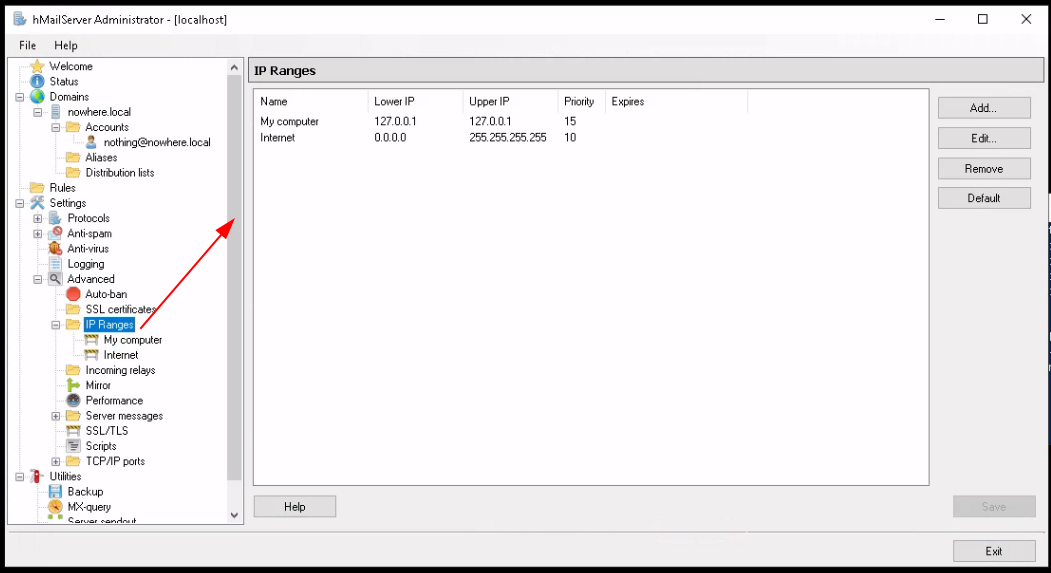
You can click 'IP Ranges' to edit the ips you want to allow / restrict to access your hmail server
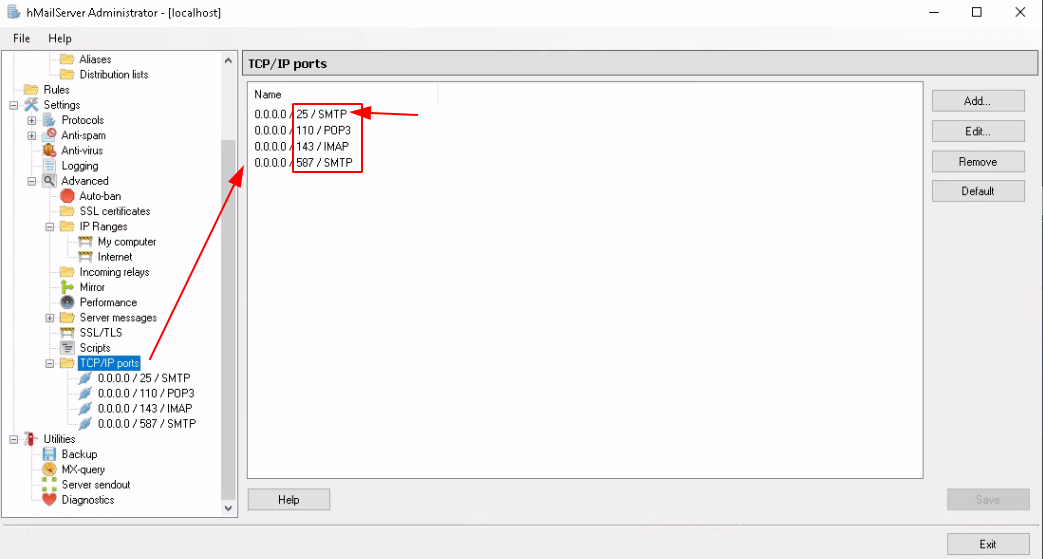
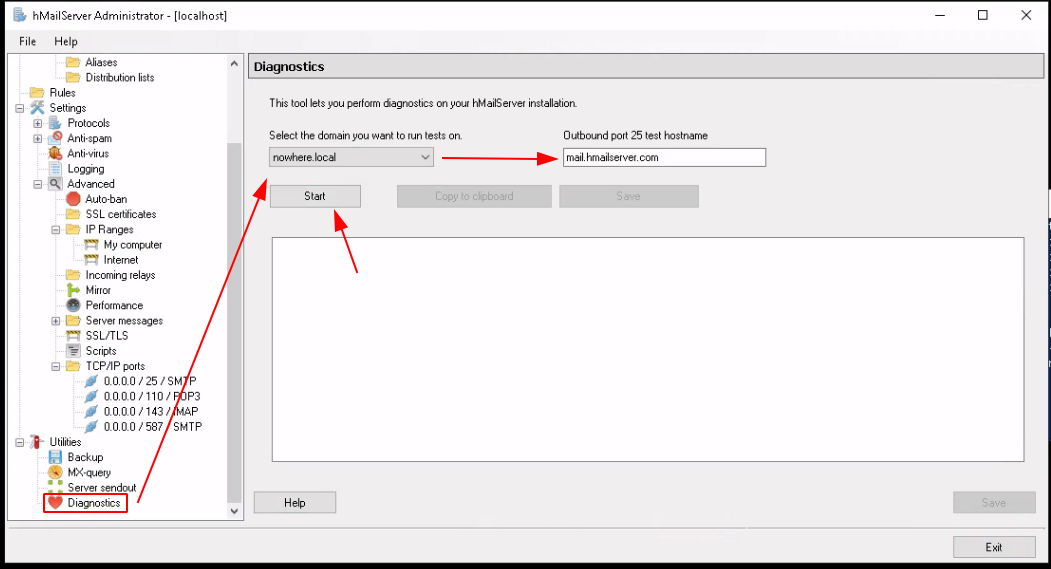
Above we see the one port that most providers refuse to allow publicly. If you try to use port 25 (SMTP) to send mails publicly, you will realize that not many ISPs allow it, why ? because most people use it to spam, and to battle against spam, most providers refuse to allow traffic coming from this port. Most commonly you have to ask the support services to allow your ip to use it's port 25 (SMTP). Unless if you're purely in a local network obviously. Now let's run the diagnostics checks:
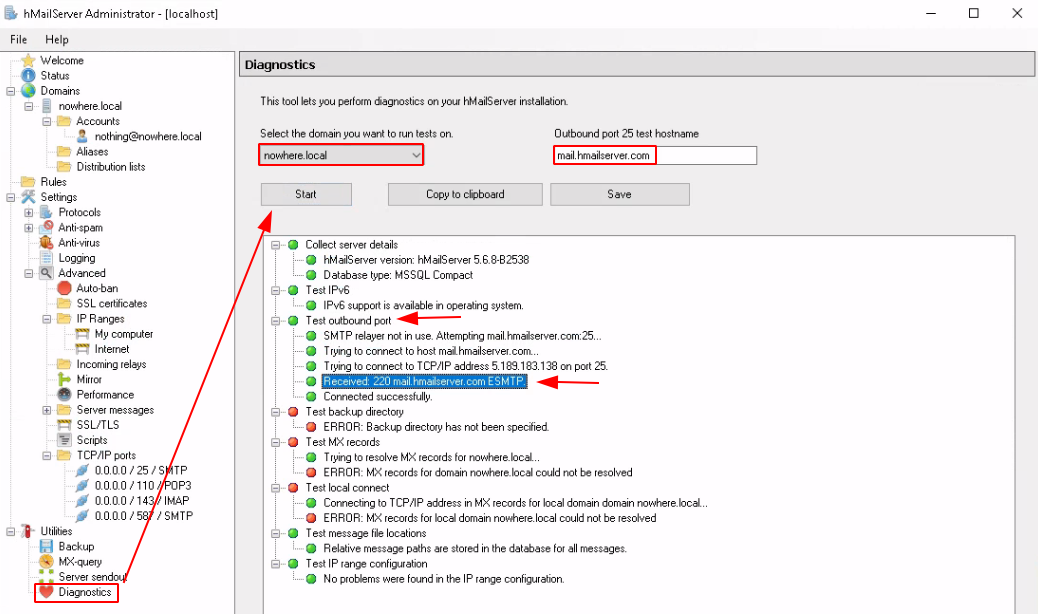
And that's it! We ran the diagnostics, and it passed the outbound port SMTP test. Obviously since this is purely a local hMailServer it won't pass all the checks. Now let's try to connect to it with thunderbird:
We're going to use thunderbird as the mail client, so download it and install it:

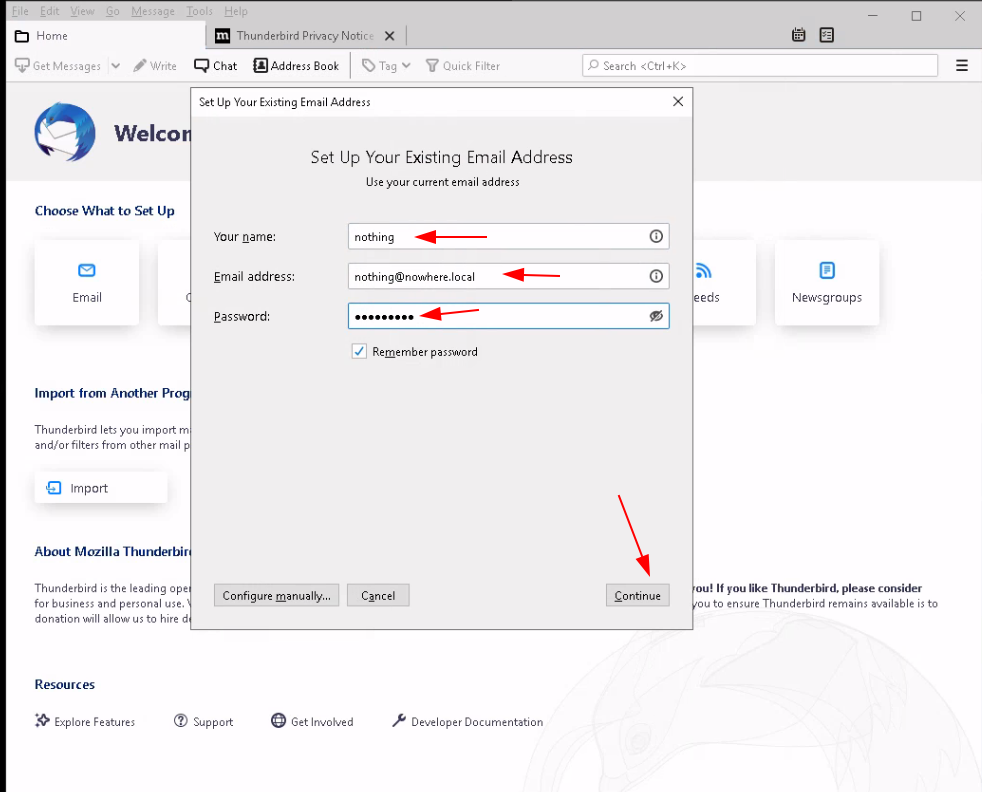
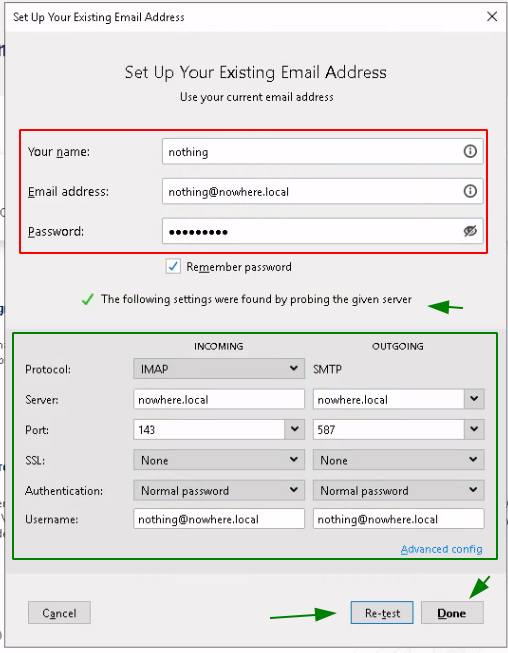
Use the following manual connection settings for now:
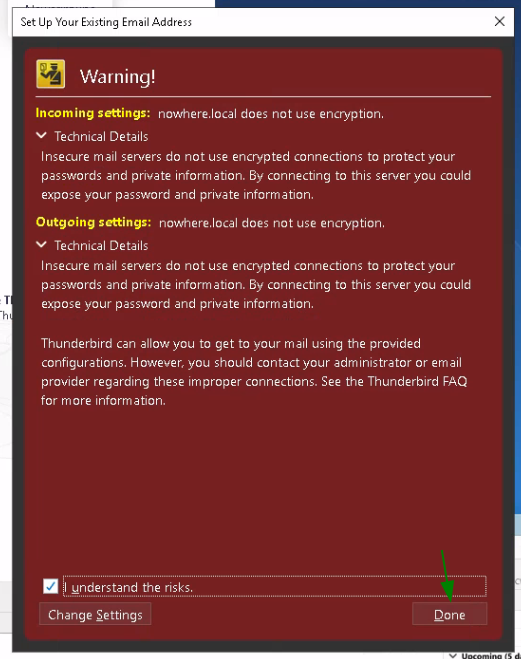
For now the server doesn't use SSL encryption, so you get the following warning:
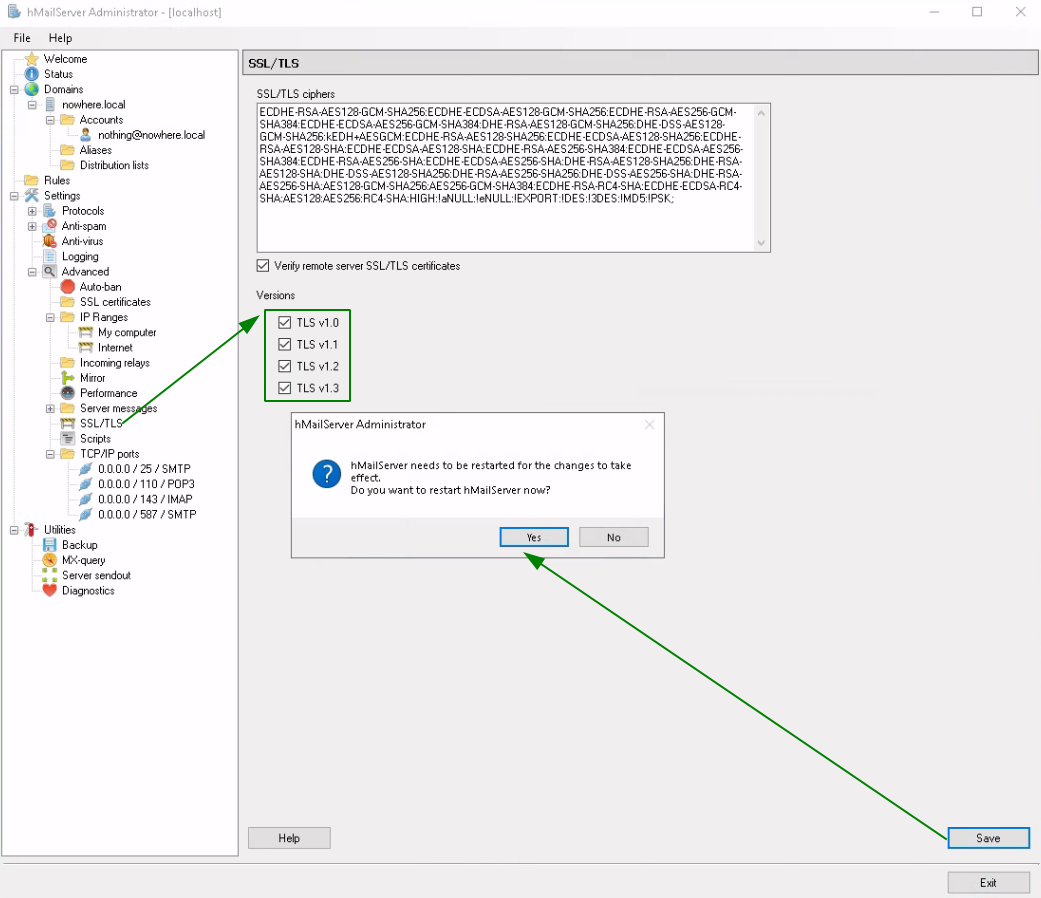
Let's see if we can enable SSL encryption:
For this next part just follow the first part of this tutorial to create the WS2019 certificate and then export it for hmailserver:
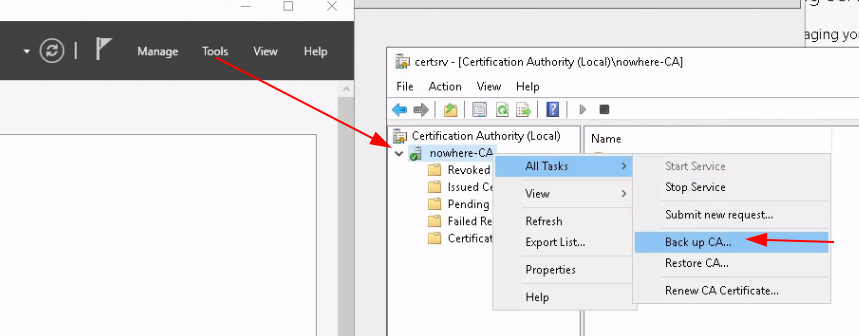
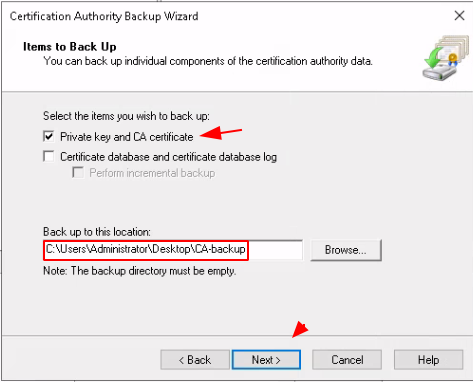
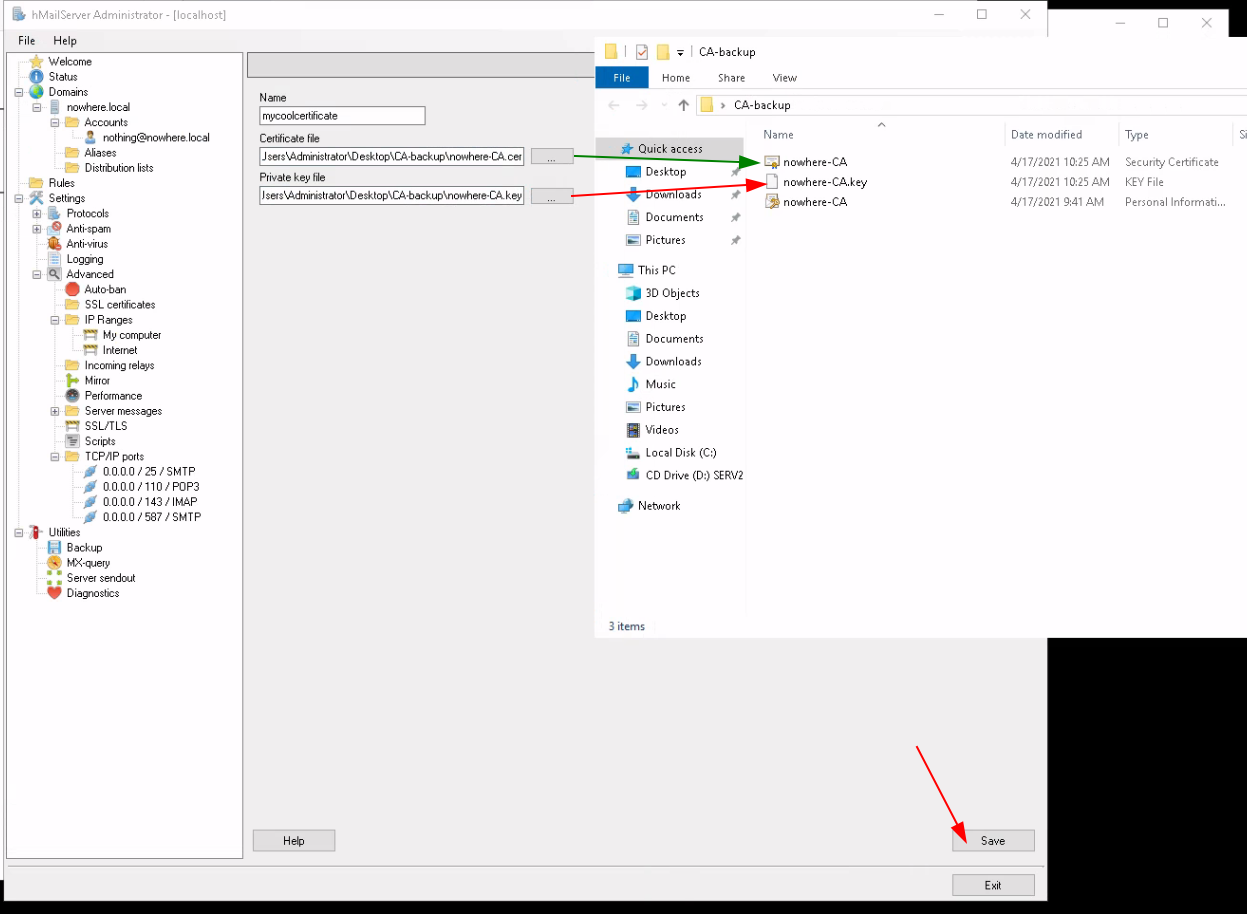
hmail will need both the private key and the CA certificate:
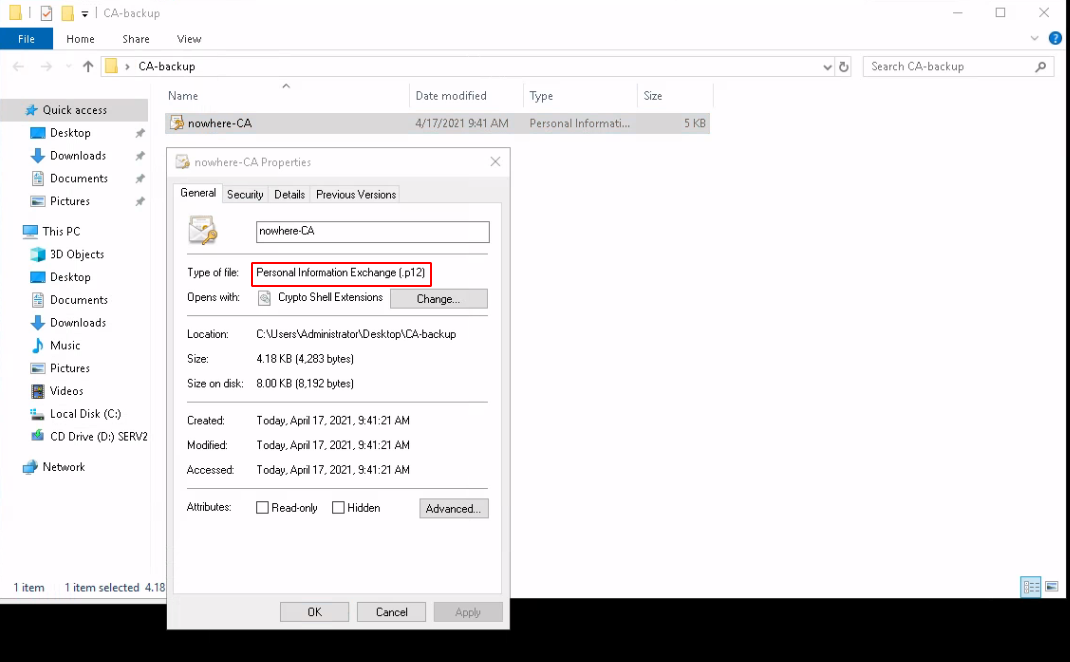
Now once that's done you will get a .p12 file and we want to extract the key and the CA from it:
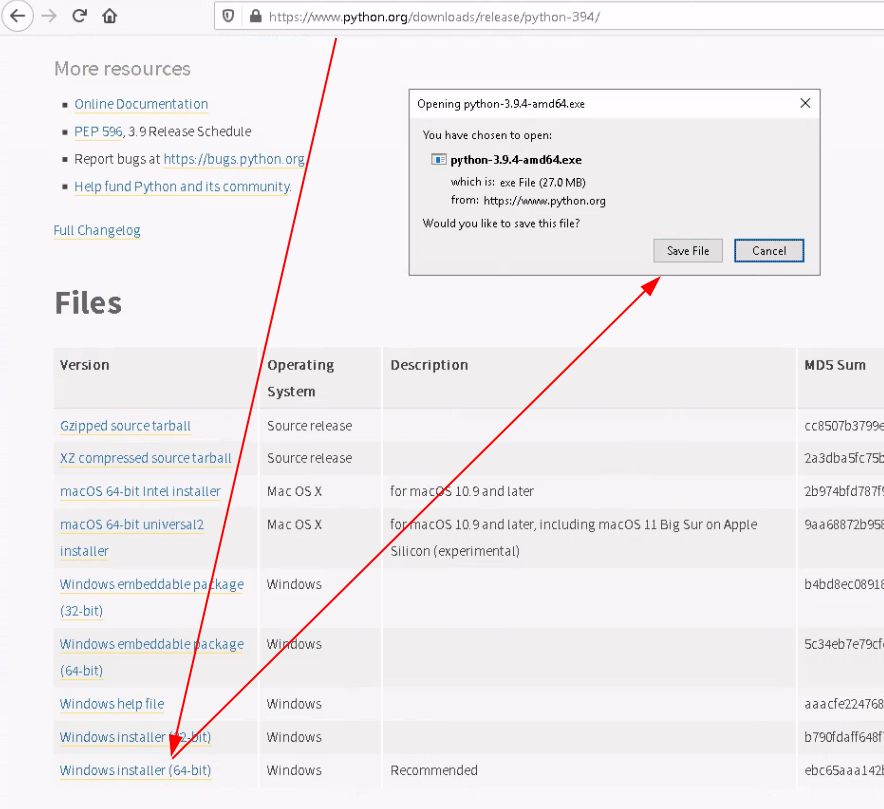
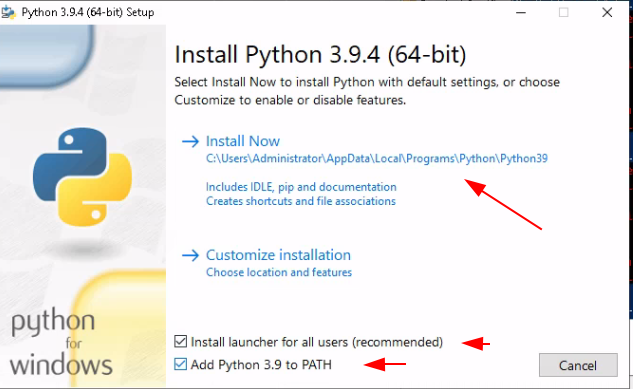
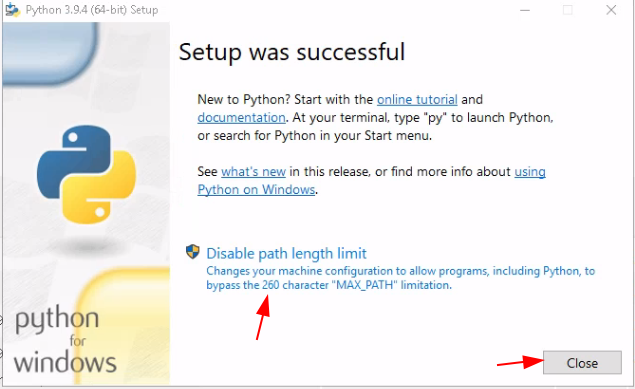
You could use C++ to use openssl on windows, but instead we're just going to get the file to a thanks to python3's http module to a linux host where we can use openssl natively and extract the CA and private key
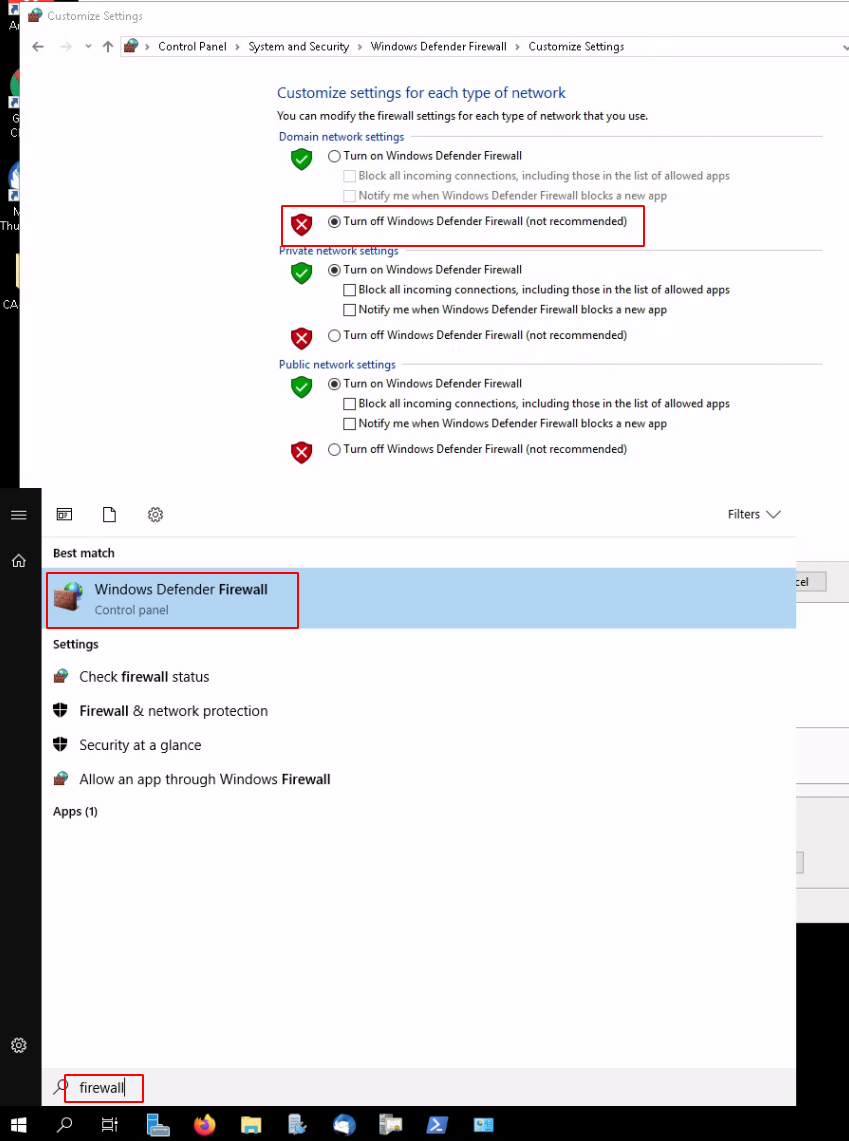
Now here we need to disable the windows firewall temporarily to retrieve the file to our linux host:
Then do the following from powershell:
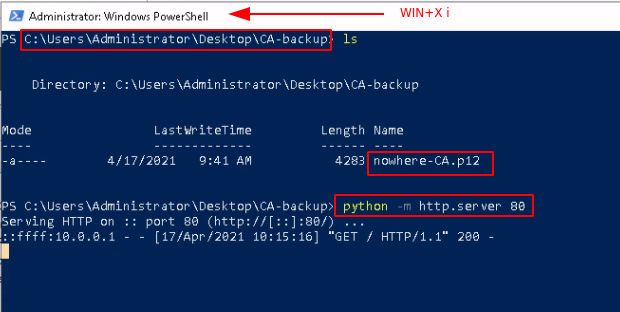
And retrieve it on your linux host in a temporary directory:
[ 10.0.0.10/16 ] [ /dev/pts/5 ] [Github/blog/servers]
→ mkdir /tmp/CA/

[ 10.0.0.10/16 ] [ /dev/pts/5 ] [Github/blog/servers]
→ cd /tmp/CA

[ 10.0.0.10/16 ] [ /dev/pts/5 ] [/tmp/CA]
→ wget 10.0.0.204/nowhere-CA.p12
--2021-04-17 10:18:19--  http://10.0.0.204/nowhere-CA.p12
Connecting to 10.0.0.204:80... connected.
HTTP request sent, awaiting response... 200 OK
Length: 4283 (4.2K) [application/x-pkcs12]
Saving to: ‘nowhere-CA.p12’

nowhere-CA.p12            100%[===================================>]   4.18K  --.-KB/s    in 0.002s

2021-04-17 10:18:19 (2.32 MB/s) - ‘nowhere-CA.p12’ saved [4283/4283]


[ 10.0.0.10/16 ] [ /dev/pts/5 ] [/tmp/CA]
→ file nowhere-CA.p12
nowhere-CA.p12: data

[ 10.0.0.10/16 ] [ /dev/pts/5 ] [/tmp/CA]
→ which openssl
/usr/bin/openssl
Then use openssl to extract the CA and the pkey out of it:
[ 10.0.0.10/16 ] [ /dev/pts/5 ] [/tmp/CA]
→ openssl pkcs12 -info -in nowhere-CA.p12 -nodes
Enter Import Password:
MAC: sha1, Iteration 2000
MAC length: 20, salt length: 20
PKCS7 Data
Shrouded Keybag: pbeWithSHA1And3-KeyTripleDES-CBC, Iteration 2000
Bag Attributes
    Microsoft Local Key set:
    localKeyID: 01 00 00 00
    friendlyName: nowhere-CA
    Microsoft CSP Name: Microsoft Software Key Storage Provider
Key Attributes
    X509v3 Key Usage: 80
-----BEGIN PRIVATE KEY-----
Here you can see the infos contained in the .p12 file, but let's extract them in a .key and .cer file:
[ 10.0.0.10/16 ] [ /dev/pts/5 ] [/tmp/CA]
→ openssl pkcs12 -info -in nowhere-CA.p12 -nodes -nocerts > nowhere-CA.key
Enter Import Password:
MAC: sha1, Iteration 2000
MAC length: 20, salt length: 20
PKCS7 Data
Shrouded Keybag: pbeWithSHA1And3-KeyTripleDES-CBC, Iteration 2000
PKCS7 Encrypted data: pbeWithSHA1And3-KeyTripleDES-CBC, Iteration 2000
Certificate bag

[ 10.0.0.10/16 ] [ /dev/pts/5 ] [/tmp/CA]
→ openssl pkcs12 -info -in nowhere-CA.p12 -nodes -nokeys > nowhere-CA.cer
Enter Import Password:
MAC: sha1, Iteration 2000
MAC length: 20, salt length: 20
PKCS7 Data
Shrouded Keybag: pbeWithSHA1And3-KeyTripleDES-CBC, Iteration 2000
PKCS7 Encrypted data: pbeWithSHA1And3-KeyTripleDES-CBC, Iteration 2000
Certificate bag
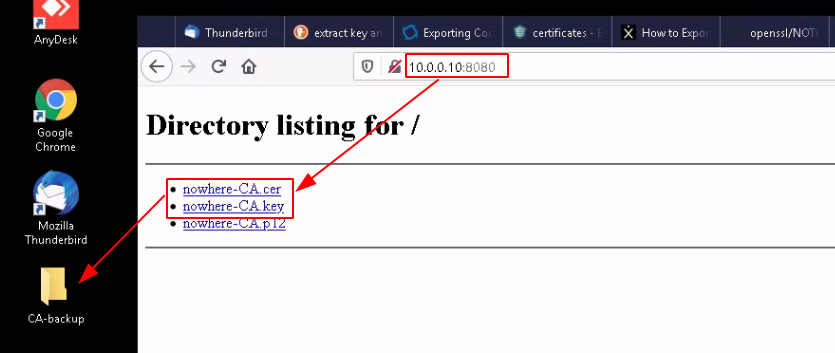
And run python3's http module to get the 2 files back on the windows host:
[ 10.0.0.10/16 ] [ /dev/pts/5 ] [/tmp/CA]
→ ls -l
total 16
-rw-r--r-- 1 nothing nothing 2080 Apr 17 10:23 nowhere-CA.cer
-rw-r--r-- 1 nothing nothing 3491 Apr 17 10:23 nowhere-CA.key
-rw-r--r-- 1 nothing nothing 4283 Apr 17  2021 nowhere-CA.p12

[ 10.0.0.10/16 ] [ /dev/pts/5 ] [/tmp/CA]
→ python3 -m http.server 8080
Serving HTTP on 0.0.0.0 port 8080 (http://0.0.0.0:8080/) ...
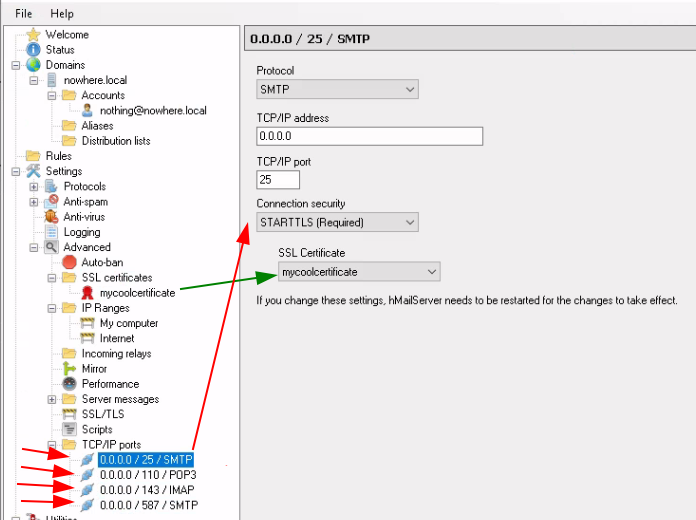
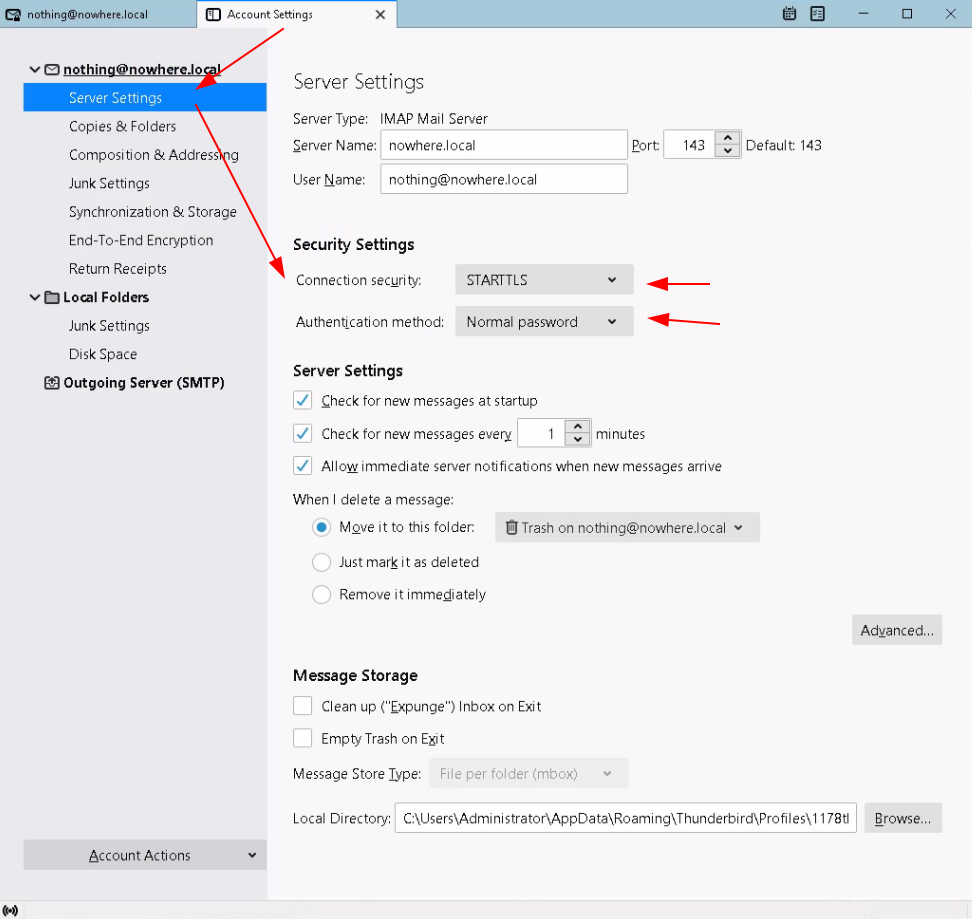
Use the certificate as STARTTLS (Required) on all ports, then hit 'Save' and edit how Thunderbird connects back to the mail server:
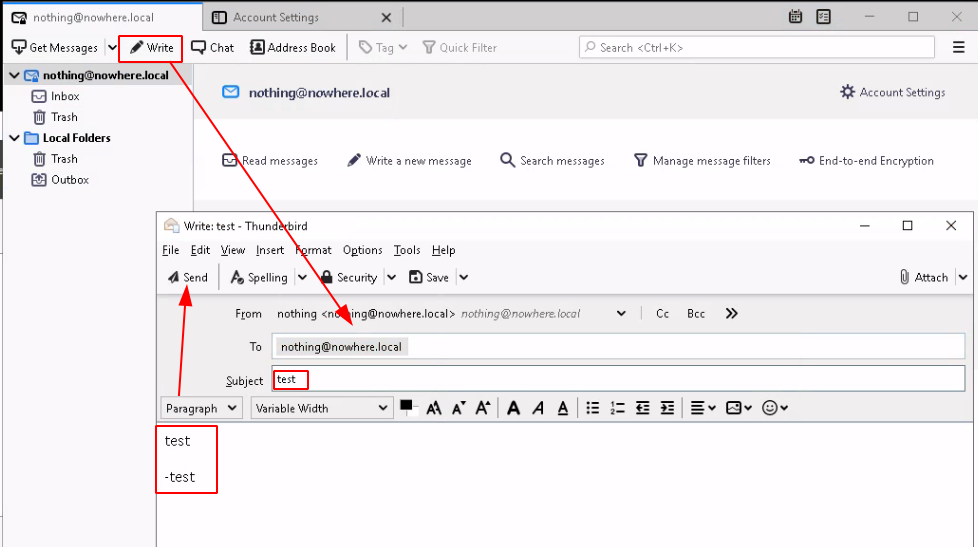
Now let's test if we can send and recieve mail on our local network:
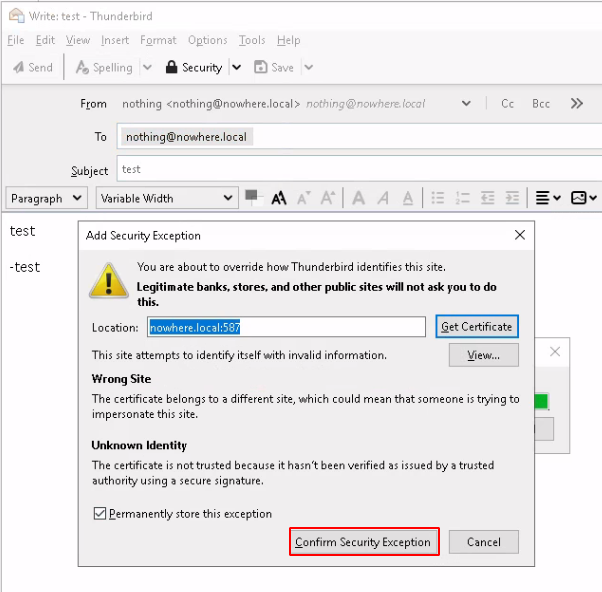
Now thunderbird by default doesn't allow self-signed certificates:

Once you allowed the security exception, hit 'Send' and 'Get Messages':
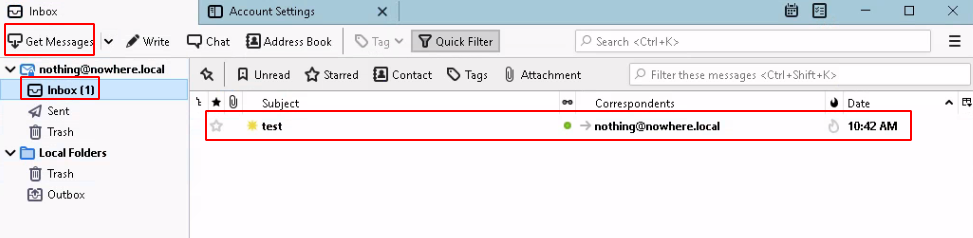
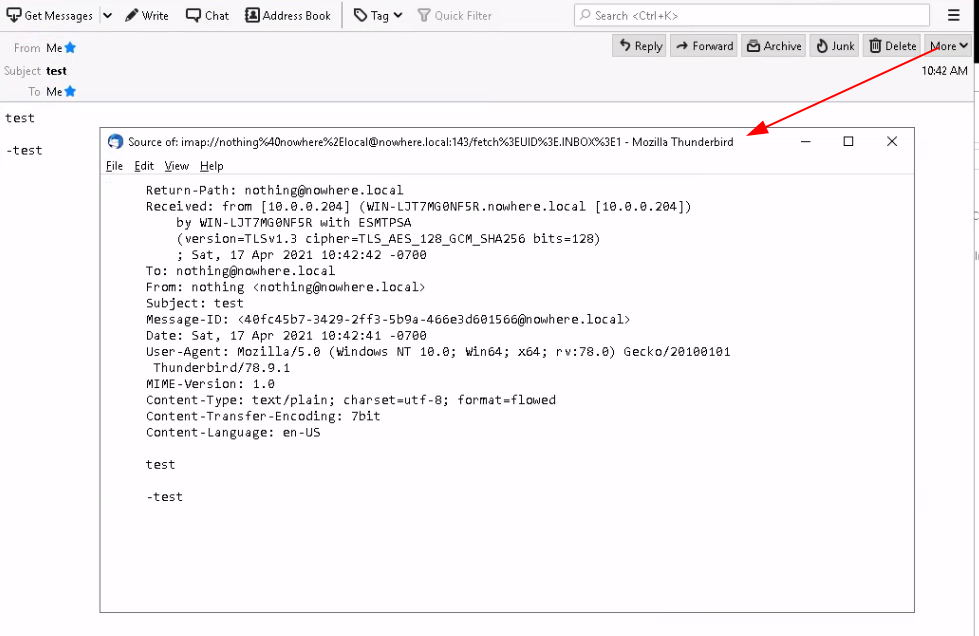
And that's it! We managed to send and recieve mail on a local hMailServer, you can also click 'View Source' to get the following result:
Some Address 67120,
Duttlenheim, France.
This cute theme was created to showcase your work in a simple way. Use it wisely.