
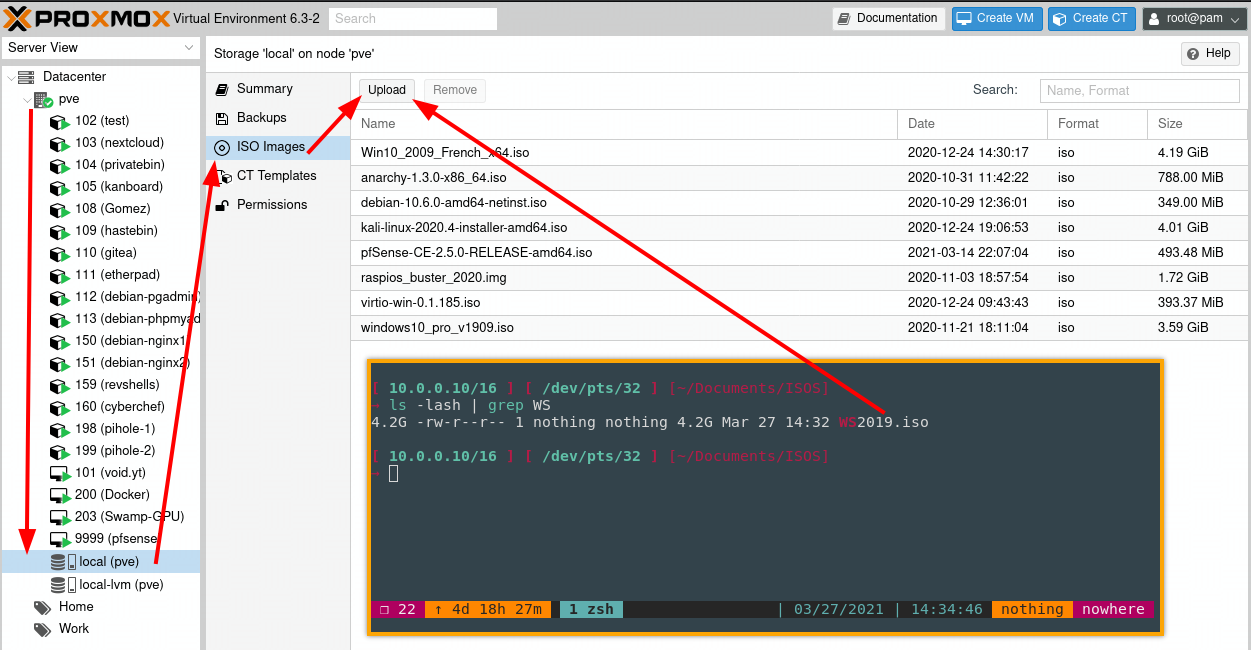
First go get the ISO here and then upload it to proxmox:

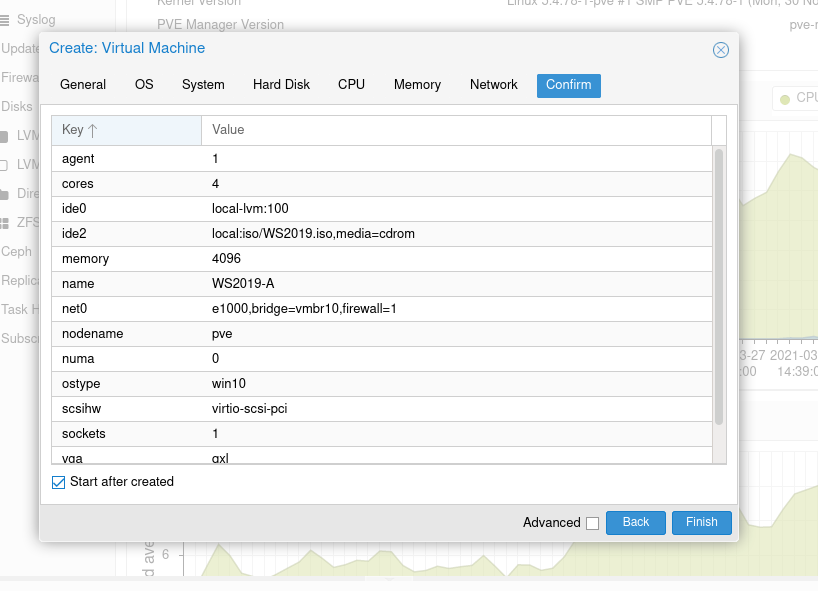
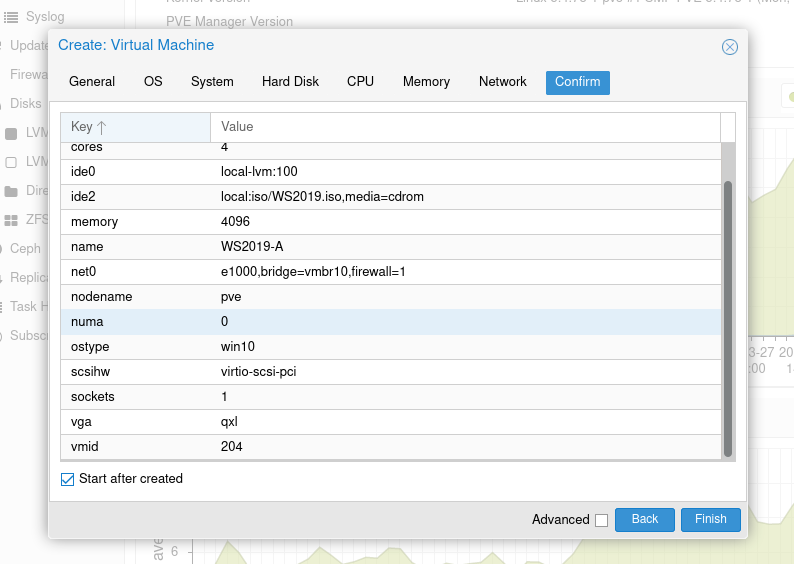
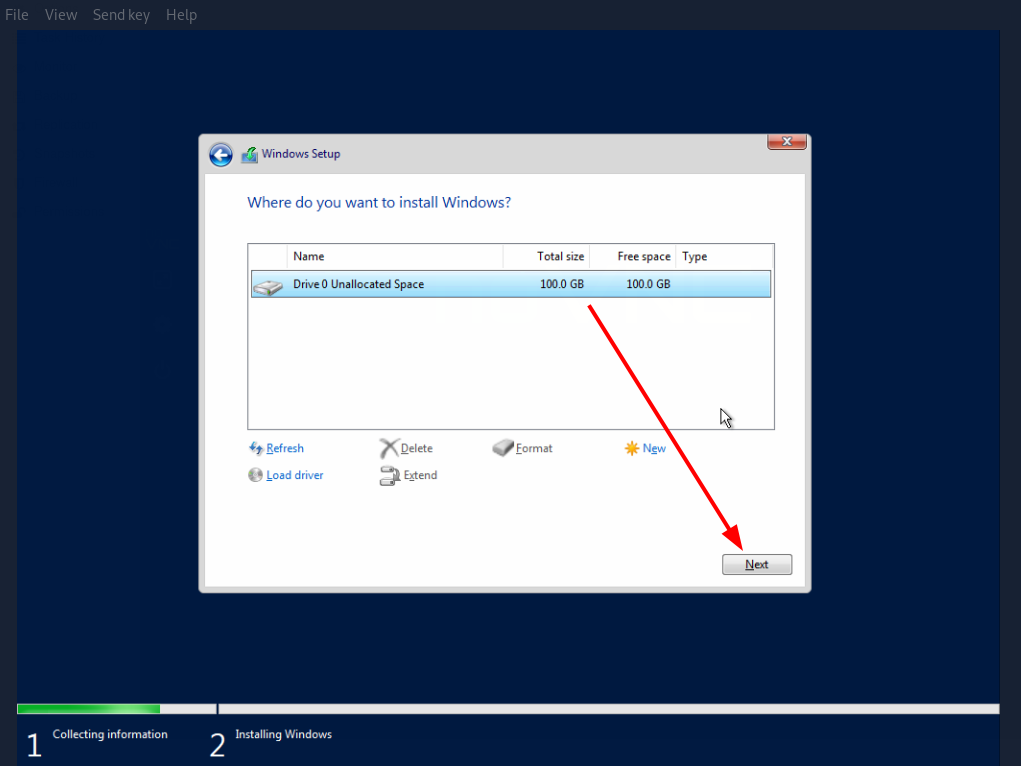
Here are my settings, make sure to tweak them to match what you need.
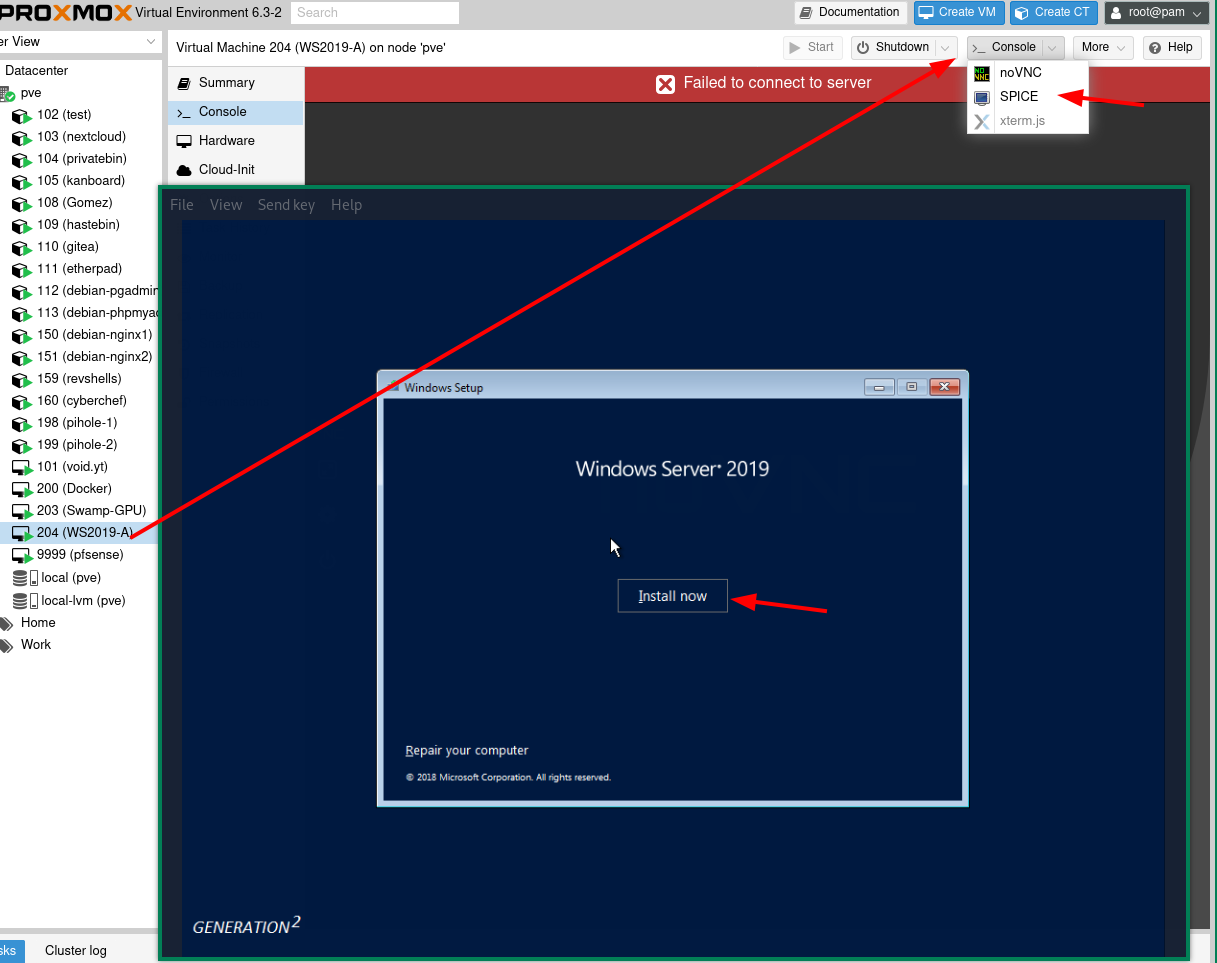
Use SPICE to view what's happening on the machine:
by default, virt-viewer captures your mouse and keyboard, if you want to escape it you need to type CTRL+ALT+R
After that, let WS2019 install itself, the VM may reboot a few times:
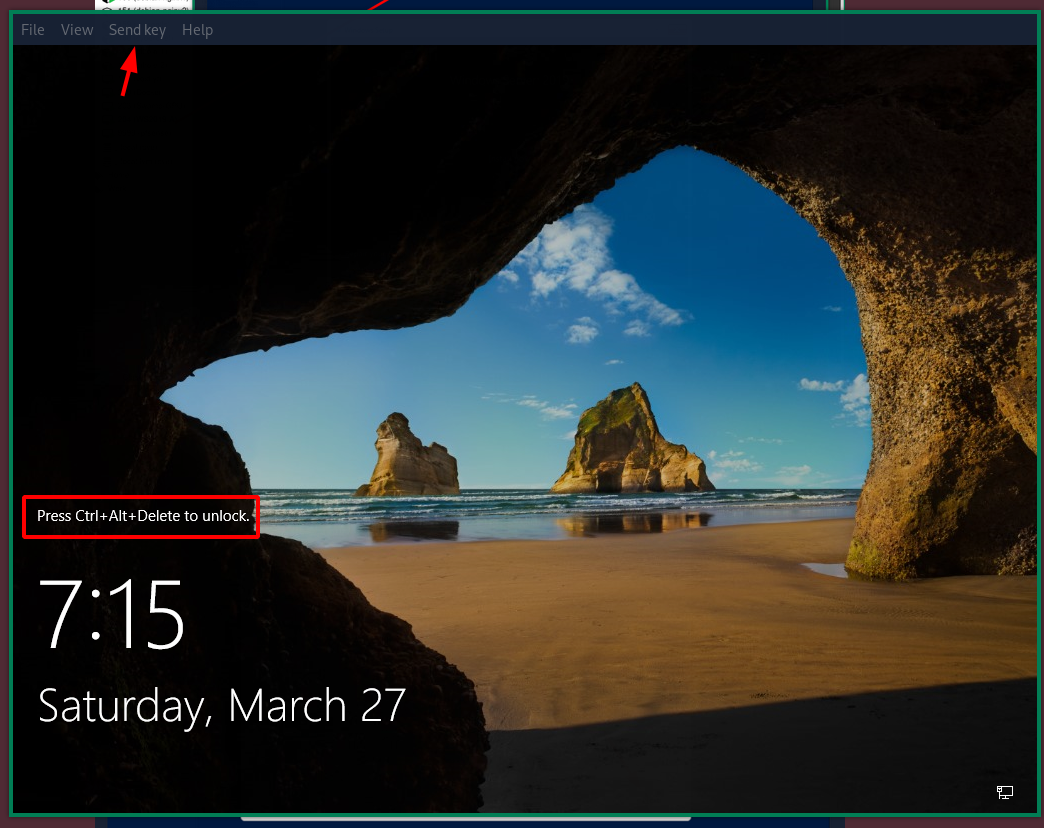
Here to send a CTRL+ALT+DEL you can use virt-viewer's sendkey feature, then after that login with the admin account you just created:
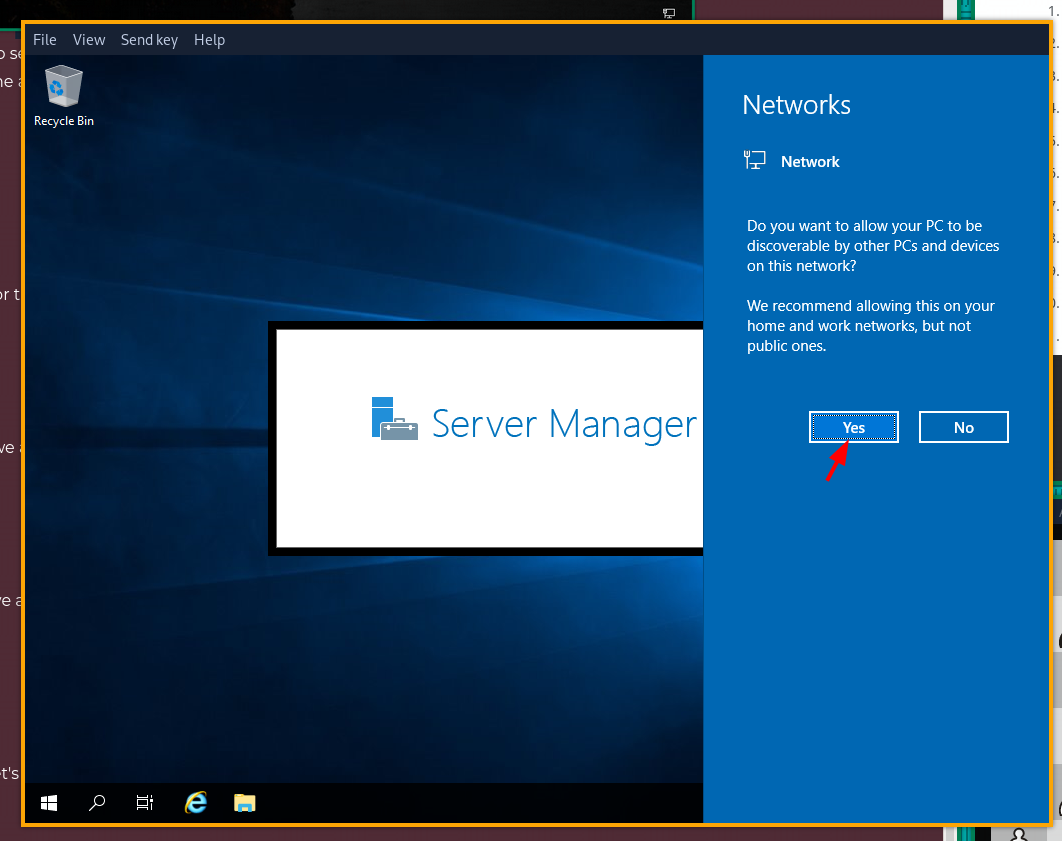
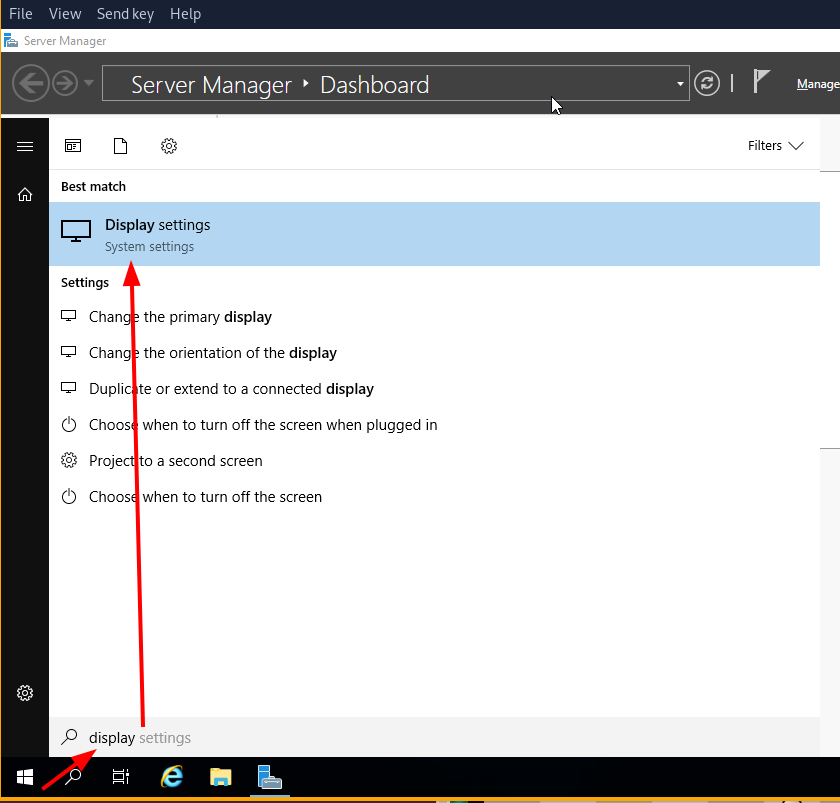
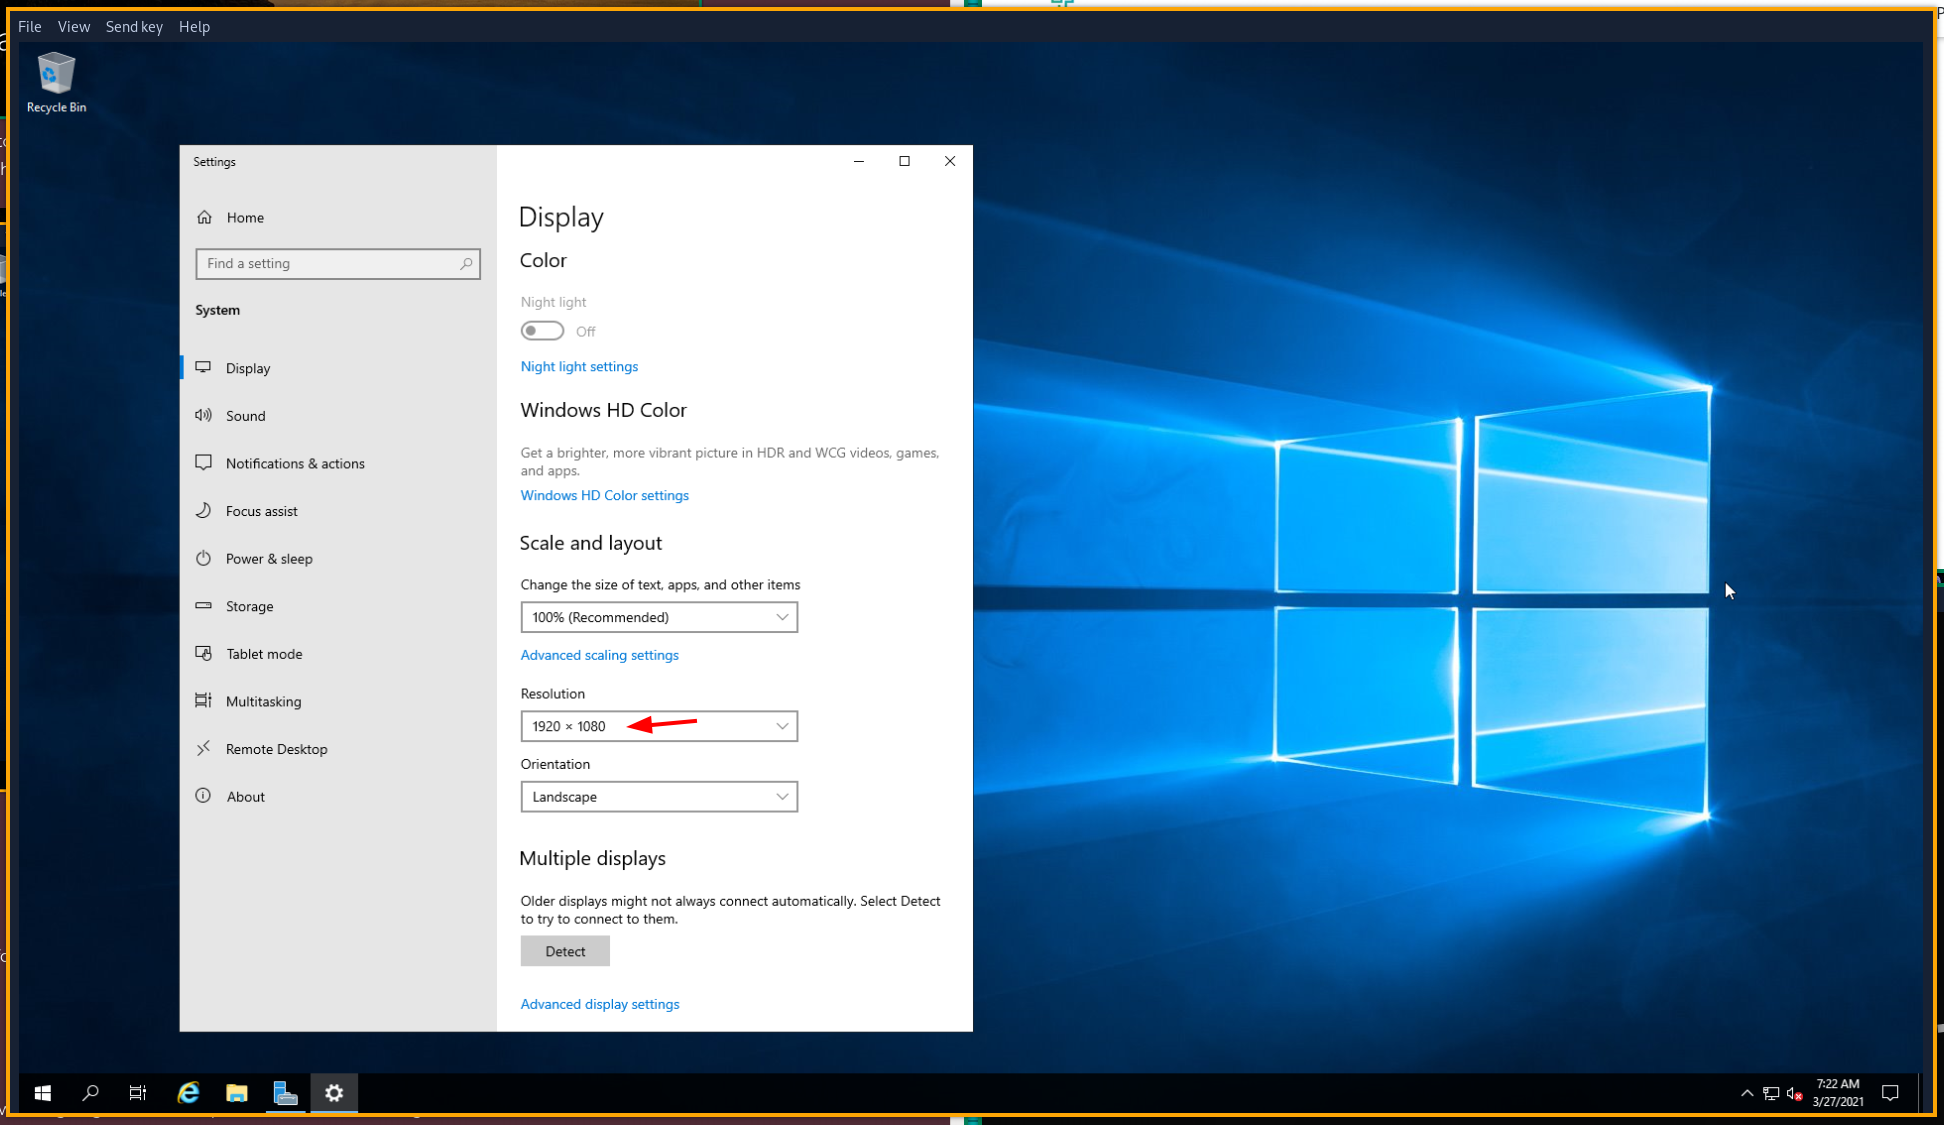
Before we start let's get confortable and set the screen resolution right:
By default on WS2019 there is only Internet Explorer, so let's get firefox on it, to do so we will simply download a firefox 64bit executable on our host machine, use python3's http module to make it available on our local network (here its 10.0.0.0/16) and retrieve it on windows server:

We move the executable into the /tmp directory alternative called /dev/shm
[ 10.0.0.10/16 ] [ /dev/pts/35 ] [~]
→ cd Downloads

[ 10.0.0.10/16 ] [ /dev/pts/35 ] [~/Downloads]
→ ls -lash Firefox\ Setup\ 87.0.exe
55M -rw-r--r-- 1 nothing nothing 55M Mar 27 15:26 'Firefox Setup 87.0.exe'

[ 10.0.0.10/16 ] [ /dev/pts/35 ] [~/Downloads]
→ mv Firefox\ Setup\ 87.0.exe firefox.exe

[ 10.0.0.10/16 ] [ /dev/pts/35 ] [~/Downloads]
→ mv firefox.exe /dev/shm/firefox.exe

[ 10.0.0.10/16 ] [ /dev/pts/35 ] [~/Downloads]
→ cd /dev/shm

[ 10.0.0.10/16 ] [ /dev/pts/35 ] [/dev/shm]
→ ls
firefox.exe

[ 10.0.0.10/16 ] [ /dev/pts/35 ] [/dev/shm]
→ python3 -m http.server 8080
Serving HTTP on 0.0.0.0 port 8080 (http://0.0.0.0:8080/) ...
Now we will retrieve it on our windows machine:
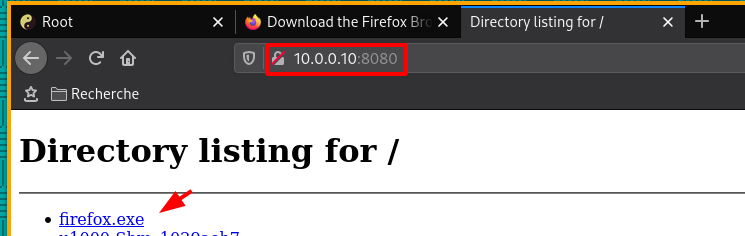
We will use the Invoke-WebRequest powershell command that got aliased to 'curl' to get our firefox installer file at the http://10.0.0.10:8080 URL:
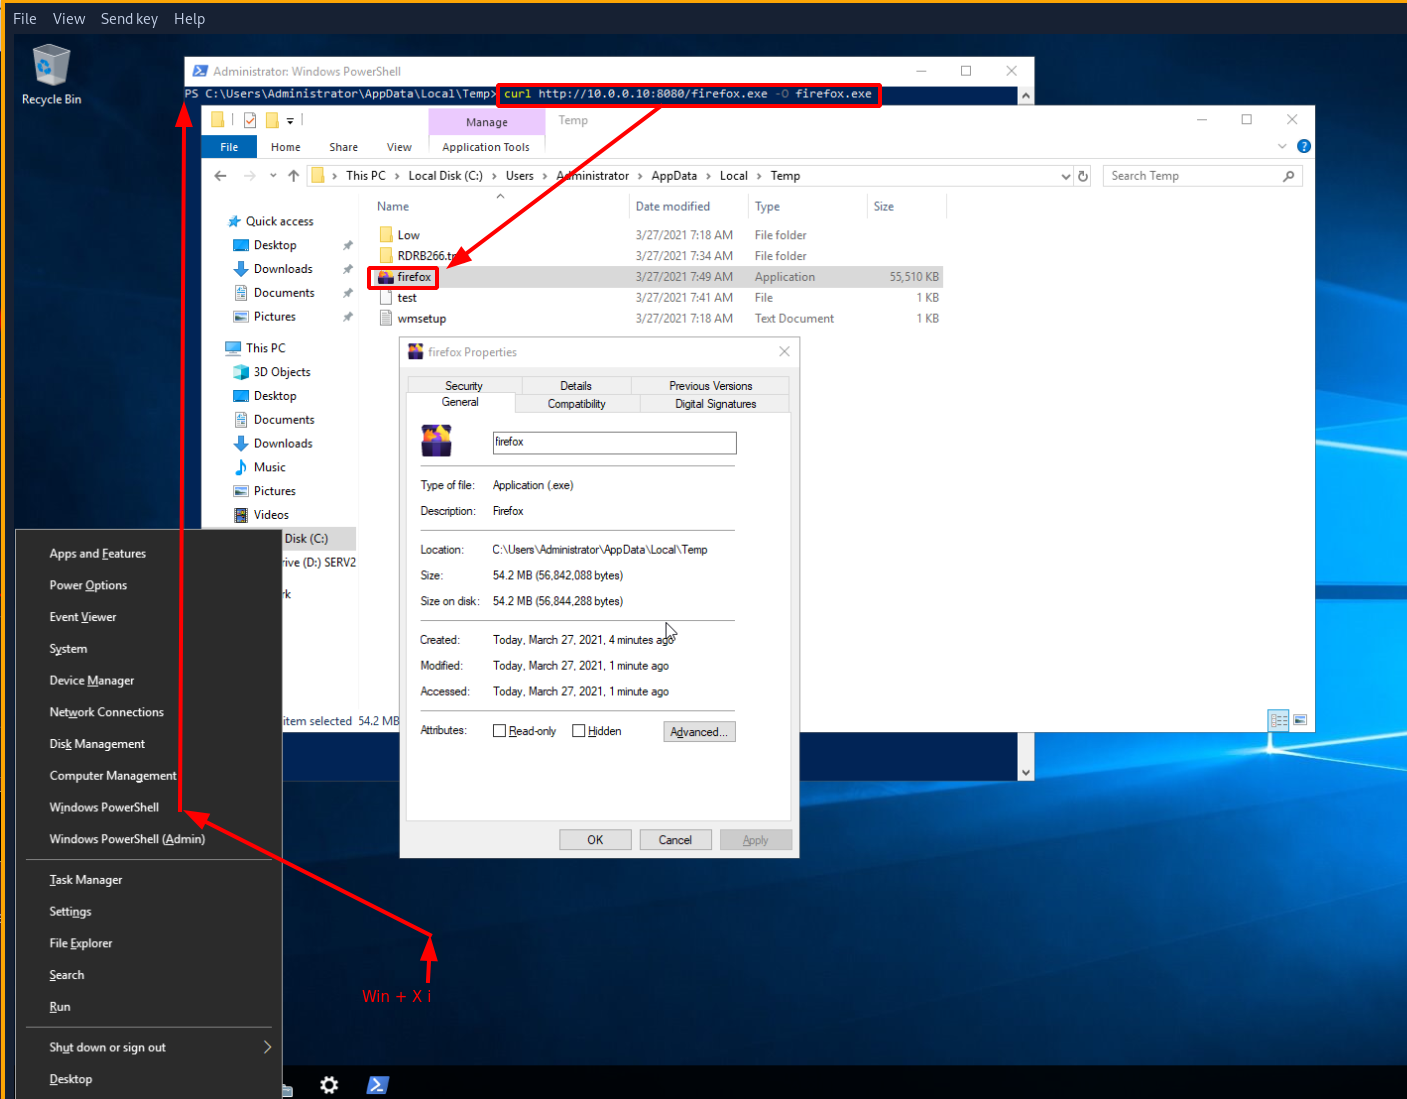
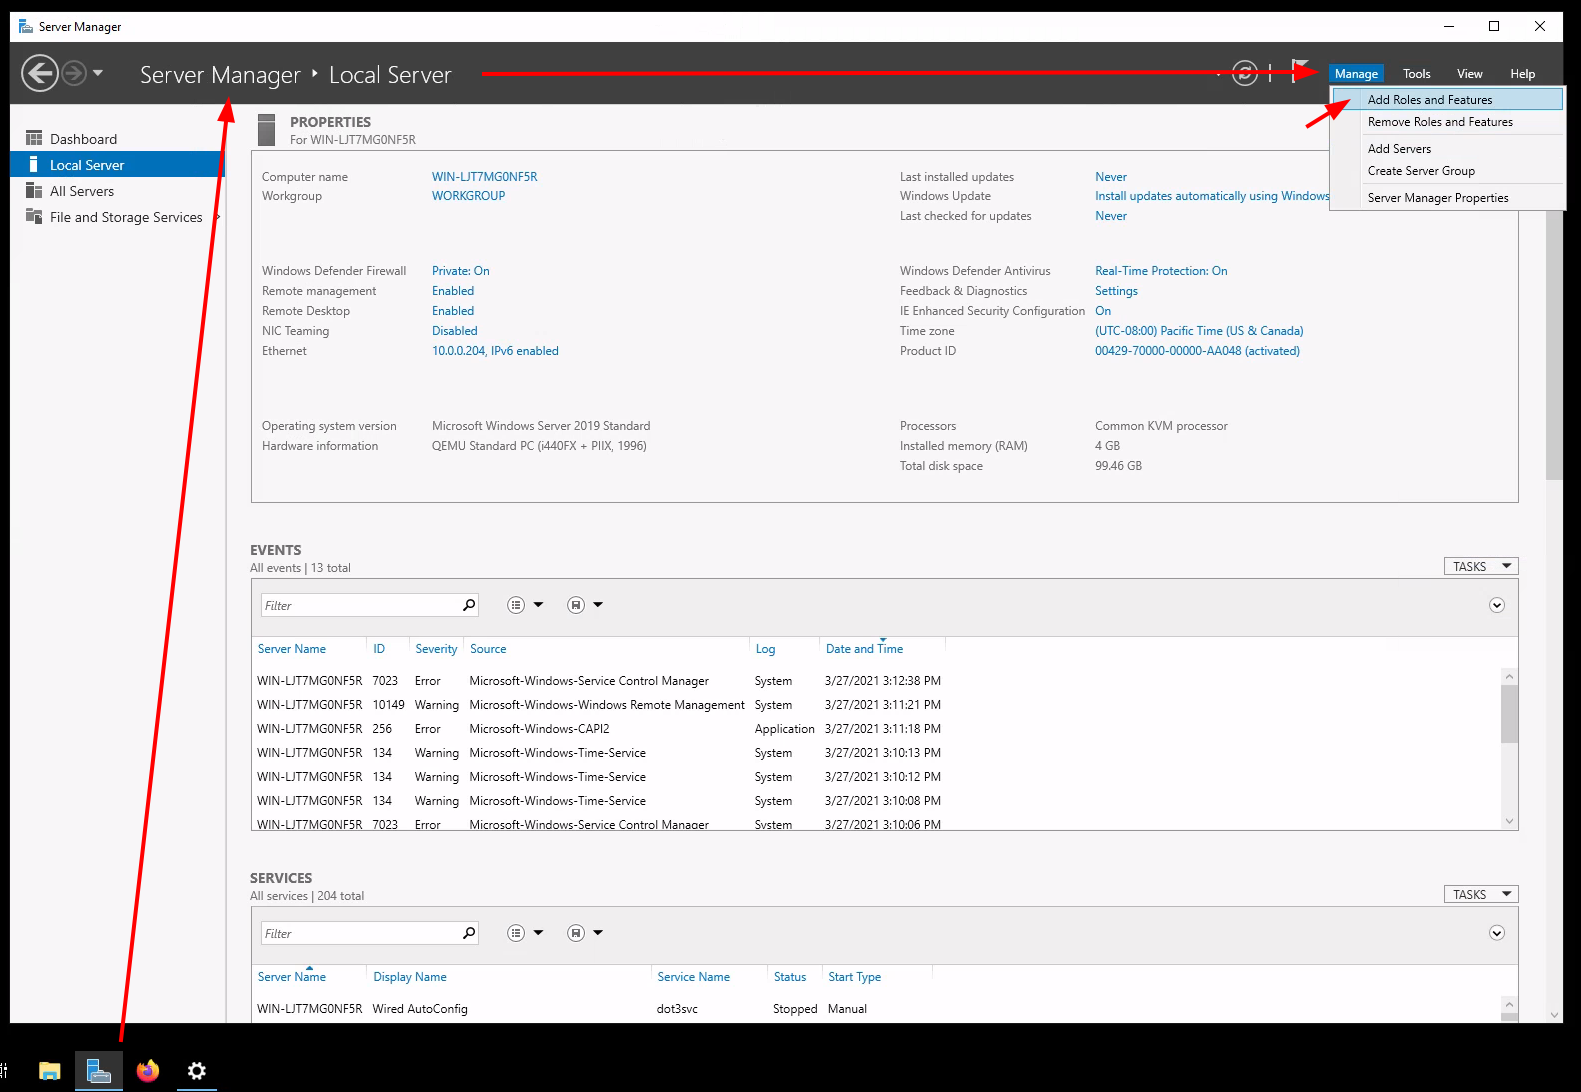
Then just run the executable to install firefox, after that we are going to follow our previous windows server guides and first install DNS using the server manager:
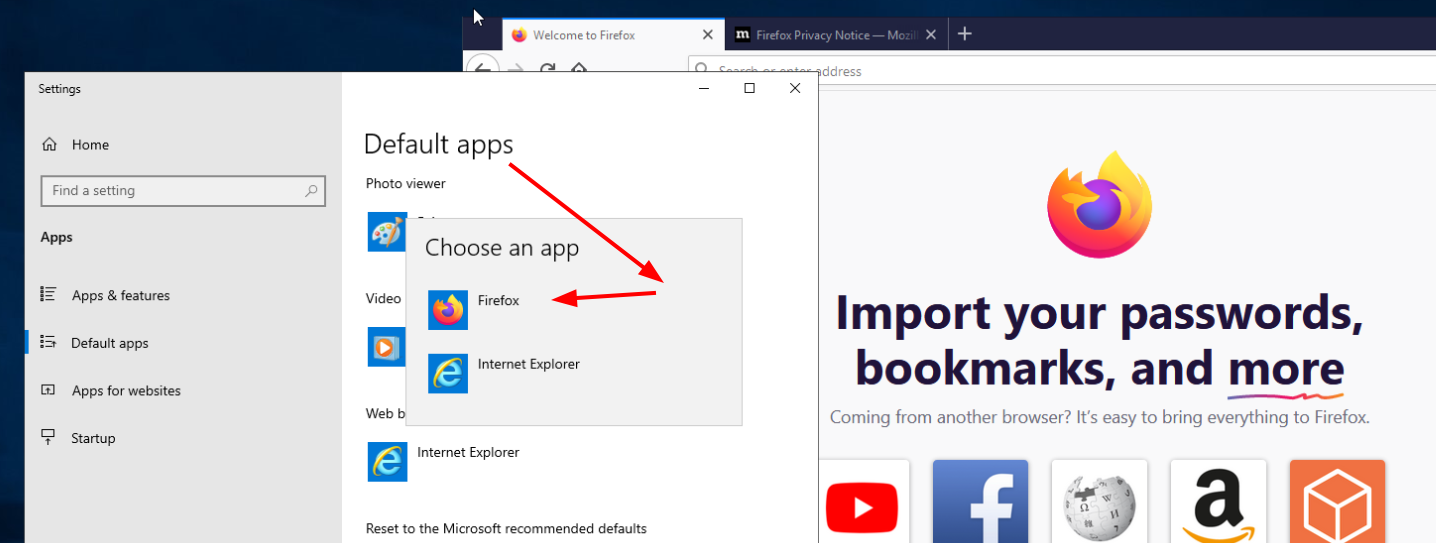
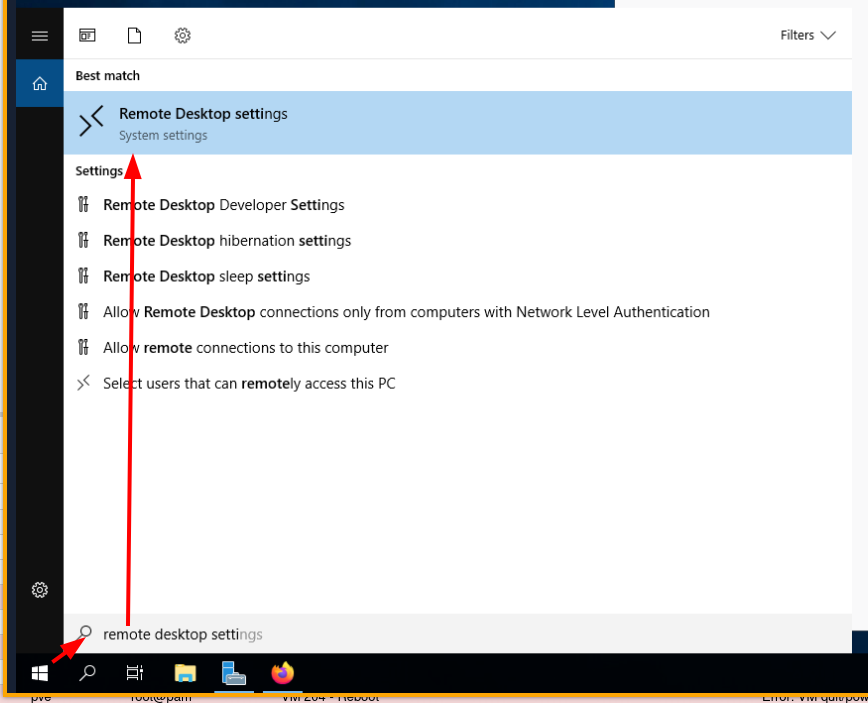
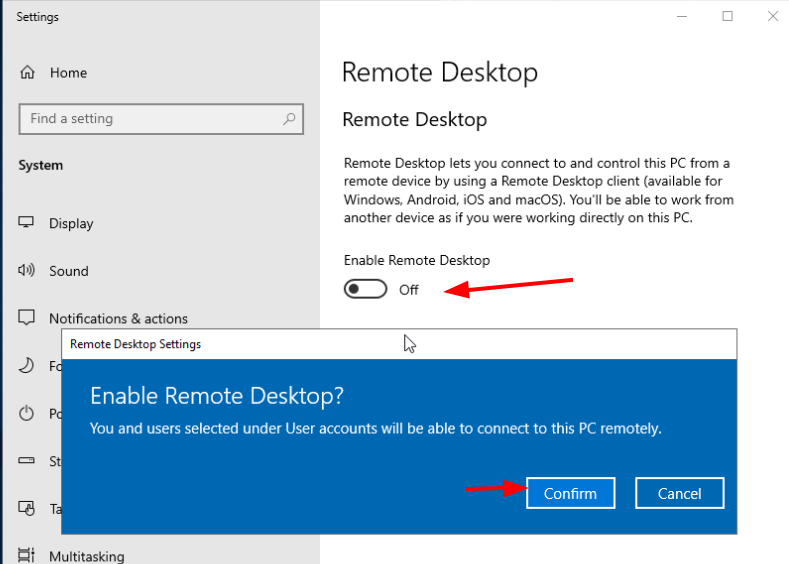
Now that firefox is our default browser, let's get rid of that annoying SPICE virt-viewer, we will simply enable windows remote desktop:
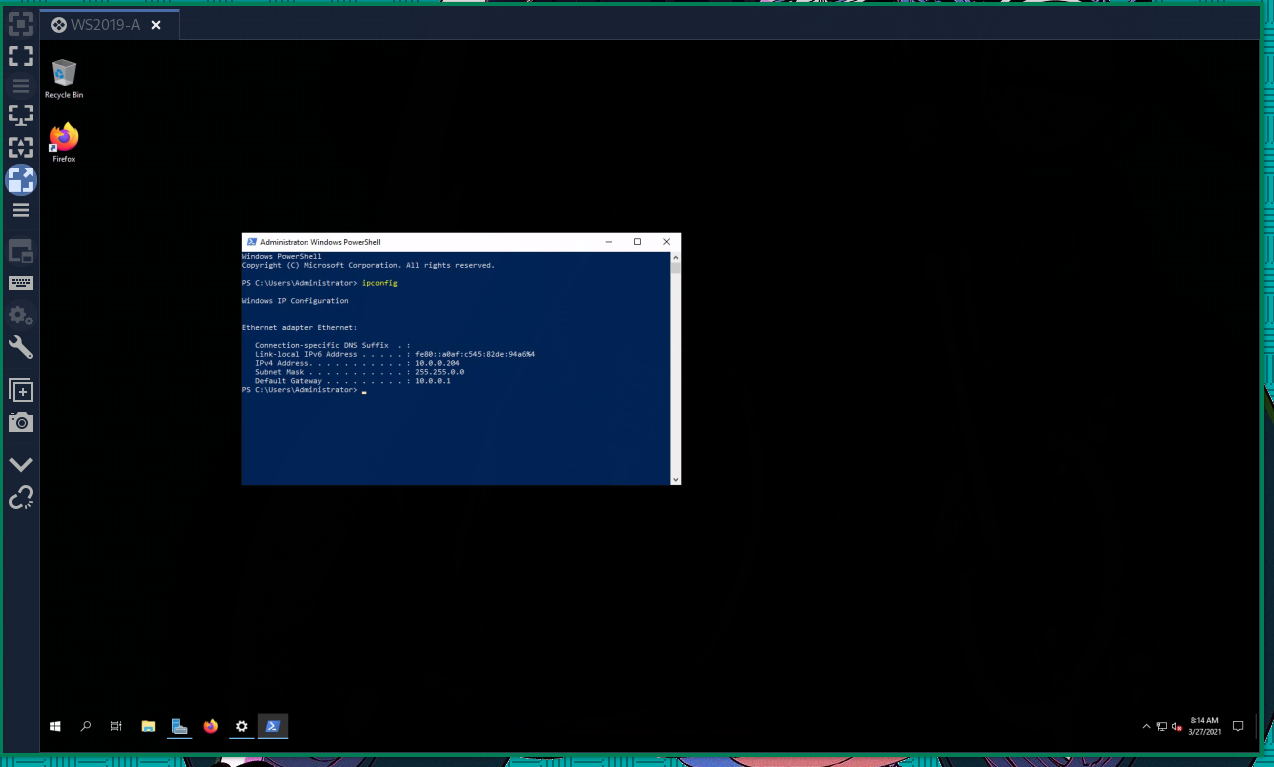
Now that's done, make sure your windows server has a static IP:
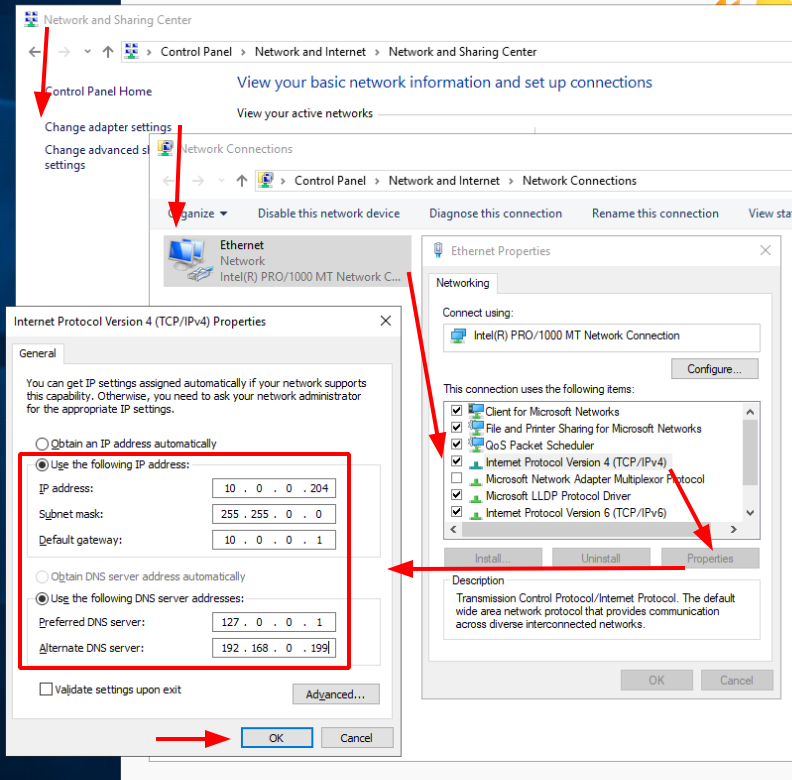
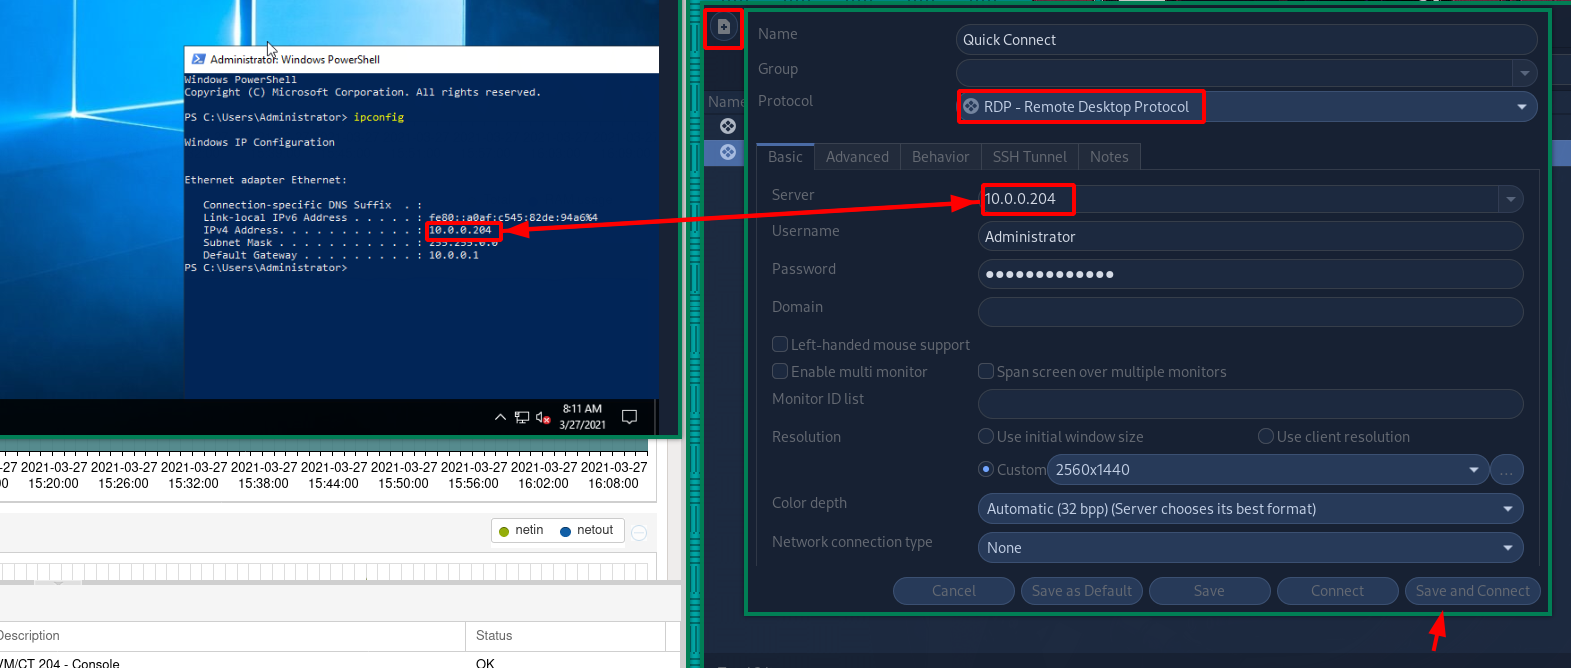
With this we know that the RDP connection will be made to 10.0.0.204 at the 3386 port (windows' default RDP port) If you are on a windows machine host, you can use WIN+R mstrc and then just give it the ip of the machine, Or if you are in linux, you can install remmina to remote desktop into your windows server 2019 VM:
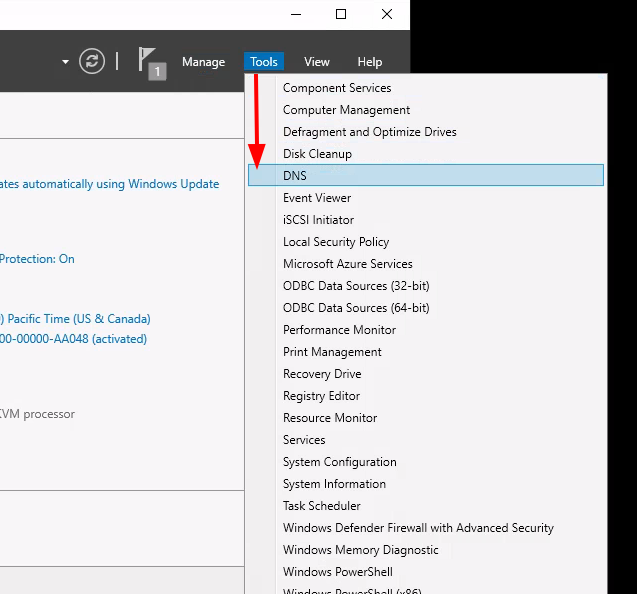
And that's it! Now we are ready to work on WS2019 properly, let's get to the DNS installation:
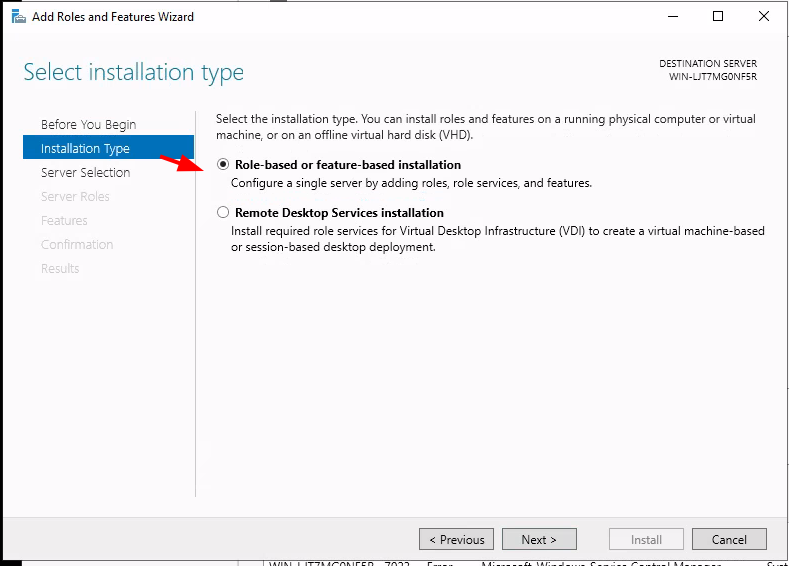
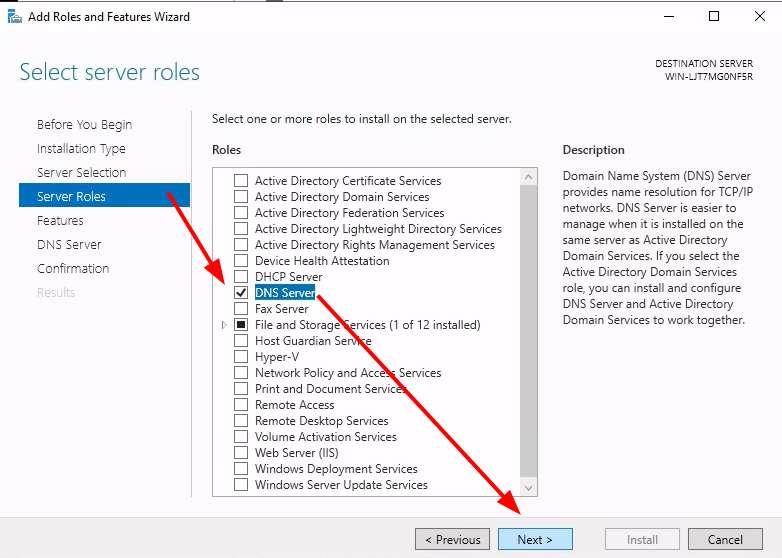
Then just click Next at everything and hit 'Install'
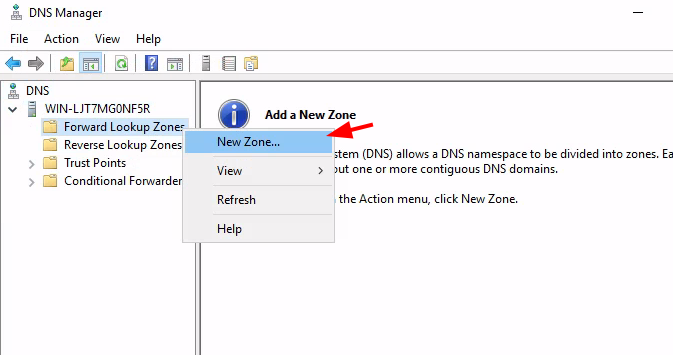
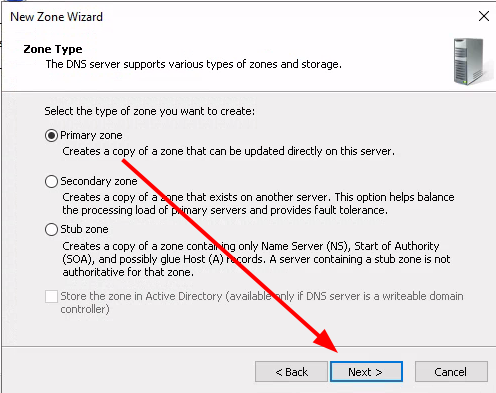
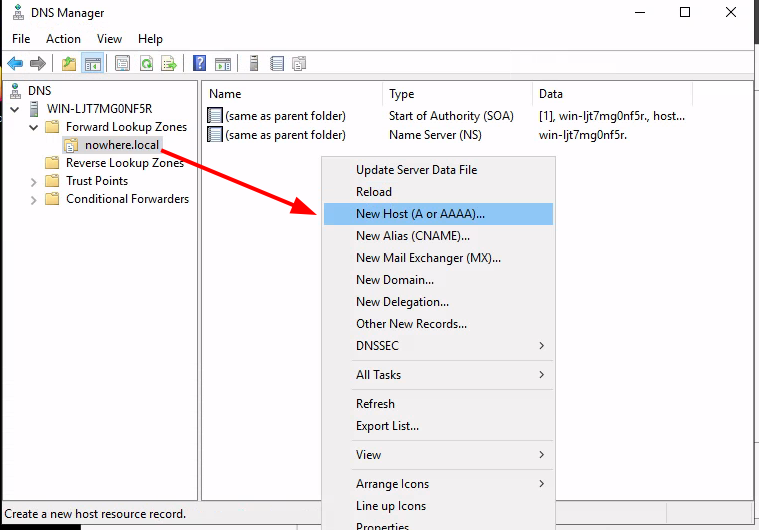
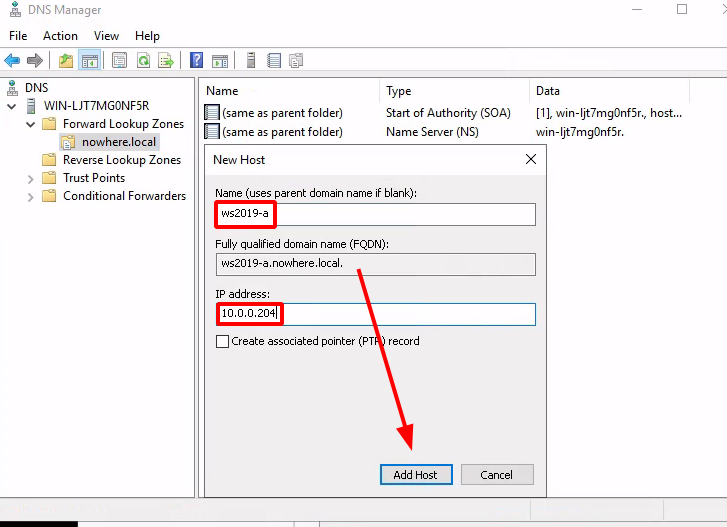
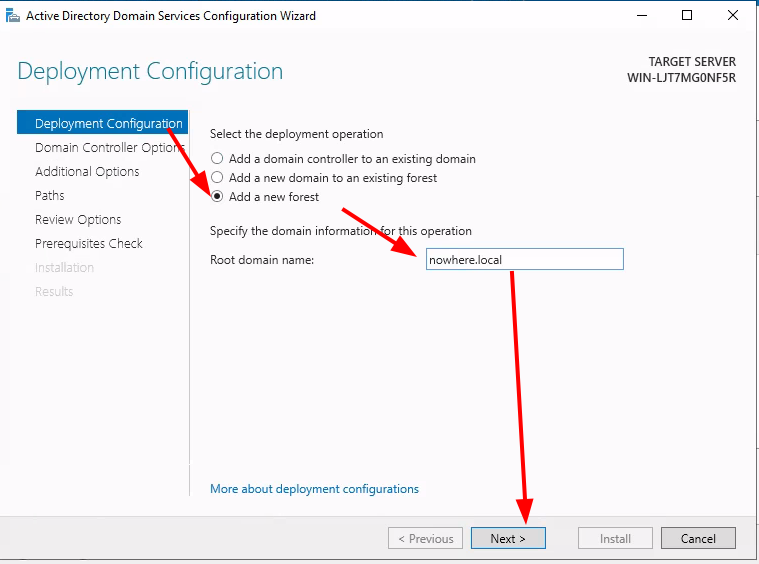
So here we're going to choose the 'nowhere.local' primary zone:

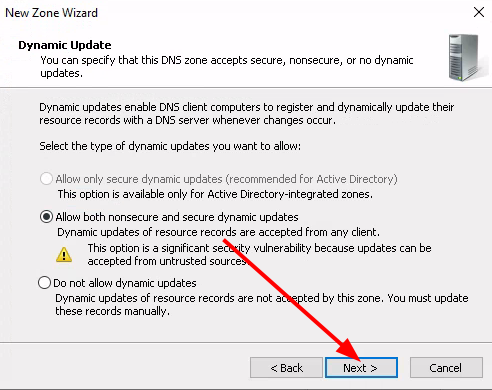
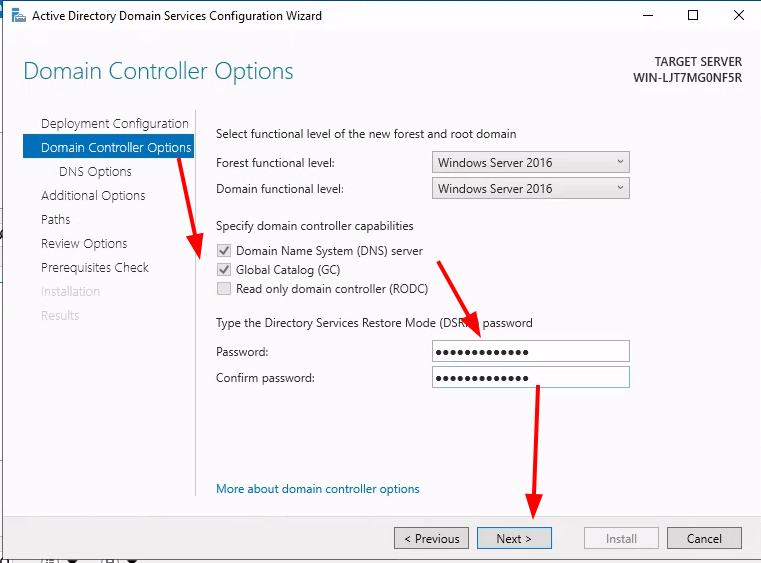
Now this part right here is going to be used by our Active Directory:
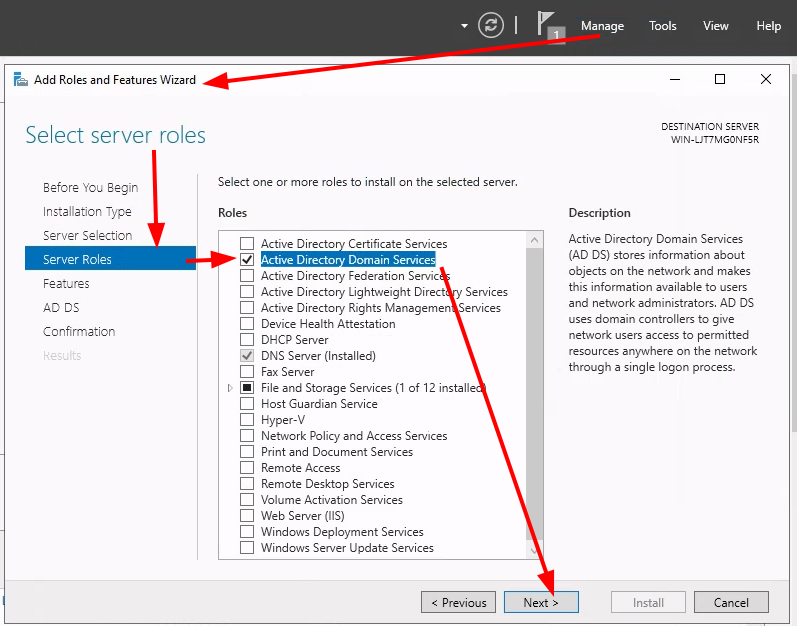
This is what we need to be able to install our AD and promote our server to being a domain controller. So let's install it:
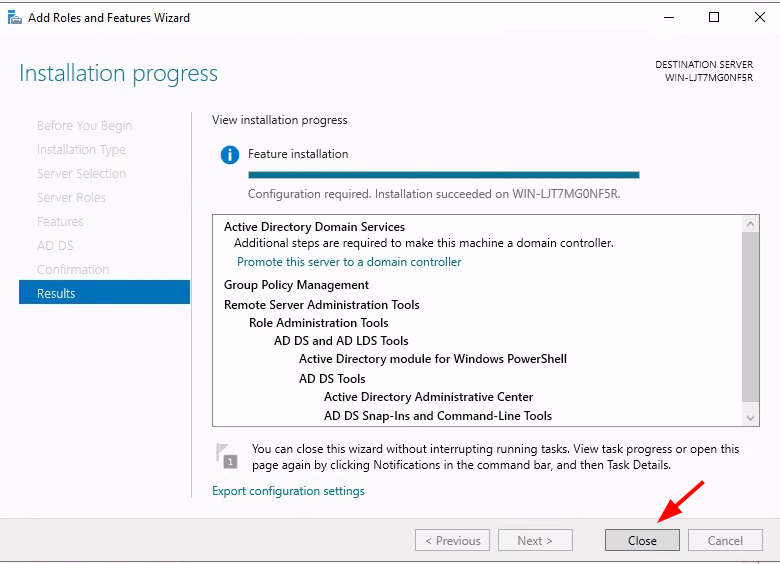
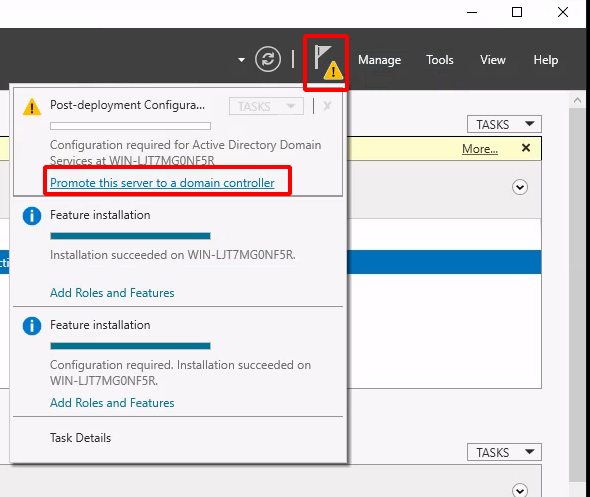
Now promote your WS2019 server to a domain controller:
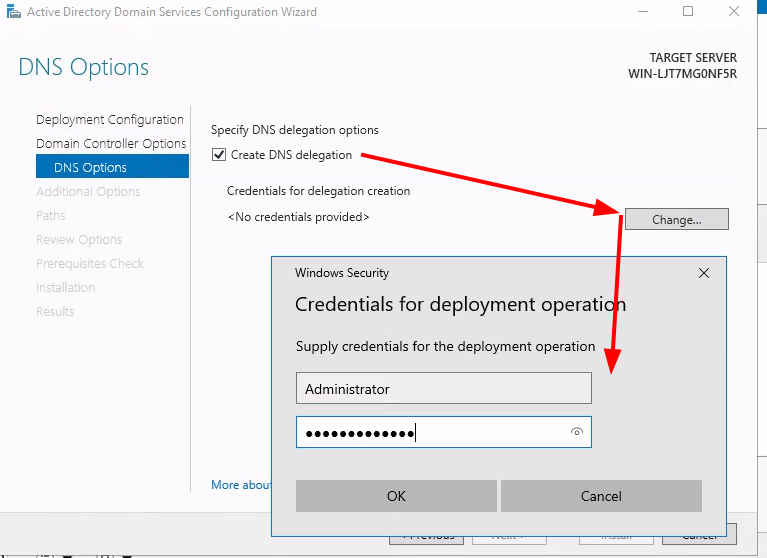
Then just hit next at everything until you get there:

Hit 'Install' and be patient, because this may take a while, and may reboot aswell. Upon rebooting you can see the following:
Now you know that we have been able to setup our Active Directory properly since we managed to log into it.
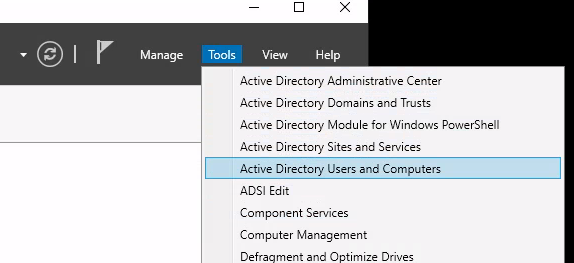
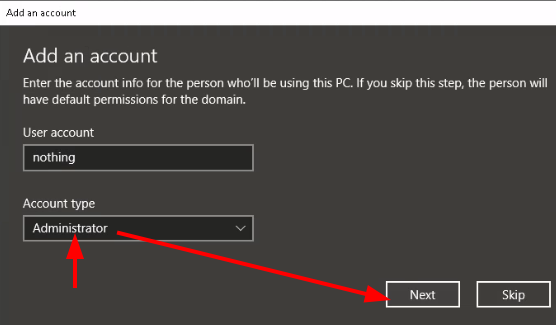
Now let's create a few users:
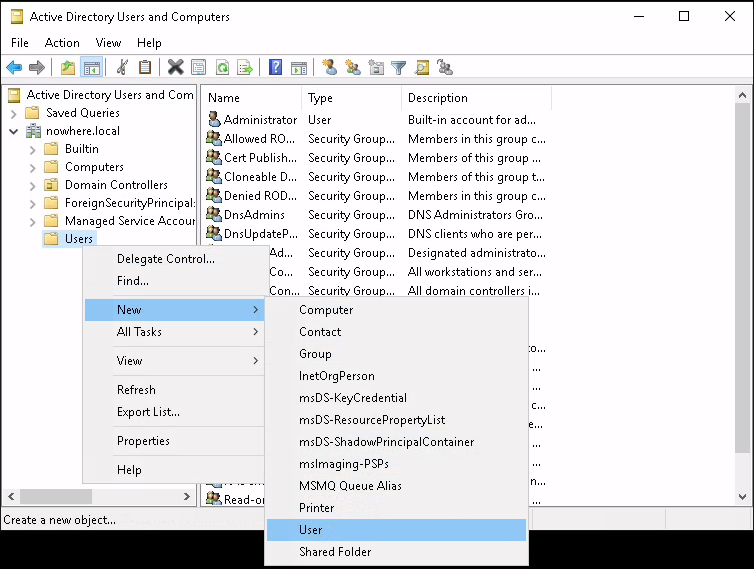
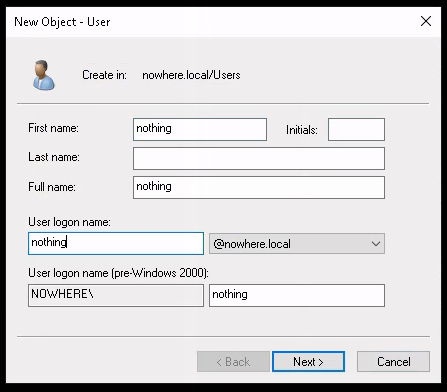
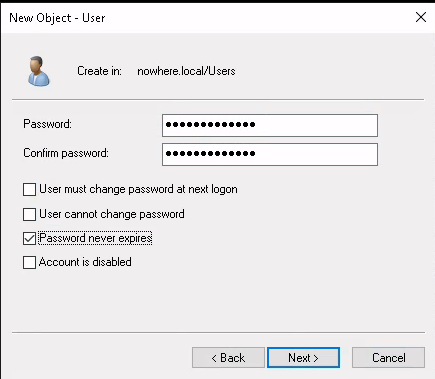
So right now we managed to create our user called 'nothing' and we will make use of it on a second Win10 VM on the same network:

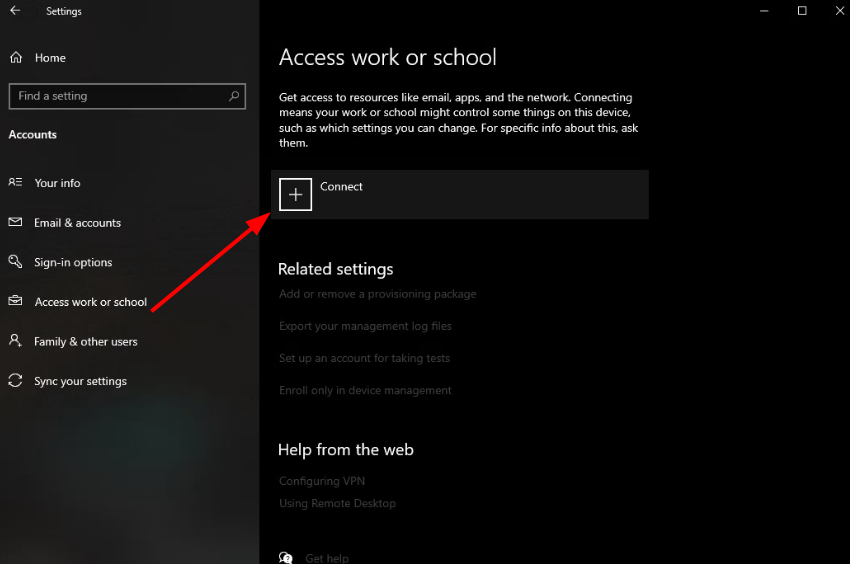
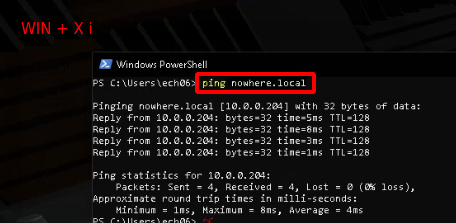
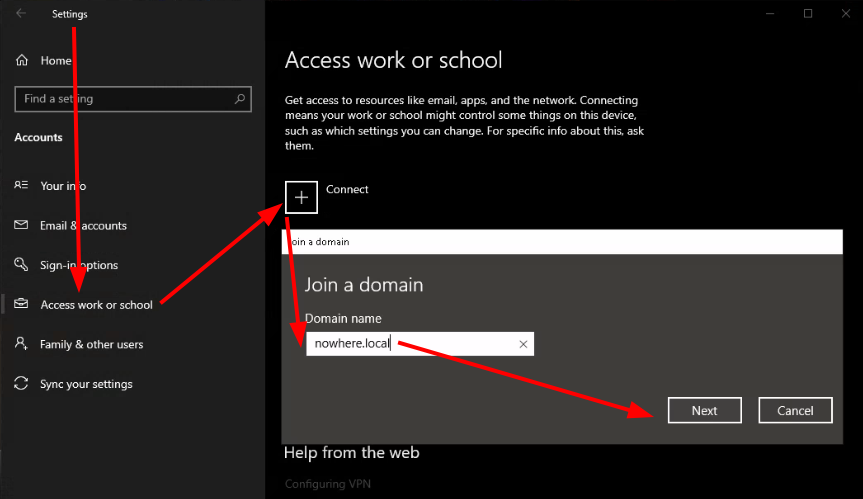
Now to do this you need to setup the DNS server to be our WS2019 because it needs to resolve where nowhere.local is:

Then you can test if it gets resolved correctly using a simple ping command:
Then put in the credentials of the user you created earlier, and then you will get the following:
Once that's done, let your win10 VM reboot and edit the RDP connection settings:
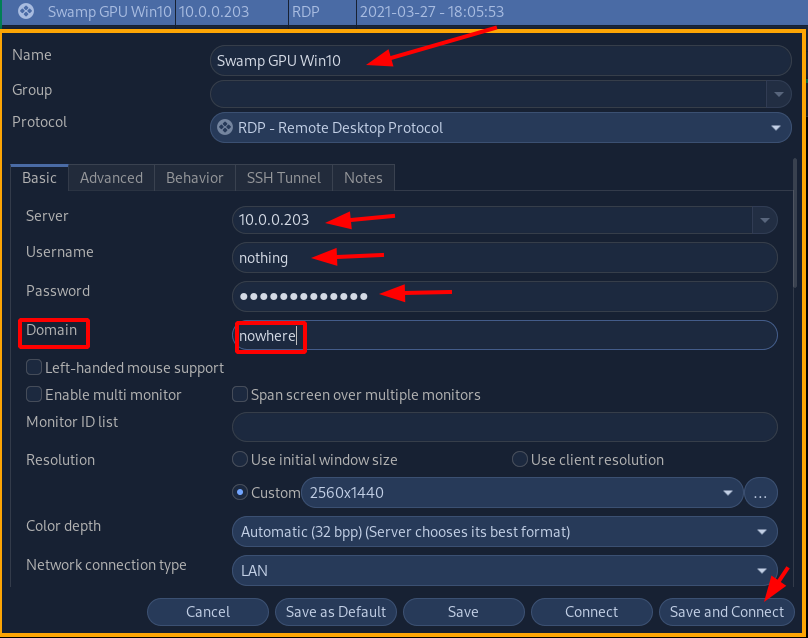
And simply connect, and you can see that you have successfully logged onto your Active Directory as the user 'nothing'.

And that's it! We have been able to install Windows Server 2019 on Proxmox, and configure it with DNS and Active Directory.
Some Address 67120,
Duttlenheim, France.
This cute theme was created to showcase your work in a simple way. Use it wisely.