
VMWare Workstation Setup

For this setup we're going to look at how to setup VMWare Workstation Pro on Arch Linux:
For this setup we're going to look at how to setup VMWare Workstation Pro on Arch Linux:
First get the package from the AUR:
[ 10.0.0.10/16 ] [ /dev/pts/18 ] [~]
→ yay -Ss vmware-workstation
aur/vmware-workstation-tech-preview 16540321-2 (+1 0.01)
    The industry standard for running multiple operating systems as virtual machines on a single Linux PC (Tech Preview).
aur/vmware-workstation-openrc 16.1.1-2 (+2 1.25)
    The industry standard for running multiple operating systems as virtual machines on a single Linux PC. Modified to use OpenRC.
aur/vmware-workstation15 15.5.7-2 (+2 0.21)
    The industry standard for running multiple operating systems as virtual machines on a single Linux PC.
aur/vmware-workstation11 11.1.4-15 (+2 0.00)
    The industry standard for running multiple operating systems as virtual machines on a single Linux PC.
aur/vmware-workstation14 14.1.7-10 (+5 0.00)
    The industry standard for running multiple operating systems as virtual machines on a single Linux PC.
aur/vmware-workstation12 12.5.9-17 (+9 0.00)
    The industry standard for running multiple operating systems as virtual machines on a single Linux PC.
aur/vmware-workstation 16.1.1-1 (+144 2.74) (Installed)
    The industry standard for running multiple operating systems as virtual machines on a single Linux PC.

[ 10.0.0.10/16 ] [ /dev/pts/18 ] [~]
→ yay -S vmware-workstation
Once it's done just start it:
[ 10.0.0.10/16 ] [ /dev/pts/18 ] [~]
→ which vmware
/usr/bin/vmware

[ 10.0.0.10/16 ] [ /dev/pts/18 ] [~]
→ sudo vmware
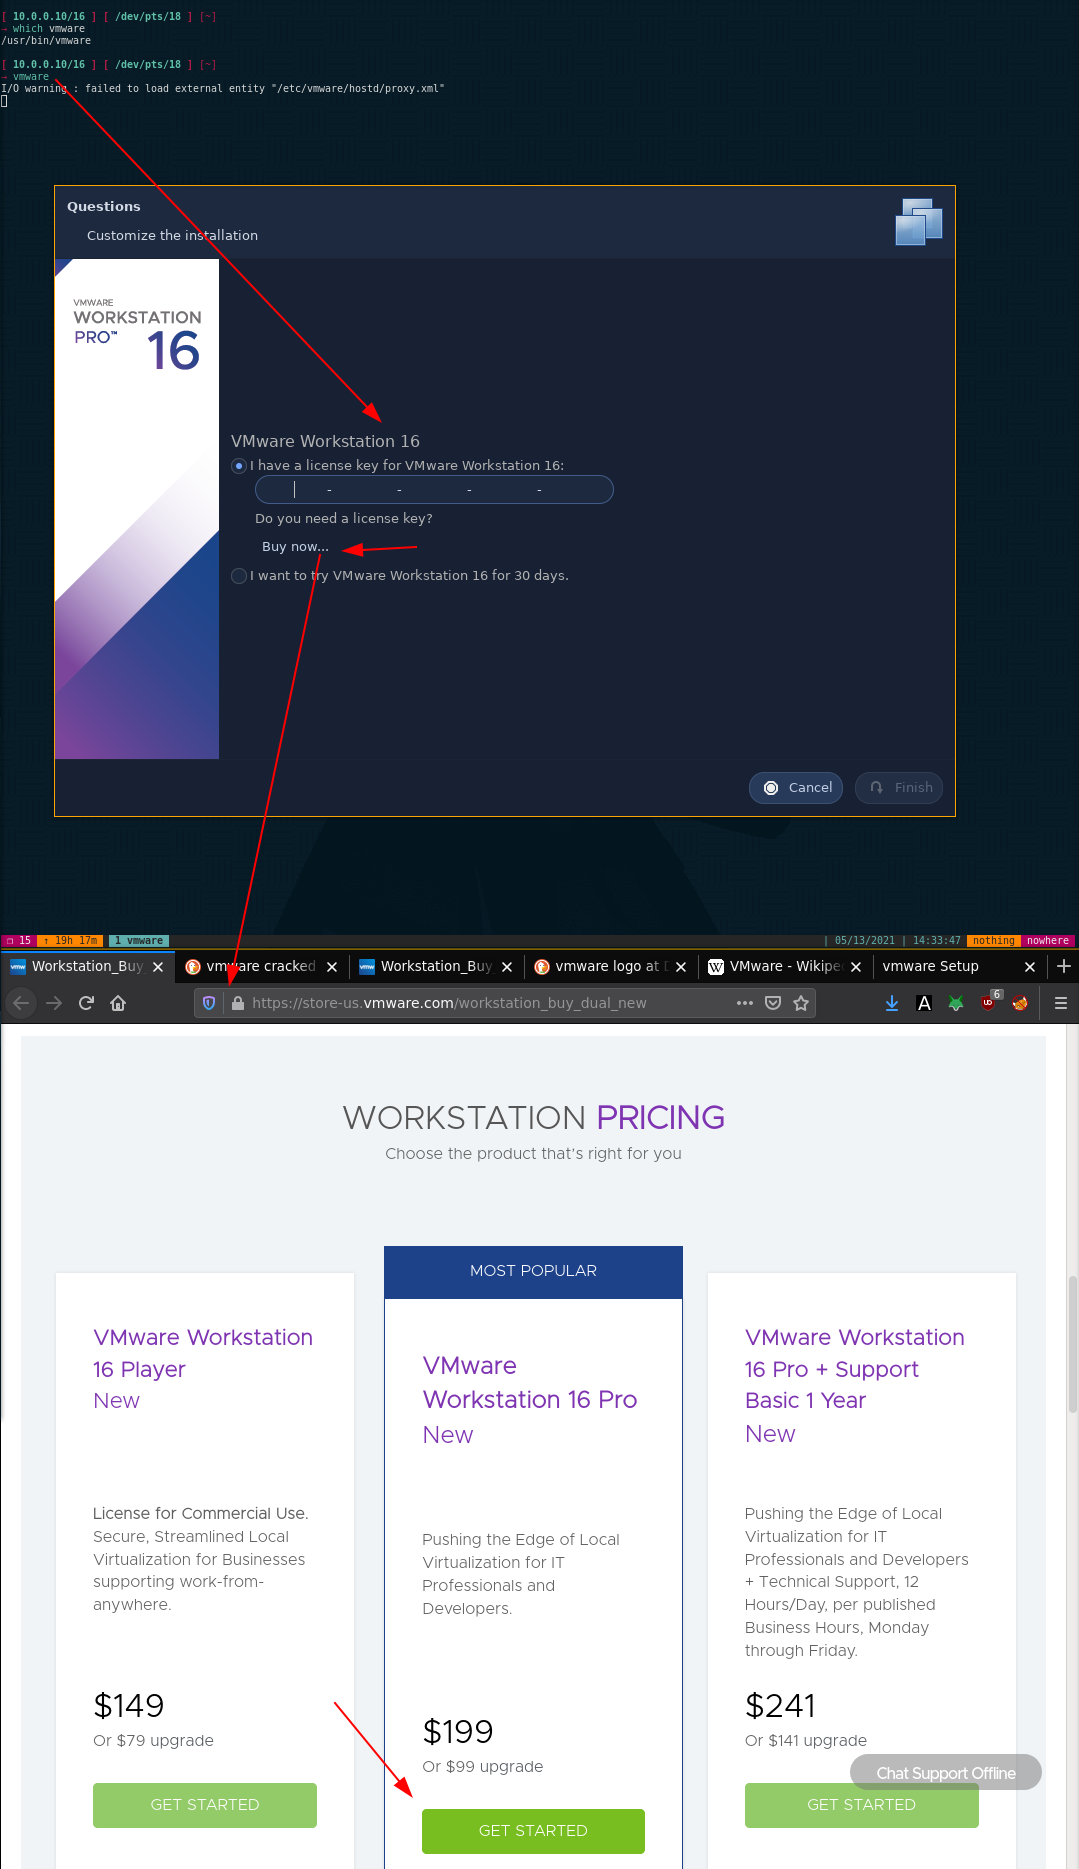
Get a VMWare license key (either buy one or find one), then proceed:

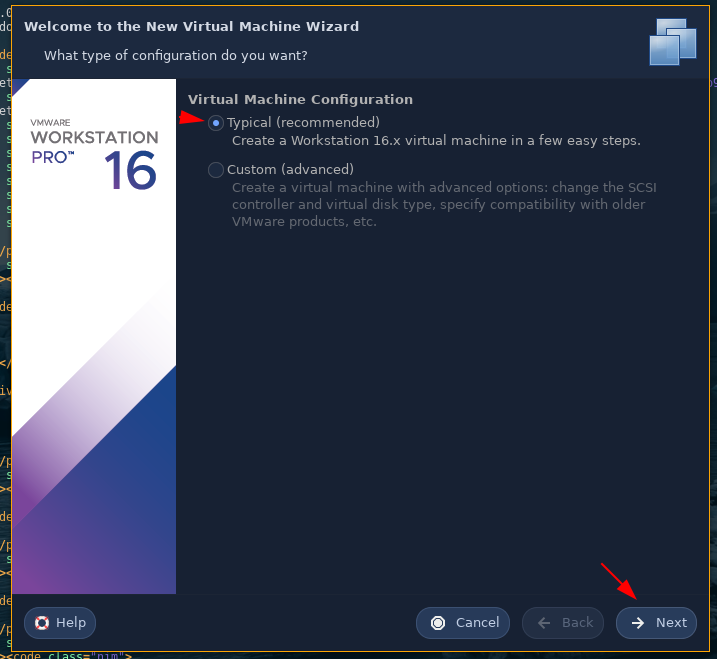
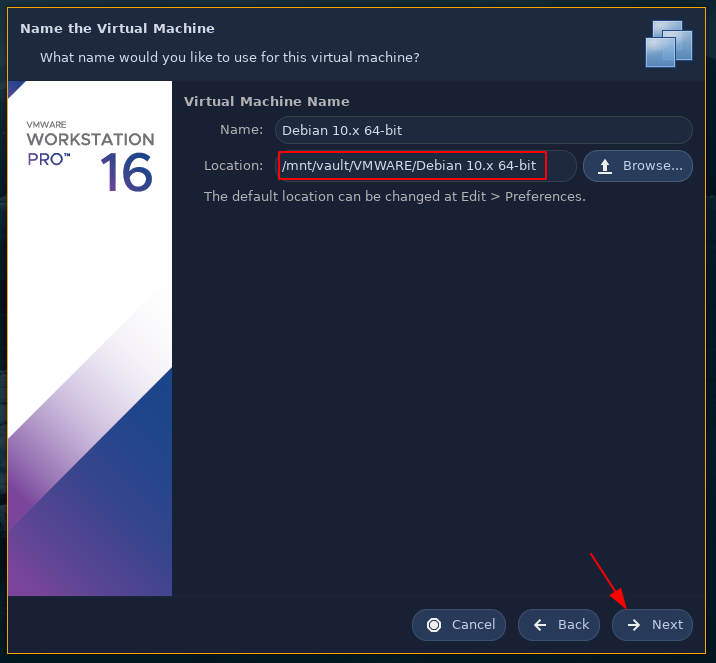
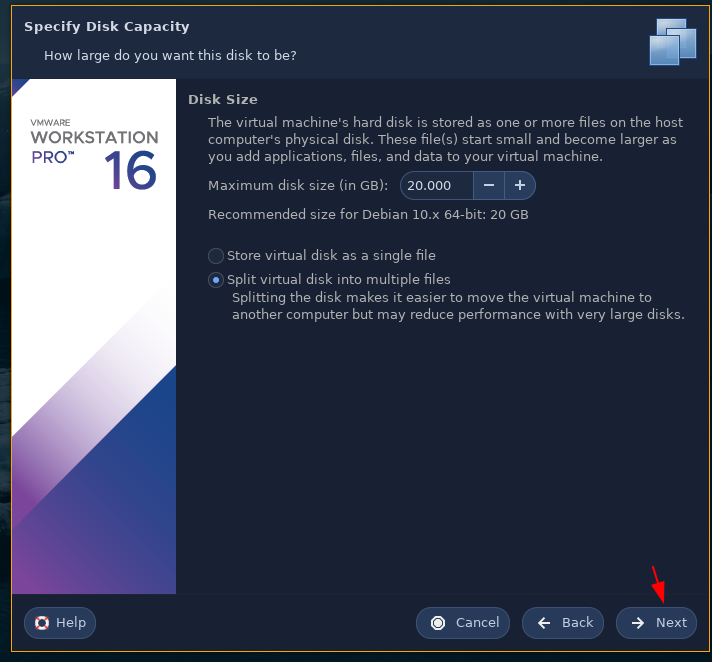
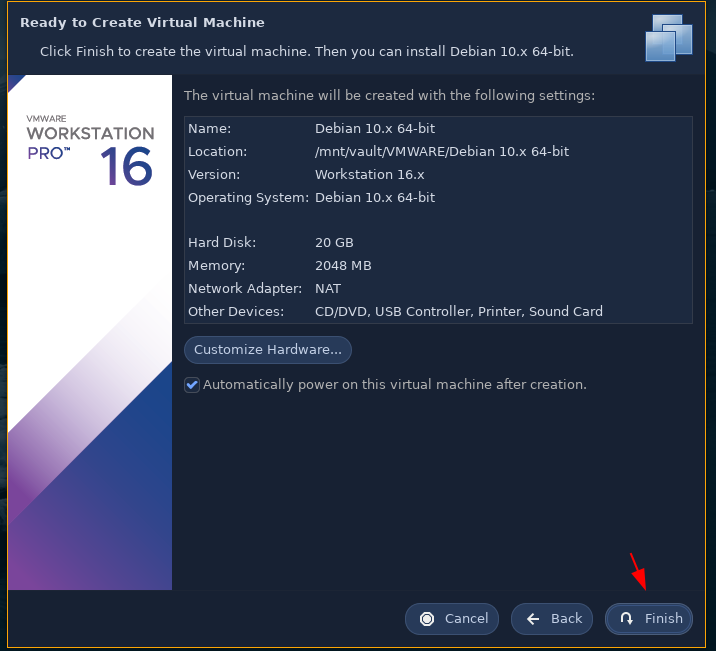
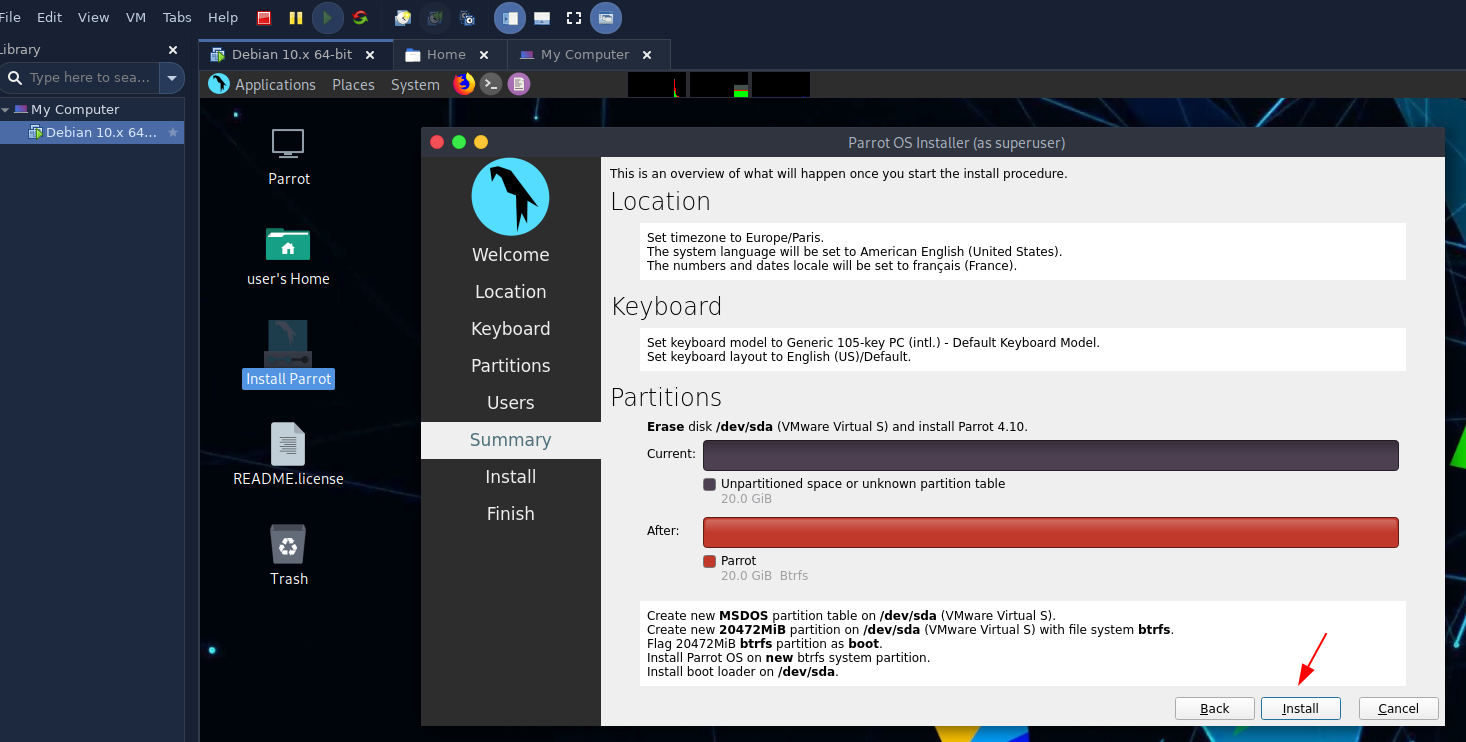
Let's create a new VM:
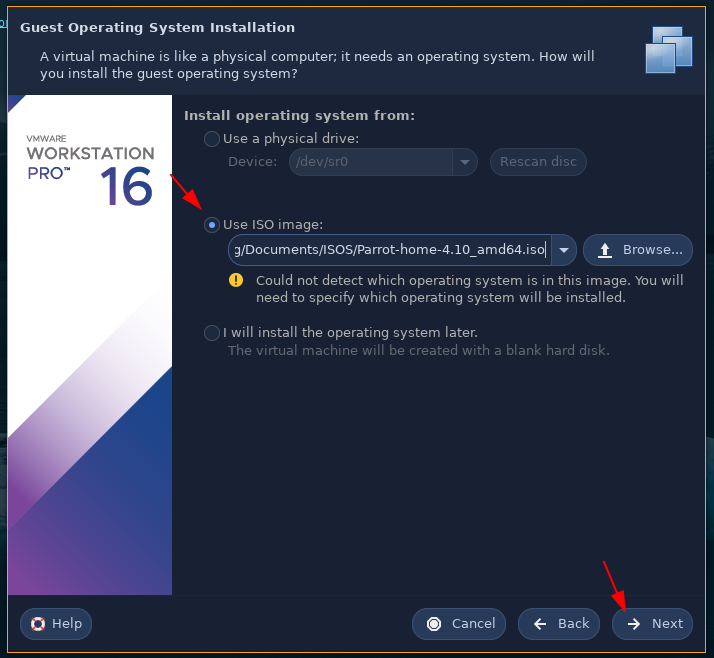

Here i'm installing a Parrot OS VM which is based on debian.

If you get this error, do the following:
[ 10.0.0.10/16 ] [ /dev/pts/8 ] [blog/servers/vmware]
→ sudo modprobe -a vmw_vmci vmmon

[ 10.0.0.10/16 ] [ /dev/pts/19 ] [~]
→ sudo pacman -Sy linux linux-headers

[ 10.0.0.10/16 ] [ /dev/pts/19 ] [~]
→ sudo modprobe -a vmw_vmci vmmon
modprobe: WARNING: Module vmw_vmci not found in directory /lib/modules/5.12.2-arch1-1
modprobe: WARNING: Module vmmon not found in directory /lib/modules/5.12.2-arch1-1

[ 10.0.0.10/16 ] [ /dev/pts/19 ] [~]
→ sudo pacman -Syu

[ 10.0.0.10/16 ] [ /dev/pts/19 ] [~]
→ sudo reboot now
After rebooting just start the VM:
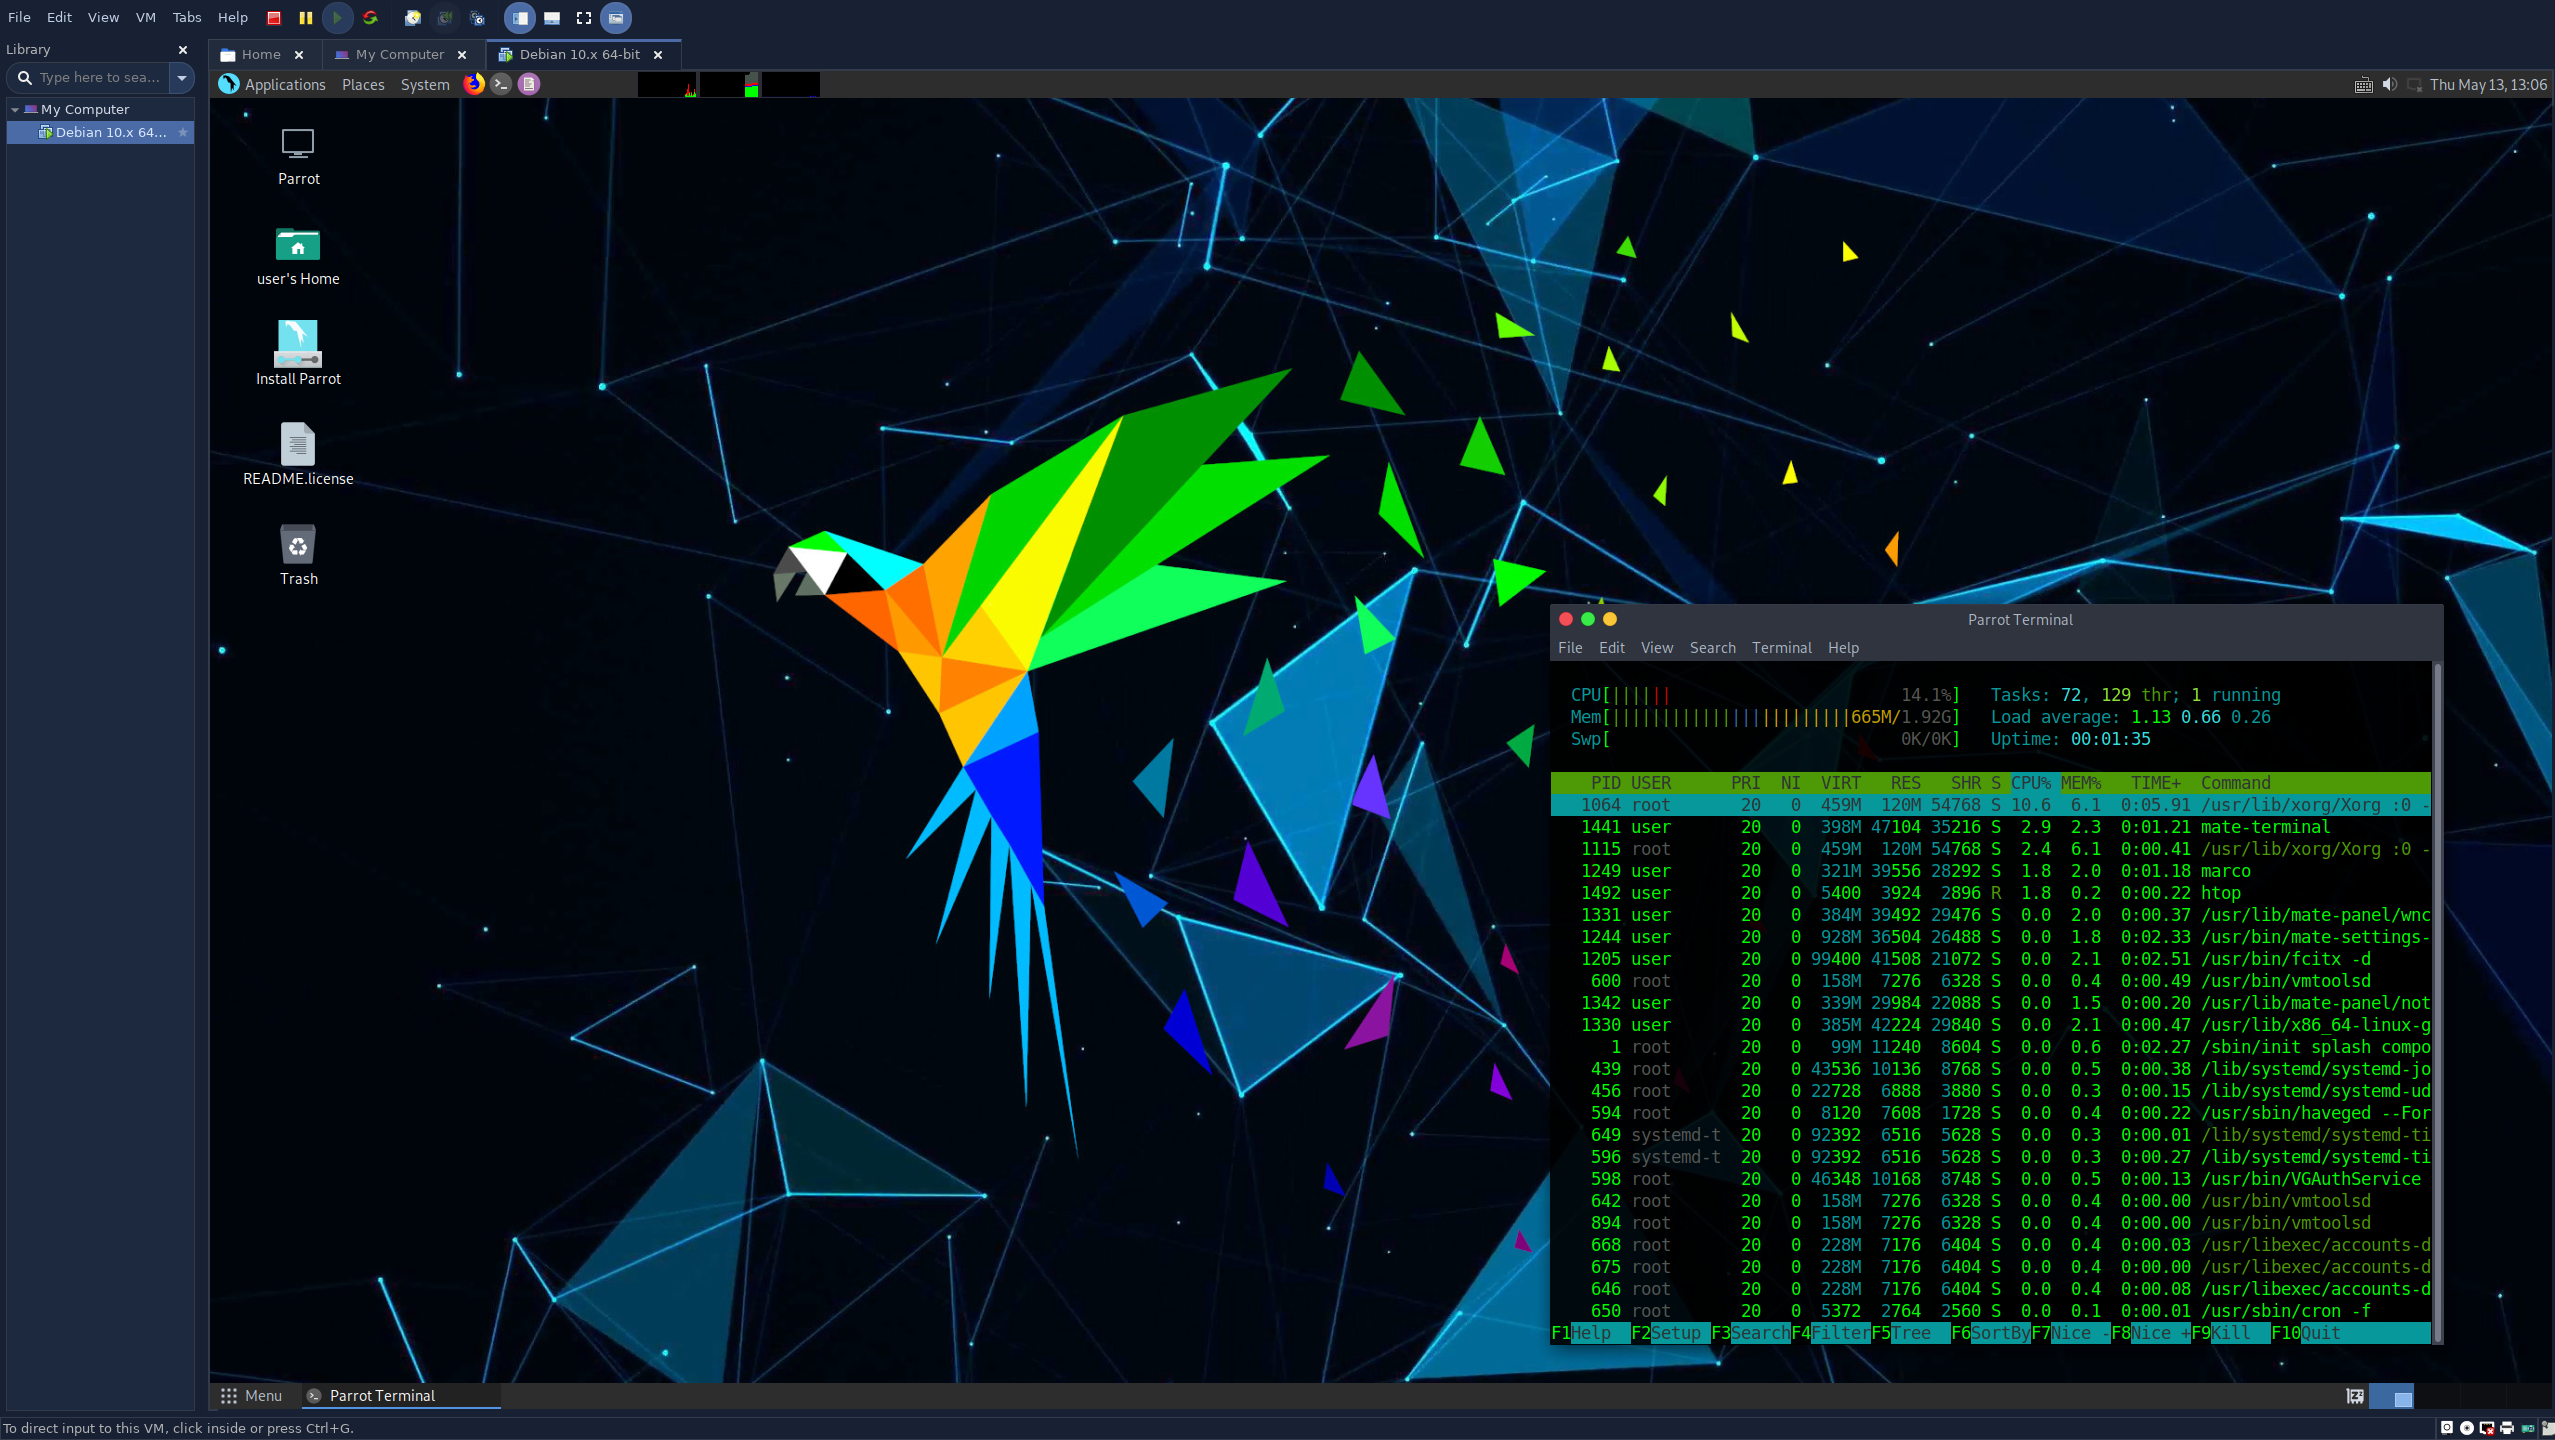
And that's it ! We managed to create a VM.
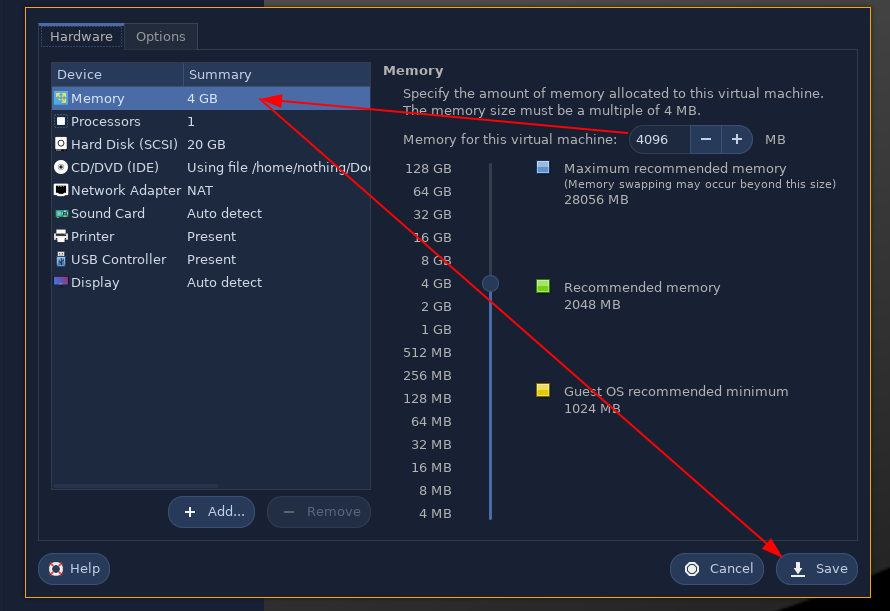
Now when we try to install the OS itself, we see this error:
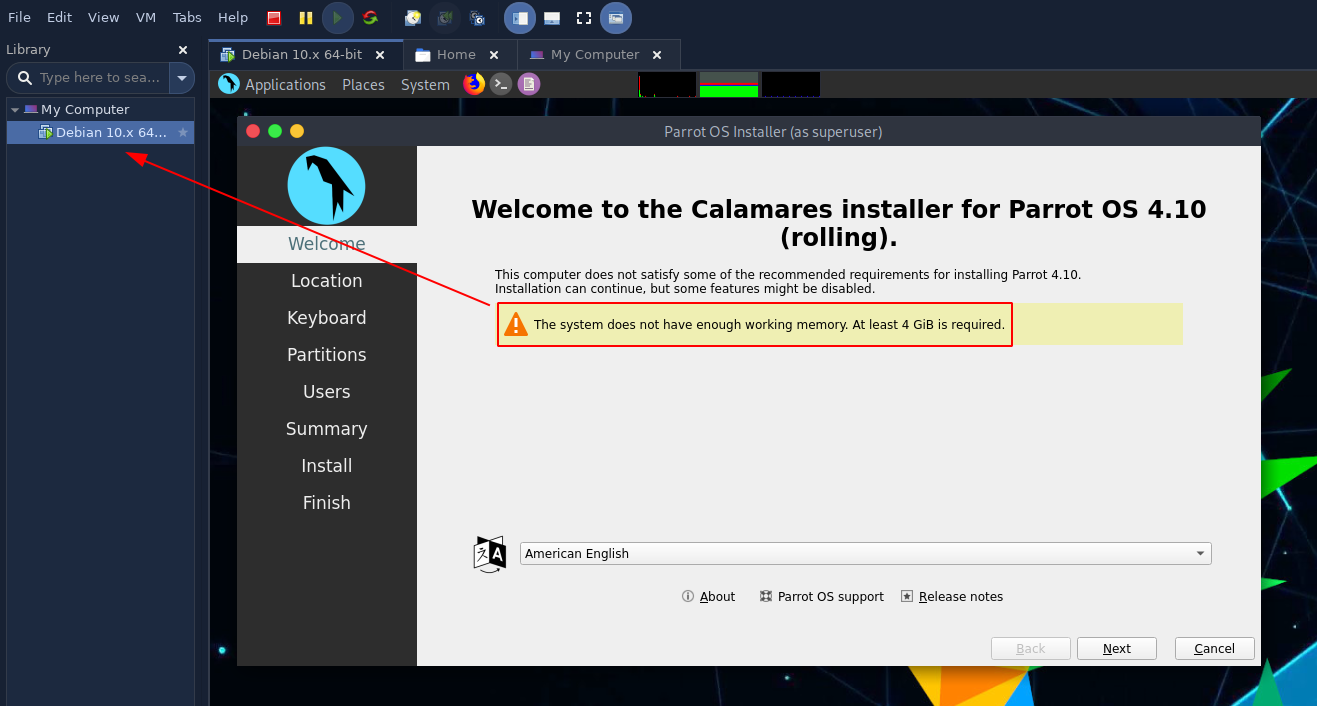
So we go into the settings to add More RAM after powering off the machine:
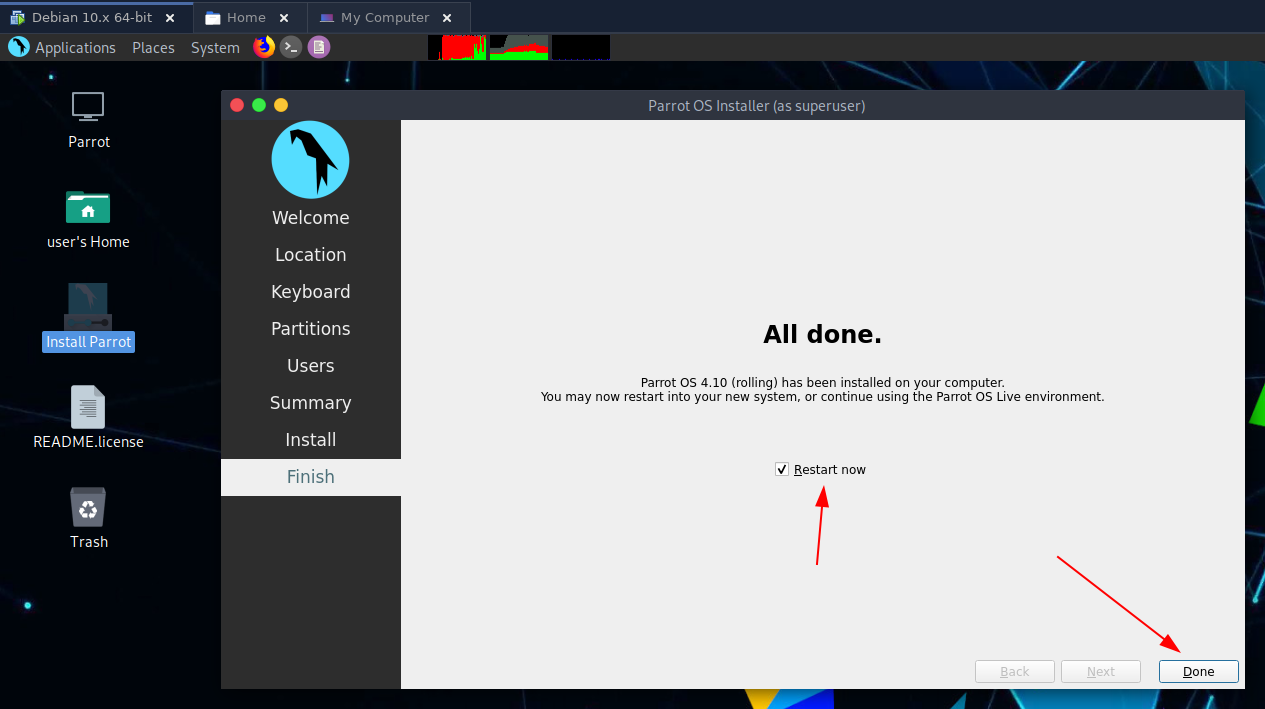
Let it install, then let the VM reboot into your freshly-installed OS:
The OS may be installed, but we need to make sure that it can access the internet !
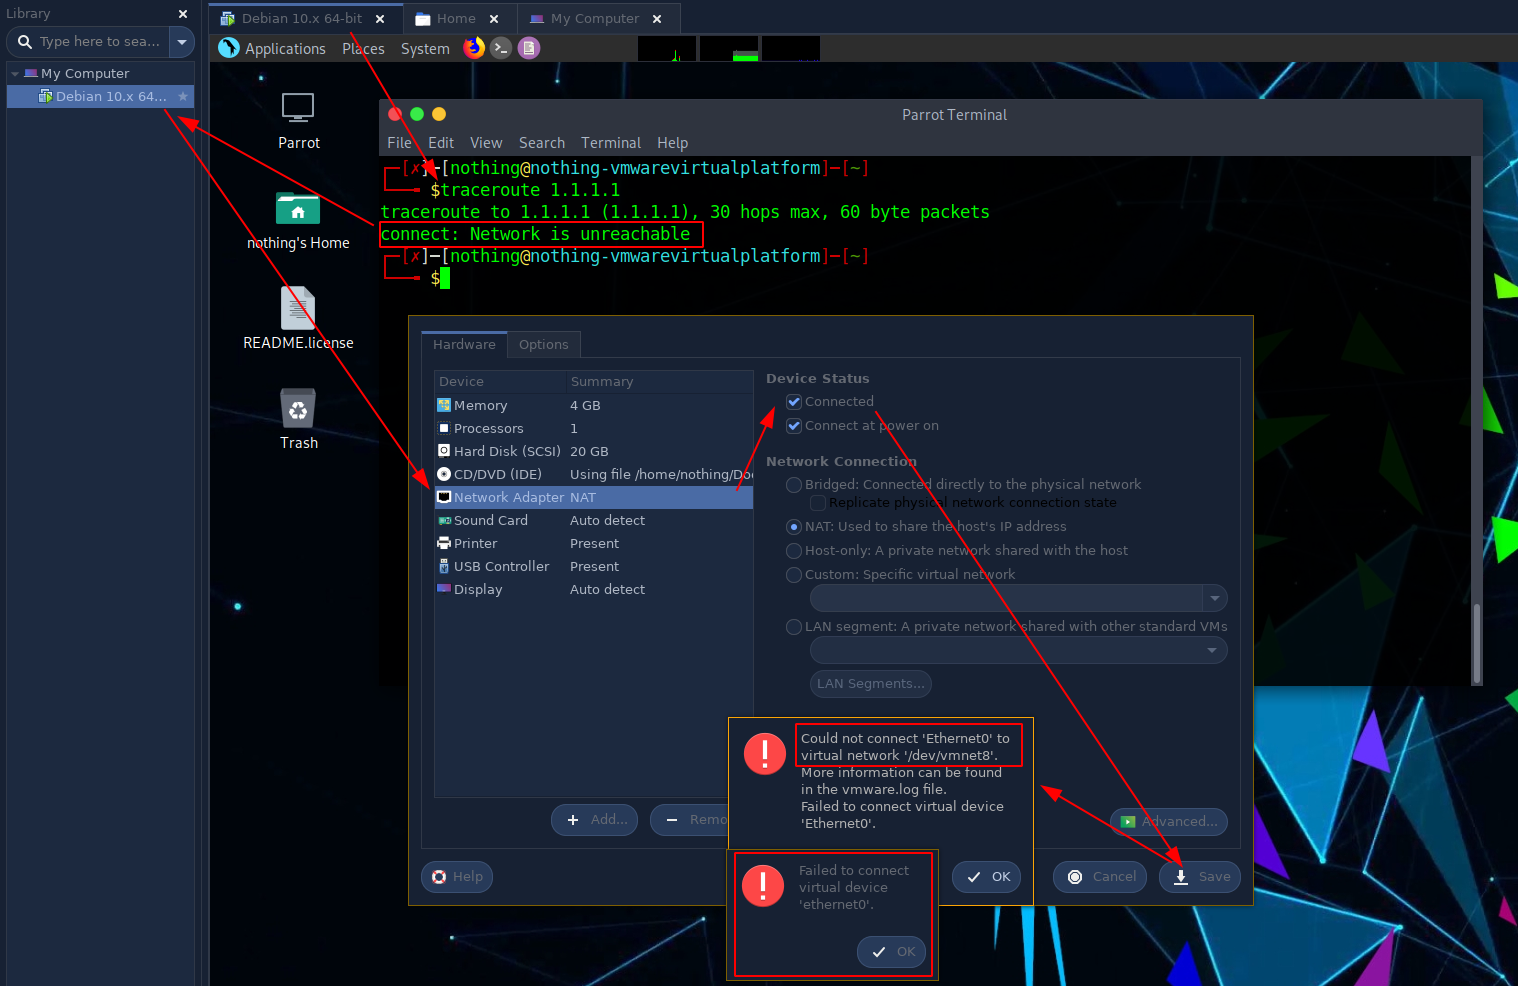
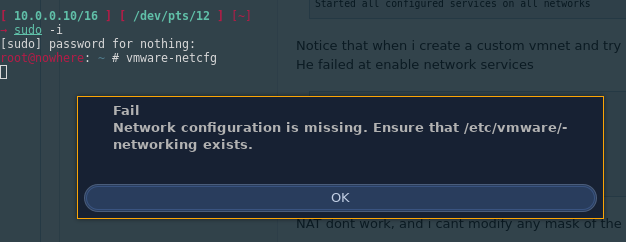
If you get this error, do the following:
root@nowhere: ~ # vmware-networks --start -v
Commands specified: start
Failed to initialize

root@nowhere: ~ # systemctl enable --now vmware-networks
root@nowhere: ~ # systemctl status vmware-networks
● vmware-networks.service - VMware Networks
     Loaded: loaded (/usr/lib/systemd/system/vmware-networks.service; disabled; vendor preset: disabled)
     Active: active (running) since Thu 2021-05-13 15:33:12 CEST; 5s ago
    Process: 94460 ExecStartPre=/sbin/modprobe vmnet (code=exited, status=0/SUCCESS)
    Process: 94462 ExecStart=/usr/bin/vmware-networks --start (code=exited, status=0/SUCCESS)
      Tasks: 6 (limit: 38422)
     Memory: 5.2M
        CPU: 52ms
     CGroup: /system.slice/vmware-networks.service
             ├─94480 /usr/bin/vmnet-bridge -s 6 -d /var/run/vmnet-bridge-0.pid -n 0
             ├─94595 /usr/bin/vmnet-netifup -s 6 -d /var/run/vmnet-netifup-vmnet1.pid /dev/vmnet1 vmnet1
             ├─94602 /usr/bin/vmnet-dhcpd -s 6 -cf /etc/vmware/vmnet1/dhcpd/dhcpd.conf -lf /etc/vmware/vmnet1/dhcpd/dhcpd.leases -pf /var/run/vmnet-dhcpd-vmnet1.pid vmnet1
             ├─94605 /usr/bin/vmnet-natd -s 6 -m /etc/vmware/vmnet8/nat.mac -c /etc/vmware/vmnet8/nat/nat.conf
             ├─94607 /usr/bin/vmnet-netifup -s 6 -d /var/run/vmnet-netifup-vmnet8.pid /dev/vmnet8 vmnet8
             └─94613 /usr/bin/vmnet-dhcpd -s 6 -cf /etc/vmware/vmnet8/dhcpd/dhcpd.conf -lf /etc/vmware/vmnet8/dhcpd/dhcpd.leases -pf /var/run/vmnet-dhcpd-vmnet8.pid vmnet8

May 13 15:33:12 nowhere vmnet-natd[94605]: RTM_NEWADDR: index:2, addr:10.0.0.10
May 13 15:33:12 nowhere vmnet-natd[94605]: RTM_NEWADDR: index:3, addr:192.168.100.1
May 13 15:33:12 nowhere vmware-networks[94462]: Started Bridge networking on vmnet0
May 13 15:33:12 nowhere vmware-networks[94462]: Enabled hostonly virtual adapter on vmnet1
May 13 15:33:12 nowhere vmware-networks[94462]: Started DHCP service on vmnet1
May 13 15:33:12 nowhere vmware-networks[94462]: Started NAT service on vmnet8
May 13 15:33:12 nowhere vmware-networks[94462]: Enabled hostonly virtual adapter on vmnet8
May 13 15:33:12 nowhere vmware-networks[94462]: Started DHCP service on vmnet8
May 13 15:33:12 nowhere vmware-networks[94462]: Started all configured services on all networks
May 13 15:33:12 nowhere systemd[1]: Started VMware Networks.
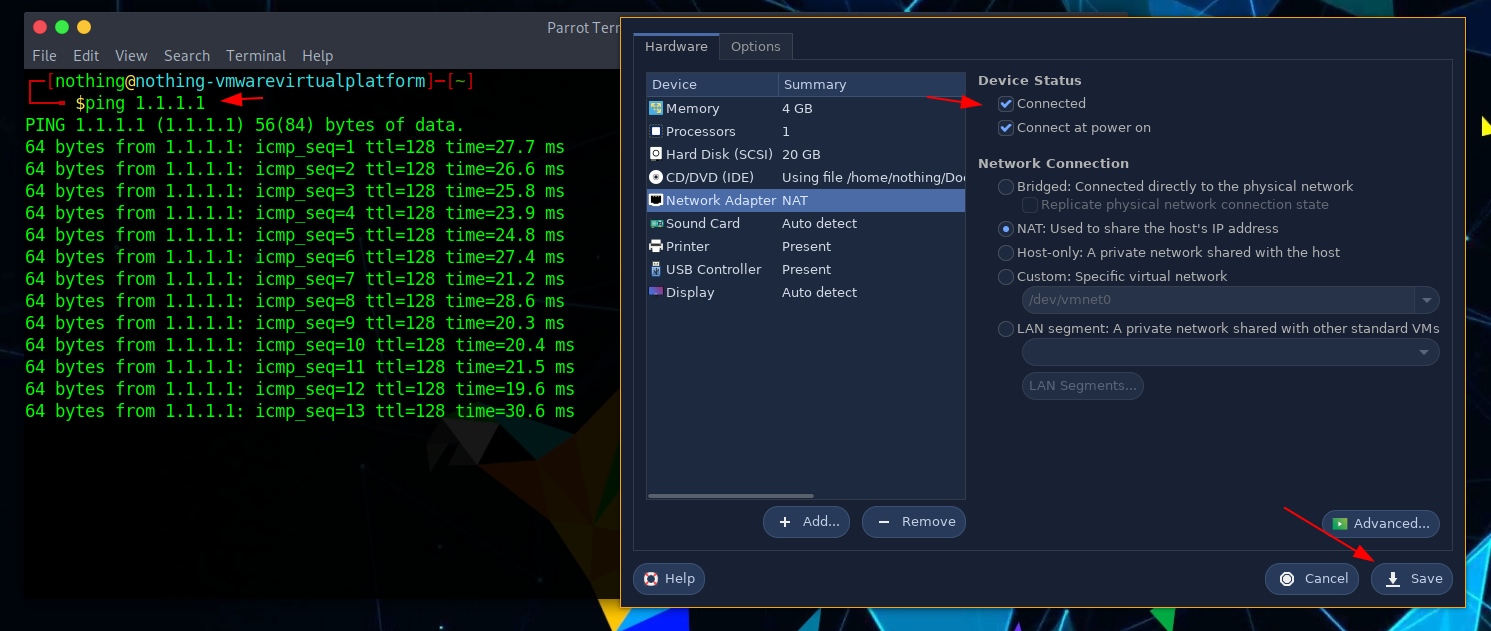
And that's it! We managed to make sure that our VM has an internet connection.
Some Address 67120,
Duttlenheim, France.
This cute theme was created to showcase your work in a simple way. Use it wisely.