Using your own bridge
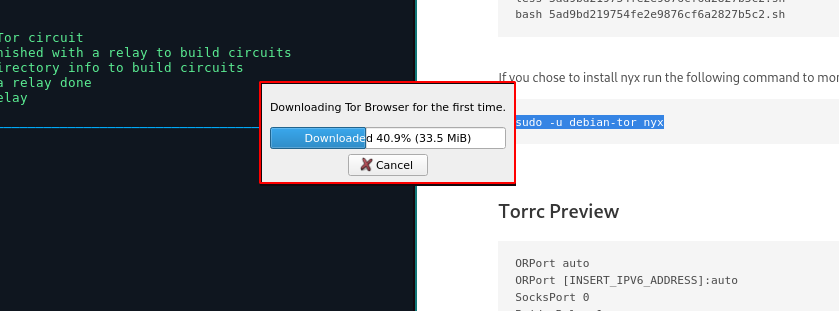
Next install tor-browser (in arch linux you can do it from the AUR), if not just go to the downloads page.
yay -S torbrowser-launcher
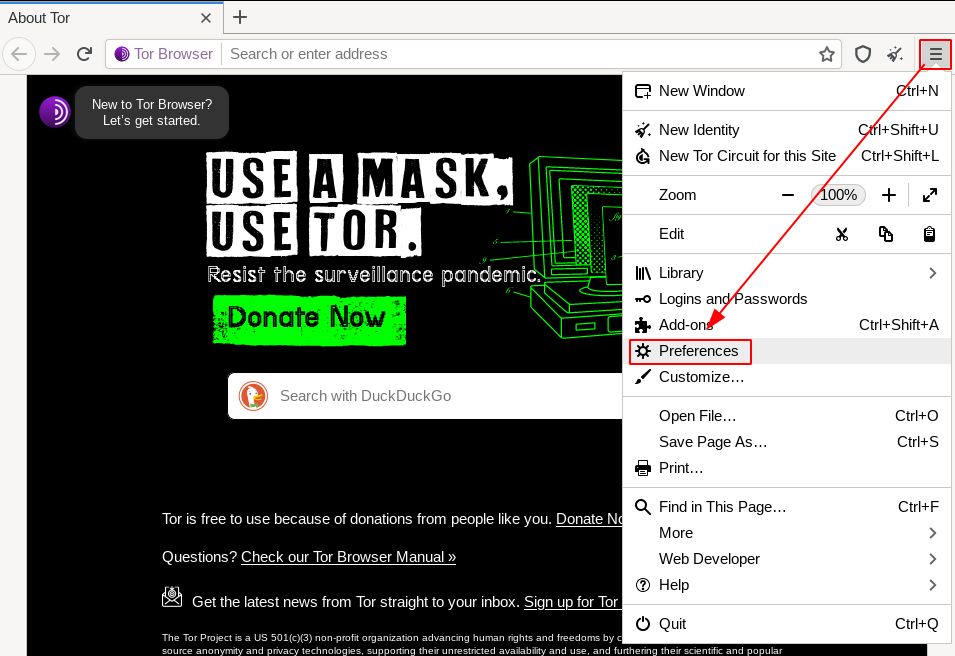
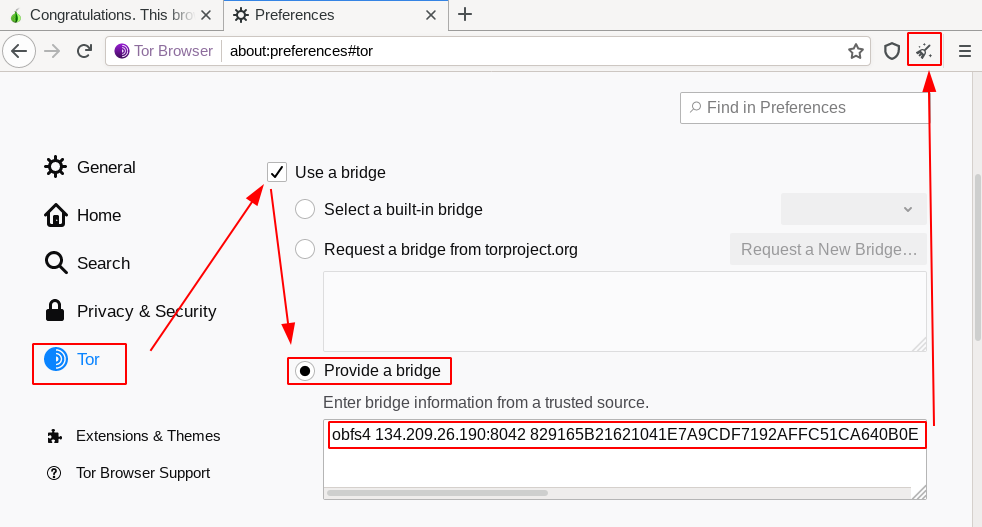
Then Launch it, and go in your preferences:
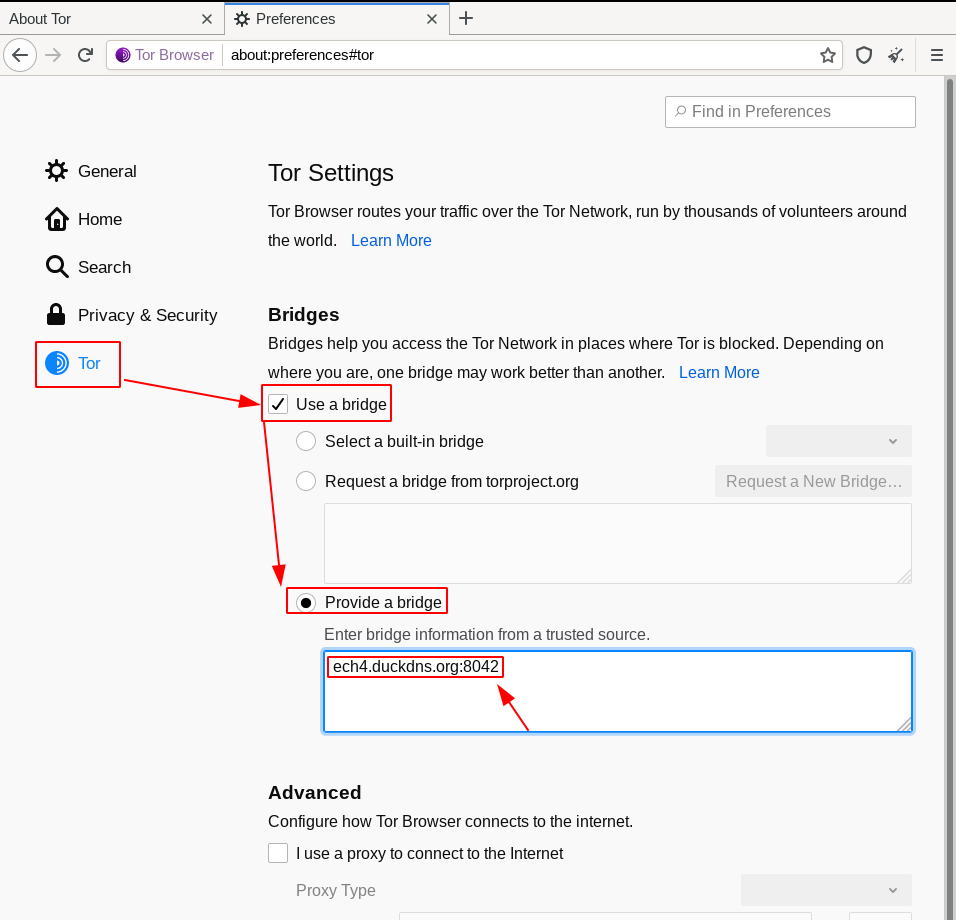
Here specifying your own bridge is not that simple, you need to use the following syntax:
Bridge obfs4 <IP ADDRESS>:<PORT> <FINGERPRINT> cert=<CERTIFICATE> iat-mode=0
First find the ip address of your server:
root@debian-s-1vcpu-1gb-lon1-01:~# curl ifconfig.me && echo && echo
134.209.26.190
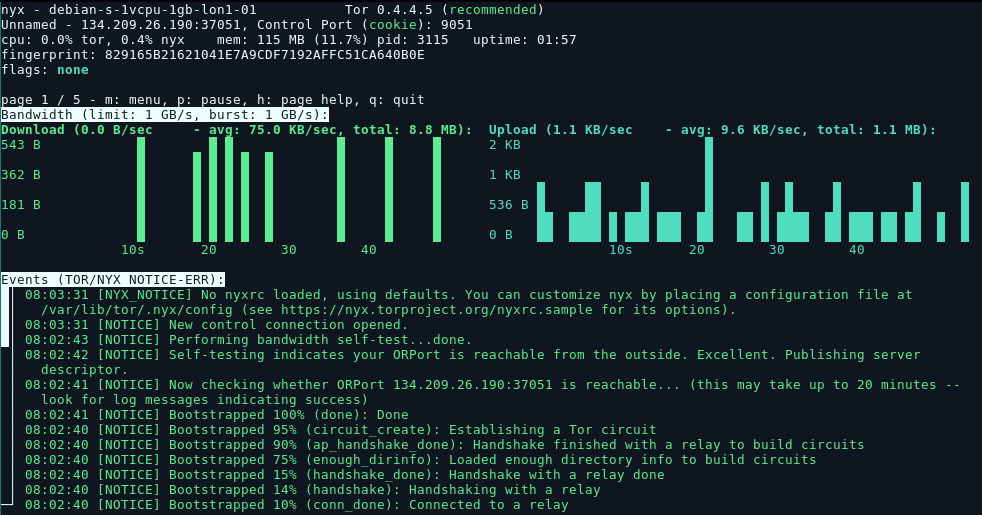
Next find the port :
sudo -u debian-tor nyx
Just hit right arrow 3 times to get to your torrc config preview:
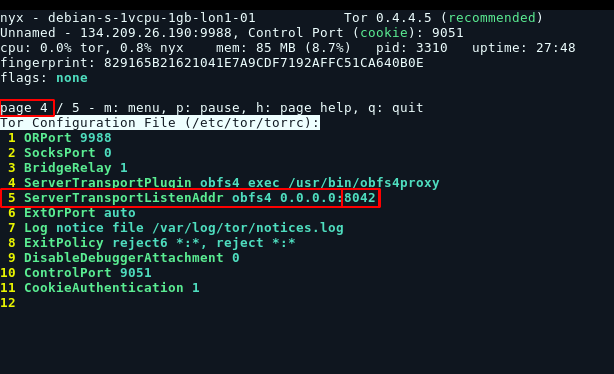
And here we have port 8042. Next we need the fingerprint which is at page 1 of nyx, so press leftarrow to get back to page 1 and then scroll down using the downarrow:
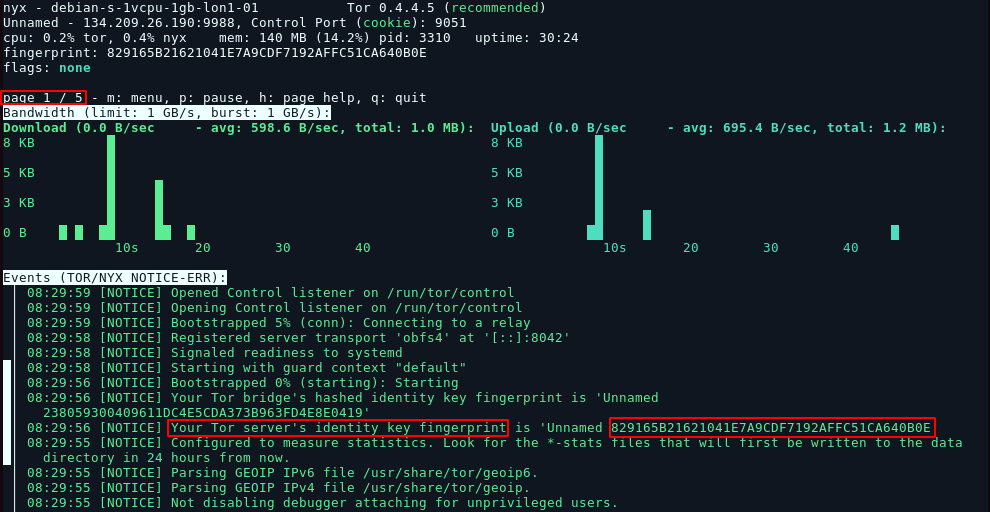
Here it is 829165B21621041E7A9CDF7192AFFC51CA640B0E, be careful not to copy the other one above which is the HASHED identity key. Here we want the original identity key fingerprint.
After this, we need the server's certificate:
root@debian-s-1vcpu-1gb-lon1-01:~# cat /var/lib/tor/pt_state/obfs4_bridgeline.txt
# obfs4 torrc client bridge line
#
# This file is an automatically generated bridge line based on
# the current obfs4proxy configuration.  EDITING IT WILL HAVE
# NO EFFECT.
#
# Before distributing this Bridge, edit the placeholder fields
# to contain the actual values:
#  <IP ADDRESS>  - The public IP address of your obfs4 bridge.
#  <PORT>        - The TCP/IP port of your obfs4 bridge.
#  <FINGERPRINT> - The bridge's fingerprint.

Bridge obfs4 <IP ADDRESS>:<PORT> <FINGERPRINT> cert=L04rcSpDJb9xdGUy/LgAlxbNgtQUWPJFsdF3q2i8lKRmzffiVFJU5ARjr4RYXRZSrsNYXg iat-mode=0
Here in this case we need the last part: cert=L04rcSpDJb9xdGUy/LgAlxbNgtQUWPJFsdF3q2i8lKRmzffiVFJU5ARjr4RYXRZSrsNYXg iat-mode=0
And so we combine it all to get the string we need:
Bridge obfs4 134.209.26.190:8042 829165B21621041E7A9CDF7192AFFC51CA640B0E cert=L04rcSpDJb9xdGUy/LgAlxbNgtQUWPJFsdF3q2i8lKRmzffiVFJU5ARjr4RYXRZSrsNYXg iat-mode=0
Paste it in and hit "new identity":
Then we check if it is working on check.torproject.org:
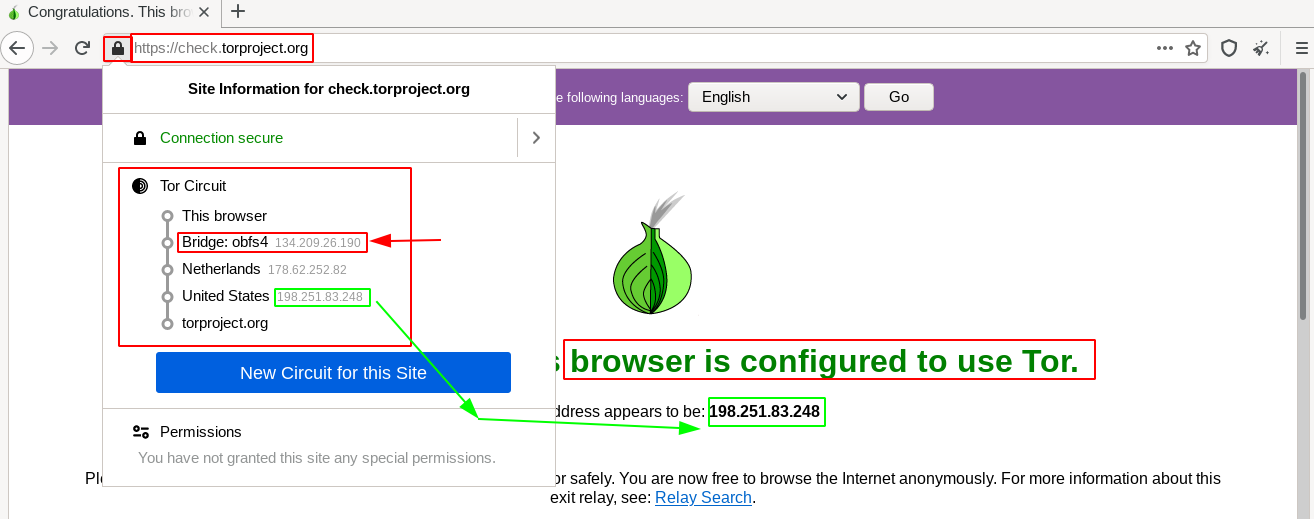
And that's it! we have been able to use our own VPS-hosted tor bridge!