Initial setup
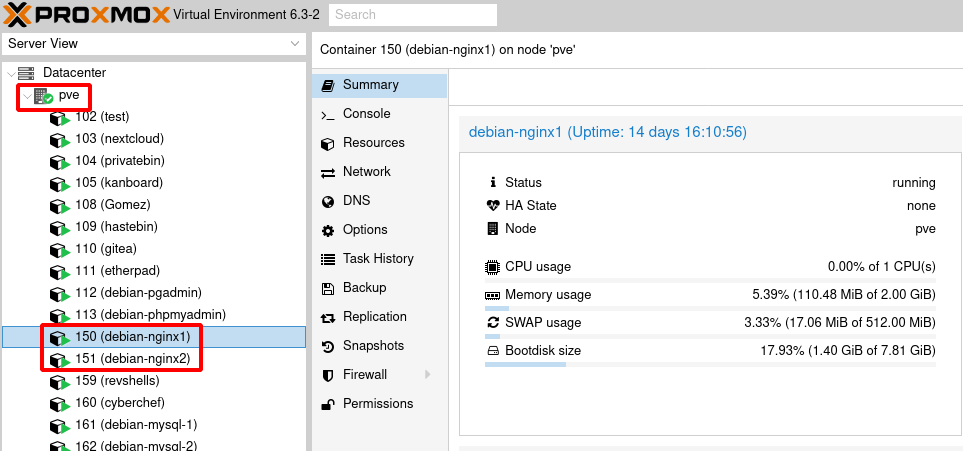
We're going to do this tutorial on a proxmox server with 2 LXC Containers on the same local network:
We login via ssh in both of them:

root@debian-nginx2:~# apt search rsync

rsync/stable,now 3.1.3-6 amd64 [installed,automatic]
  fast, versatile, remote (and local) file-copying tool


root@debian-nginx2:~# apt install rsync

root@debian-nginx2:~# which rsync
/usr/bin/rsync
Now let's create a sample directory with a bunch of extremely important data and try to send it to our second debian:
root@debian-nginx2:~# ls
masterdump.sql
root@debian-nginx2:~# mkdir myveryimportantdirectory
root@debian-nginx2:~# echo 'myveryimportant text' > myveryimportantdirectory/myveryimportanttext.txt
root@debian-nginx2:~# ls -l
total 476
-rw-r--r-- 1 root root 480150 Mar 20 10:29 masterdump.sql
drwxr-xr-x 2 root root   4096 Apr  2 07:00 myveryimportantdirectory
root@debian-nginx2:~#
Now that we have that, we will use rsync to send it over to debian1 but to do that we first need to install a ssh connection between the 2 hosts, and to make it more secure
we will use SSH keys:
root@debian-nginx1:~# apt search openssh-server
Sorting... Done
Full Text Search... Done
openssh-server/stable,now 1:7.9p1-10+deb10u2 amd64 [installed]
  secure shell (SSH) server, for secure access from remote machines
I have installed openssh pre-emptively but if you didn't then install the openssh-server package like so:
apt install openssh-server
rm /etc/ssh/sshd_config
wget https://raw.githubusercontent.com/ech1/serverside/master/ssh/sshd_config -O /etc/ssh/sshd_config
systemctl restart sshd
What my ssh config does is basically to allow the root login, and then refusing password authentifications to force the user to use SSH keys.
This means that we will need to create the ssh keys of the slave node, and then we will need to copy the private key from the slave node to the master node.
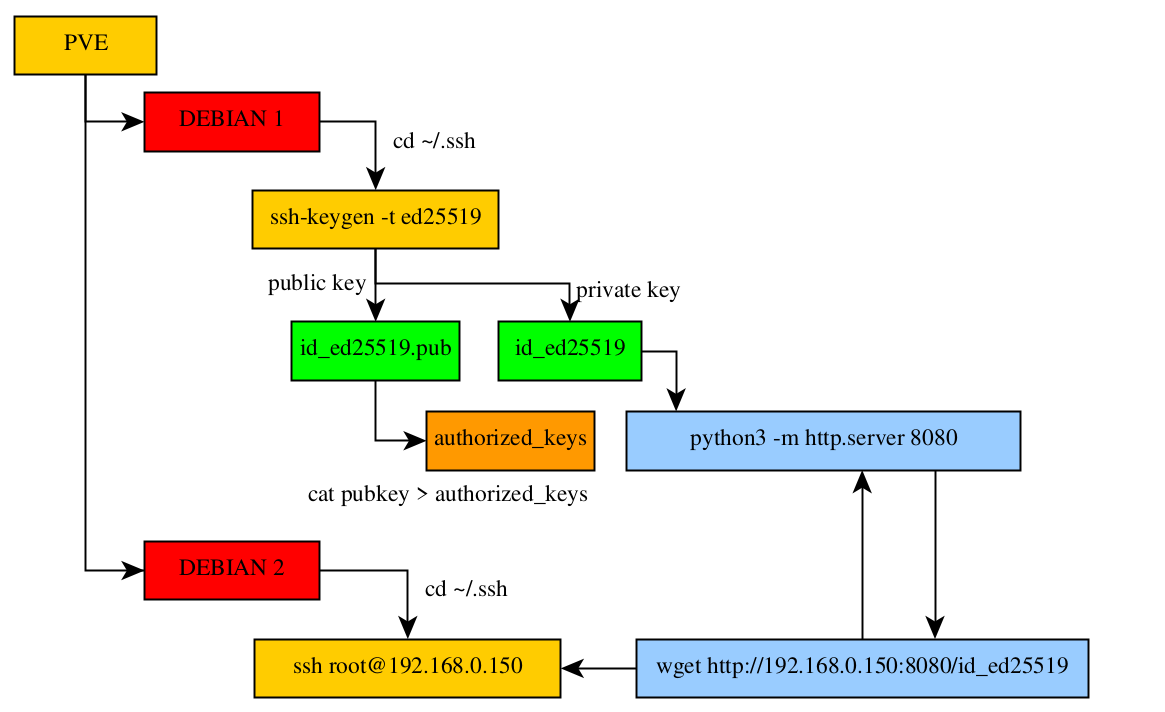
So first let's create the ssh keys on our debian1 machine, create the ~/.ssh directory if it is not already there:
root@debian-nginx1:~# cd .ssh
-bash: cd: .ssh: No such file or directory
root@debian-nginx1:~# mkdir .ssh
root@debian-nginx1:~# cd .ssh
root@debian-nginx1:~/.ssh# ssh-keygen -t ed25519
Generating public/private ed25519 key pair.
Enter file in which to save the key (/root/.ssh/id_ed25519):
Enter passphrase (empty for no passphrase):
Enter same passphrase again:
Your identification has been saved in /root/.ssh/id_ed25519.
Your public key has been saved in /root/.ssh/id_ed25519.pub.
The key fingerprint is:
SHA256:svD8ddV4wm64PWrRPUDr/z3xqk0AfS2zrFi5yccEGIo root@debian-nginx1
The key's randomart image is:
+--[ED25519 256]--+
|          .      |
|       . . + . . |
|      E . o + = .|
|           . O * |
|    . . S   =.X.o|
|     + o   +.%.=.|
|      +   o B.B +|
|       . . ..B.oo|
|        .  .+o+o=|
+----[SHA256]-----+
root@debian-nginx1:~/.ssh#
root@debian-nginx1:~/.ssh# cat id_ed25519.pub >> authorized_keys
Now that's done, we need to get the private key:
root@debian-nginx1:~/.ssh# cat id_ed25519
-----BEGIN OPENSSH PRIVATE KEY-----
b3BlbnNzaC1rZXktdjEAAAAABG5vbmUAAAAEbm9uZQAAAAAAAAABAAAAMwAAAAtzc2gtZW
QyNTUxOQAAACAR/s+1r8eJq5iHKi+JvCNyd9/vg5evPOC9HqdAKFbOkgAAAJiKlmf6ipZn
+gAAAAtzc2gtZWQyNTUxOQAAACAR/s+1r8eJq5iHKi+JvCNyd9/vg5evPOC9HqdAKFbOkg
AAAEA2aBZsMry0TeChASkAXPax2GEzEH26zcFmvGDaNzPiFRH+z7Wvx4mrmIcqL4m8I3J3
3++Dl6884L0ep0AoVs6SAAAAEnJvb3RAZGViaWFuLW5naW54MQECAw==
-----END OPENSSH PRIVATE KEY-----
into the ssh client's ~/.ssh directory, that way when they will need to ssh into our debian machine, they will automatically use the private ssh key.
To send one file to another host on the same network, we can use python3's http module:
root@debian-nginx1:~/.ssh# cat id_ed25519
-----BEGIN OPENSSH PRIVATE KEY-----
b3BlbnNzaC1rZXktdjEAAAAABG5vbmUAAAAEbm9uZQAAAAAAAAABAAAAMwAAAAtzc2gtZW
QyNTUxOQAAACAR/s+1r8eJq5iHKi+JvCNyd9/vg5evPOC9HqdAKFbOkgAAAJiKlmf6ipZn
+gAAAAtzc2gtZWQyNTUxOQAAACAR/s+1r8eJq5iHKi+JvCNyd9/vg5evPOC9HqdAKFbOkg
AAAEA2aBZsMry0TeChASkAXPax2GEzEH26zcFmvGDaNzPiFRH+z7Wvx4mrmIcqL4m8I3J3
3++Dl6884L0ep0AoVs6SAAAAEnJvb3RAZGViaWFuLW5naW54MQECAw==
-----END OPENSSH PRIVATE KEY-----
root@debian-nginx1:~/.ssh# ip a | grep inet
    inet 127.0.0.1/8 scope host lo
    inet6 ::1/128 scope host
    inet 192.168.0.150/24 brd 192.168.0.255 scope global eth0
    inet6 fe80::1cb1:50ff:fe1d:27dc/64 scope link
root@debian-nginx1:~/.ssh# python3 -m http.server 8080
root@debian-nginx2:~# cd ~/.ssh
-bash: cd: /root/.ssh: No such file or directory
root@debian-nginx2:~# mkdir ~/.ssh
root@debian-nginx2:~# cd ~/.ssh
root@debian-nginx2:~/.ssh# wget http://192.168.0.150:8080/id_ed25519
--2021-04-02 07:26:37--  http://192.168.0.150:8080/id_ed25519
Connecting to 192.168.0.150:8080... connected.
HTTP request sent, awaiting response... 200 OK
Length: 411 [application/octet-stream]
Saving to: 'id_ed25519'

id_ed25519                               100%[=================================================================================>]     411  --.-KB/s    in 0s

2021-04-02 07:26:37 (27.9 MB/s) - 'id_ed25519' saved [411/411]
Now here you need to set the correct permissions onto the client's private ssh key because otherwise you will get this error :
root@debian-nginx2:~/.ssh# ssh root@192.168.0.150
The authenticity of host '192.168.0.150 (192.168.0.150)' can't be established.
ECDSA key fingerprint is SHA256:o7DMwIrXDCyQ3uzVdiUEHkViOXrJhcd47zLBc2U4uDU.
Are you sure you want to continue connecting (yes/no)? yes
Warning: Permanently added '192.168.0.150' (ECDSA) to the list of known hosts.
@@@@@@@@@@@@@@@@@@@@@@@@@@@@@@@@@@@@@@@@@@@@@@@@@@@@@@@@@@@
@         WARNING: UNPROTECTED PRIVATE KEY FILE!          @
@@@@@@@@@@@@@@@@@@@@@@@@@@@@@@@@@@@@@@@@@@@@@@@@@@@@@@@@@@@
Permissions 0644 for '/root/.ssh/id_ed25519' are too open.
It is required that your private key files are NOT accessible by others.
This private key will be ignored.
Load key "/root/.ssh/id_ed25519": bad permissions
you need to set the 600 permissions on the private ssh key and then you're able to login via ssh:
root@debian-nginx2:~/.ssh# chmod 600 id_ed25519
root@debian-nginx2:~/.ssh# ssh root@192.168.0.150
Linux debian-nginx1 5.4.78-1-pve #1 SMP PVE 5.4.78-1 (Mon, 30 Nov 2020 10:57:47 +0100) x86_64

The programs included with the Debian GNU/Linux system are free software;
the exact distribution terms for each program are described in the
individual files in /usr/share/doc/*/copyright.

Debian GNU/Linux comes with ABSOLUTELY NO WARRANTY, to the extent
permitted by applicable law.
Last login: Fri Apr  2 06:57:25 2021 from 192.168.0.99
root@debian-nginx1:~# id
uid=0(root) gid=0(root) groups=0(root)
So now that we are able to login via ssh from debian2 TO debian1 we will be able to use rsync to send files from debian2 TO debian1

We will use rsync like so:
root@debian-nginx2:~# mkdir myveryimportantdirectory
root@debian-nginx2:~# echo 'myveryimportant text' > myveryimportantdirectory/myveryimportanttext.txt
root@debian-nginx2:~# ls -l
total 476
-rw-r--r-- 1 root root 480150 Mar 20 10:29 masterdump.sql
drwxr-xr-x 2 root root   4096 Apr  2 07:42 myveryimportantdirectory

root@debian-nginx2:~# rsync /root/myveryimportantdirectory root@192.168.0.150:/root/
skipping directory myveryimportantdirectory
root@debian-nginx2:~# rsync -a /root/myveryimportantdirectory root@192.168.0.150:/root/
root@debian-nginx2:~#
Now here we basically synchronized the very important directory using the -a flag between our 2 debian hosts (192.168.0.150 and 192.168.0.151)
we can see it appear in the first debian host
root@debian-nginx1:~# ls
masterdump.sql
root@debian-nginx1:~# ls -l
total 476
-rw-r--r-- 1 root root 480150 Mar 20 10:29 masterdump.sql
drwxr-xr-x 2 root root   4096 Apr  2 07:42 myveryimportantdirectory
root@debian-nginx1:~# cat myveryimportantdirectory/myveryimportanttext.txt
myveryimportant text
And that's it! we have been able to use rsync to backup our important directory and it's contents into the other debian host.

