
First install virt-manager in your debian system:
sudo apt install virt-manager qemu libvirt0 qemu-kvm ebtables dnsmasq bridge-utils -y

sudo gpasswd -a $USER libvirt

sudo systemctl enable --now libvirtd
sudo systemctl status libvirtd

sudo virt-manager
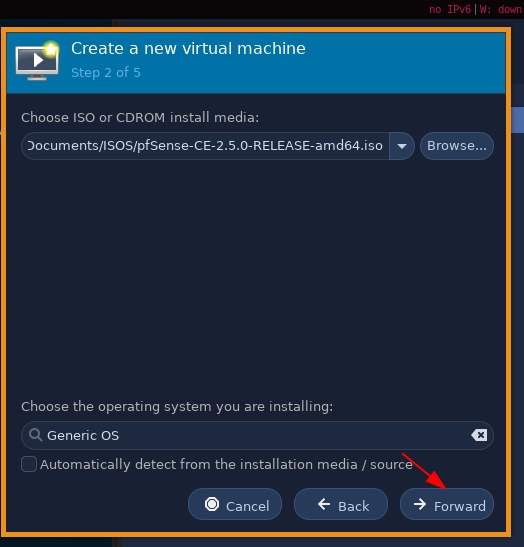
Then configure the network (NAT for the WAN interface of pfsense + an ip-less interface for the LAN interface of pfsense and the other VMs)
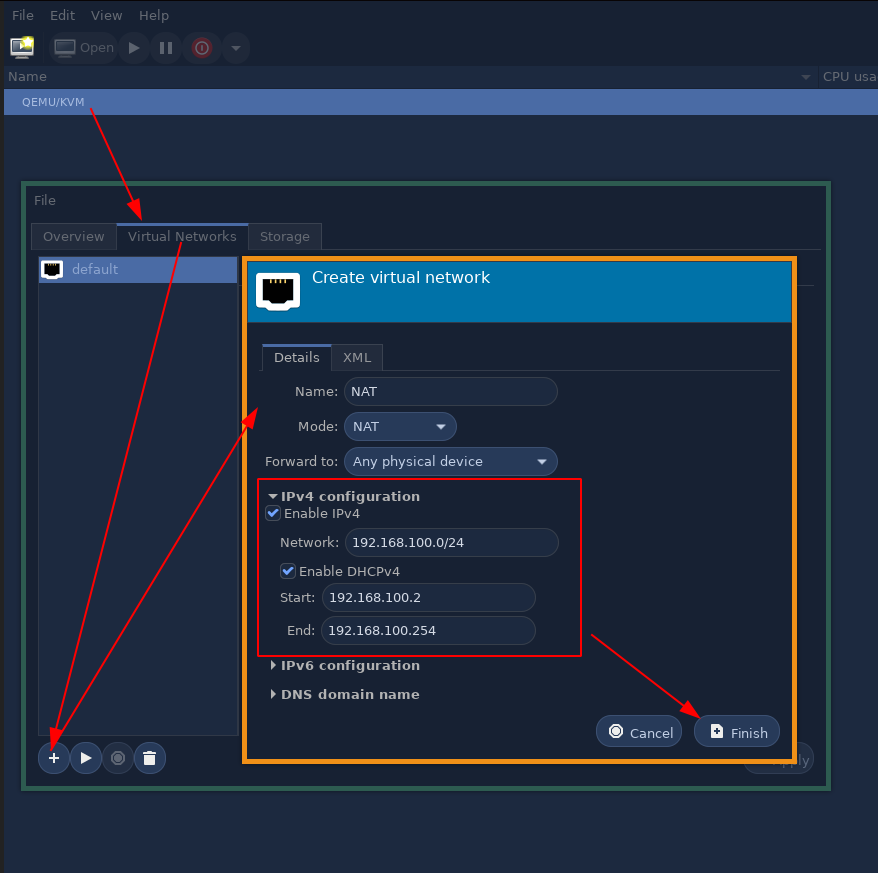
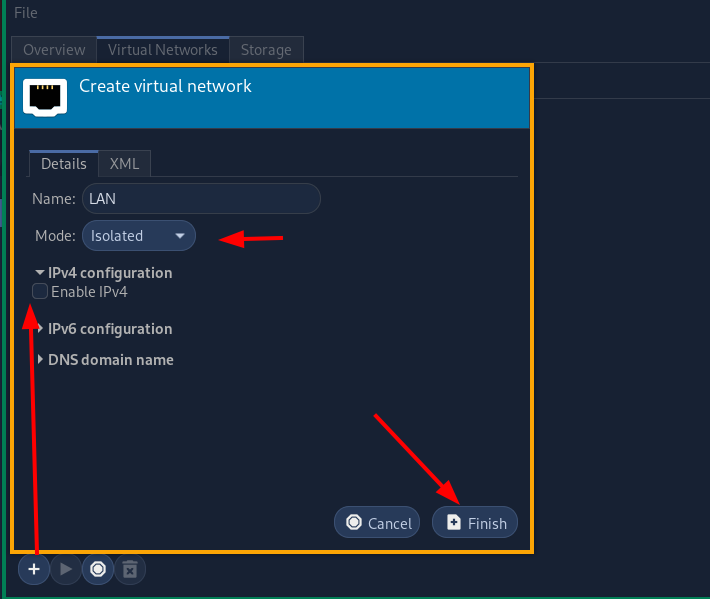
so we get the following lan network, and a /24 NAT network, DO NOT ACTIVATE DHCP ON THE LAN network, because our pfsense will do it instead:
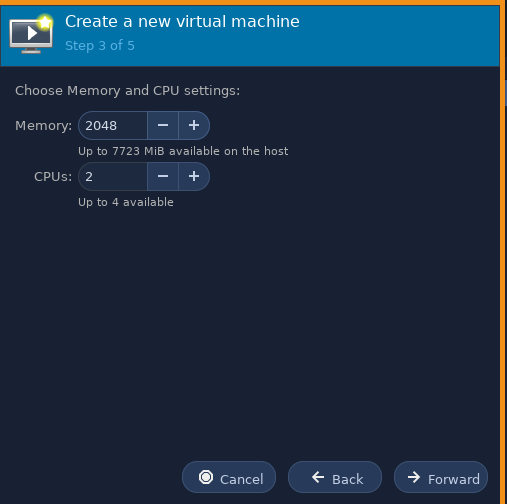
now we activate them both and install our pfsense VM following this network graph:
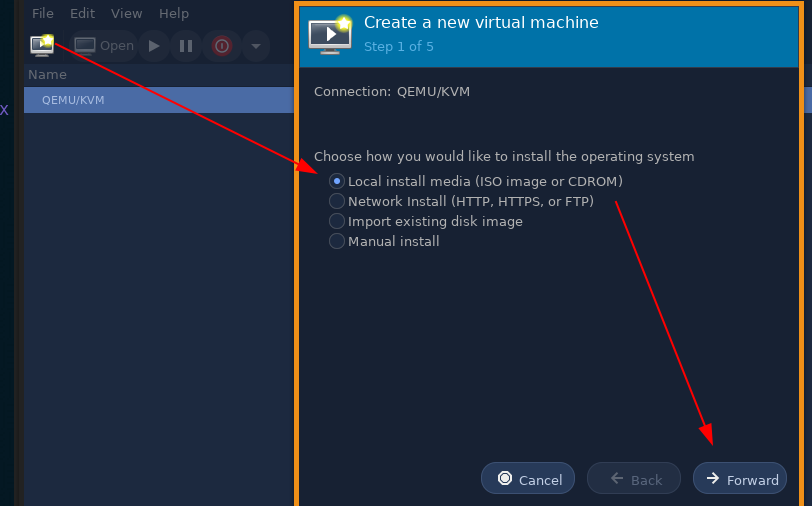

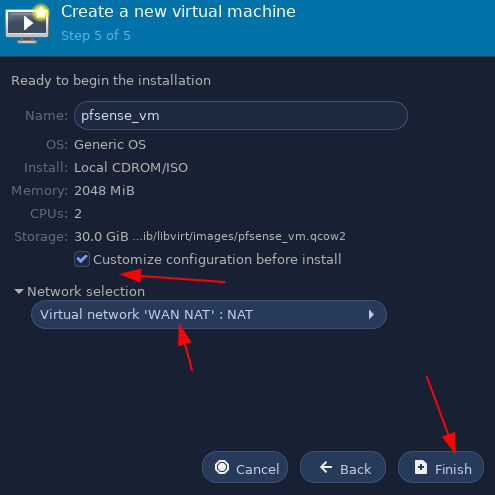
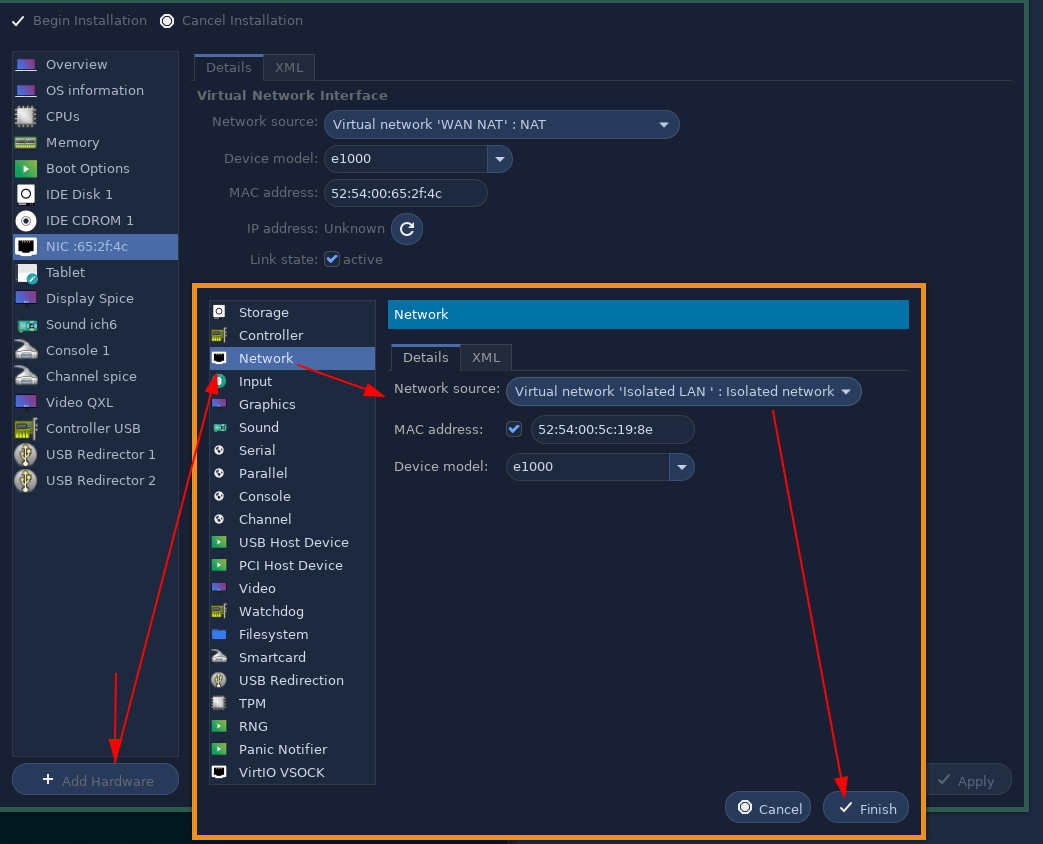
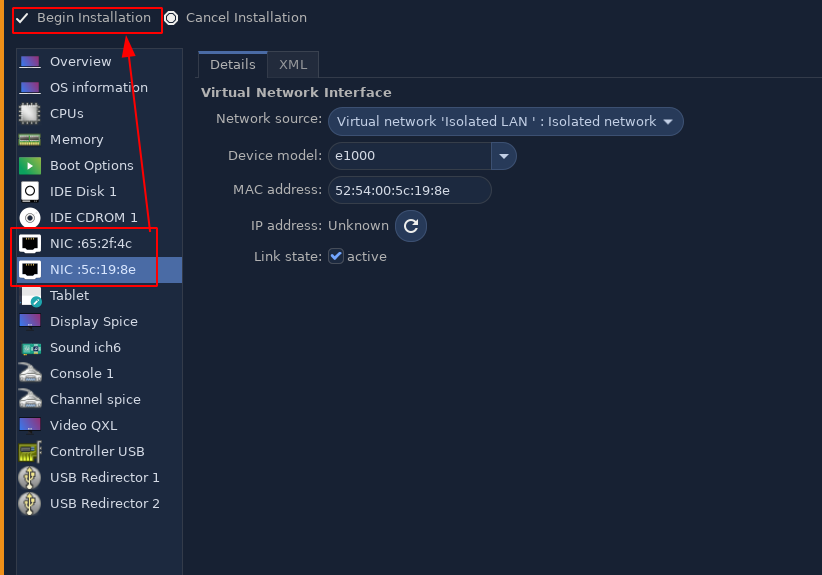
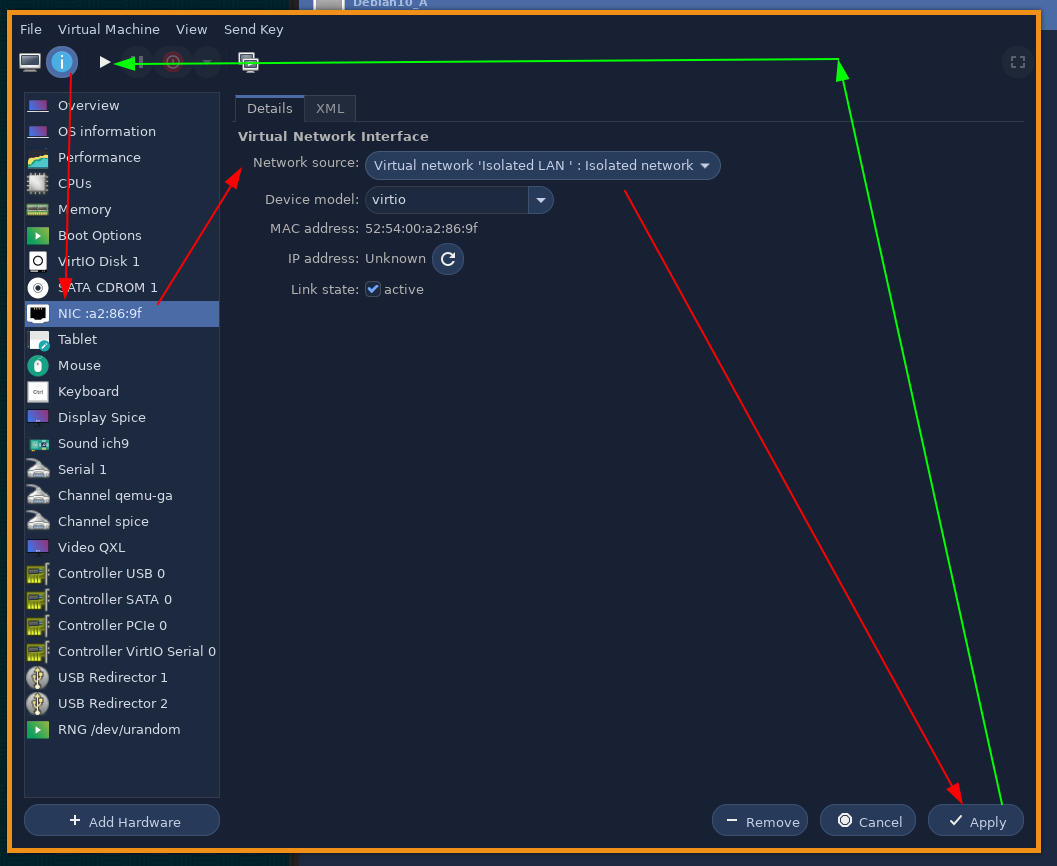
here we make sure that our pfsense VM has 2 NICs, one is the WAN interface with our NAT, the other is the isolated 10.0.0.0/16 network.
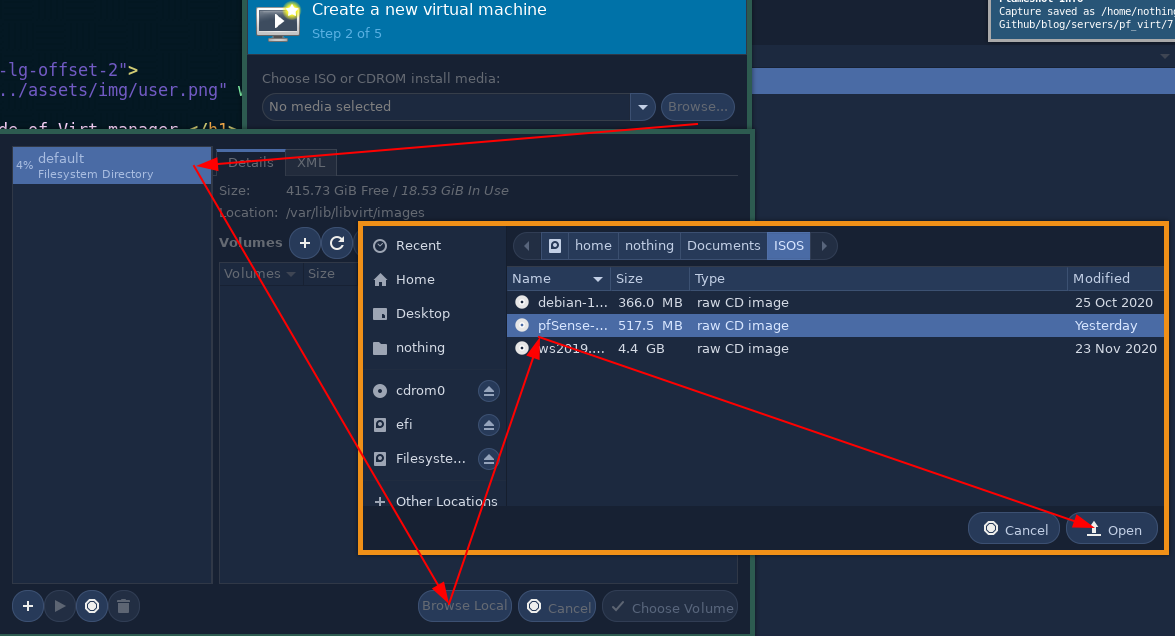
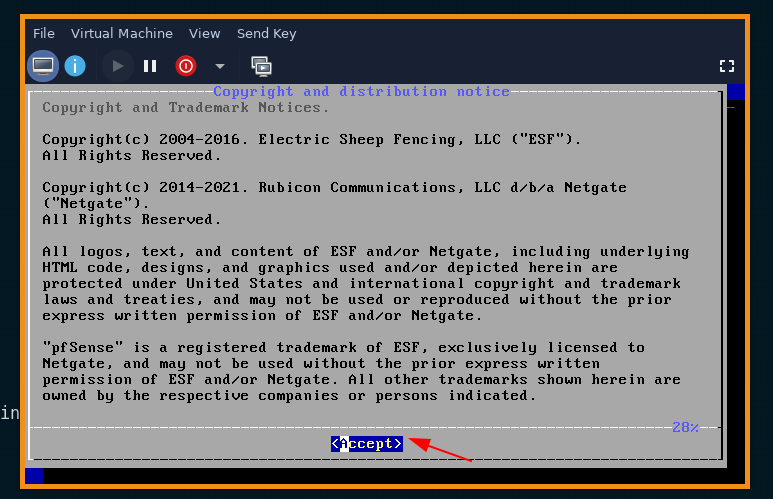
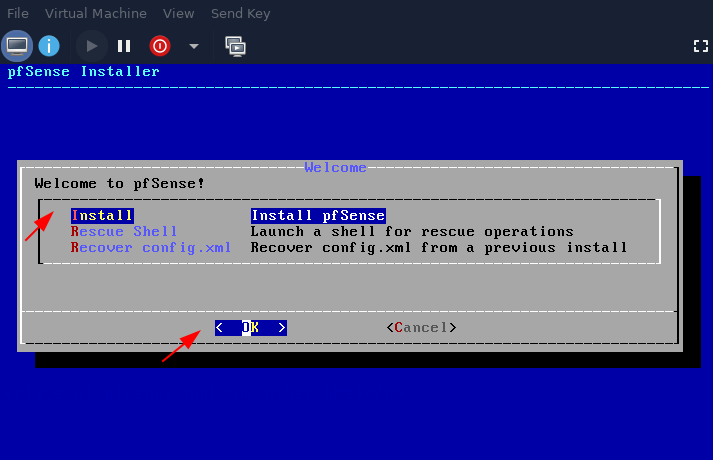
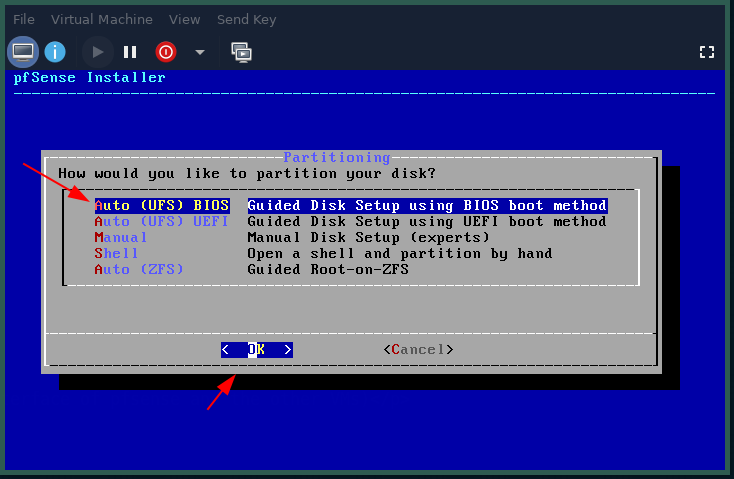
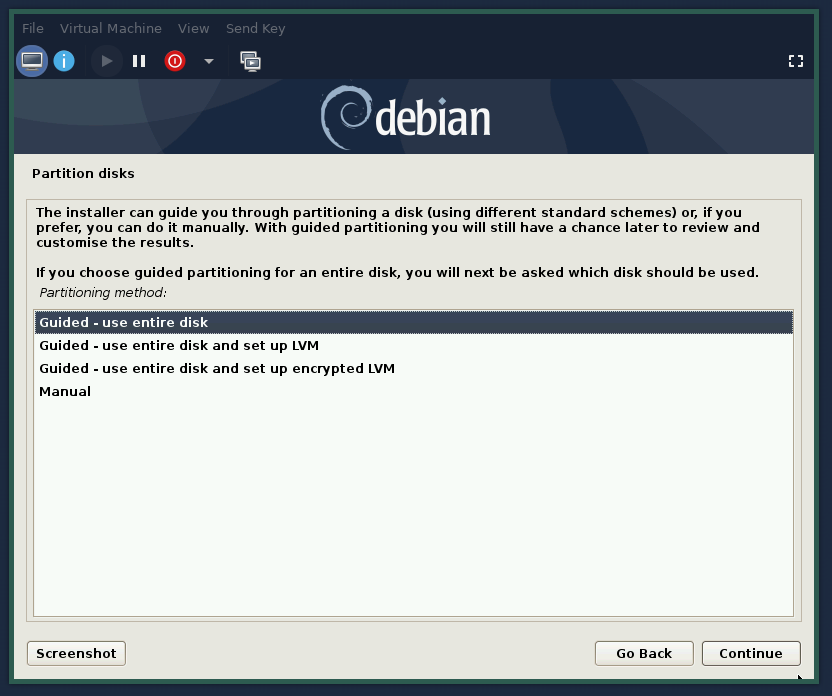
Next we install pfsense :
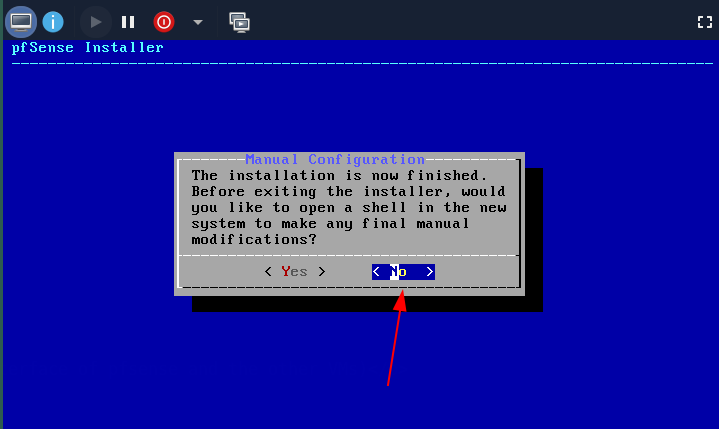
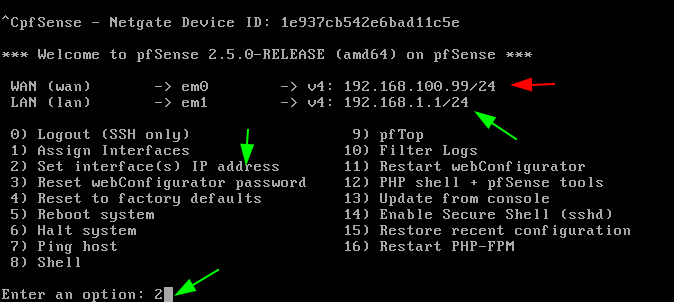
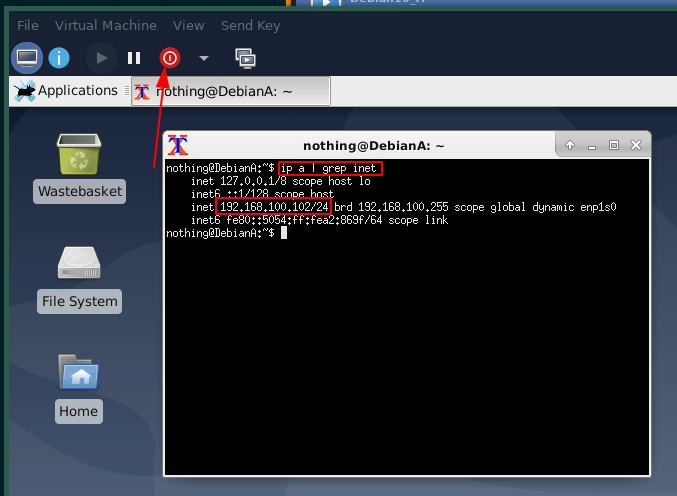
Next select reboot, and we're going to configure our pfsense as the gateway router for the 10.0.0.0/16 network as 10.0.0.1/16, and then we will configure the WAN side of pfsense to be the other NIC as a static address in 192.168.100.0/24:
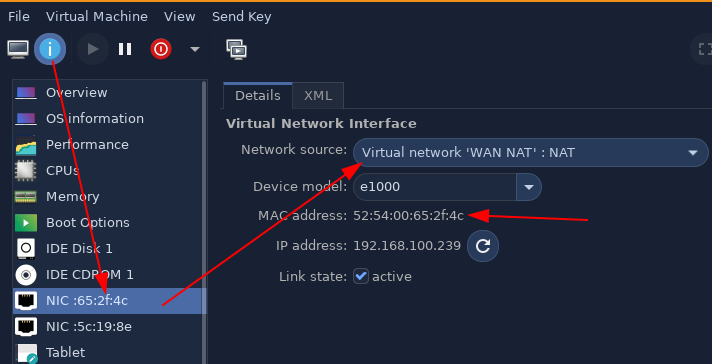
Now if we look at the vm's 2 NICs, we see that the WAN interface has the following mac address:
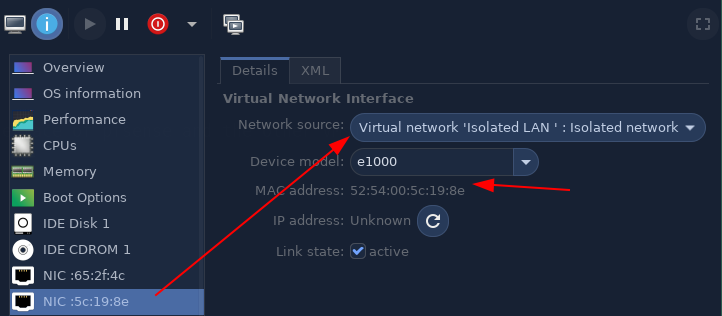
And we see that the LAN interface has the following mac address:
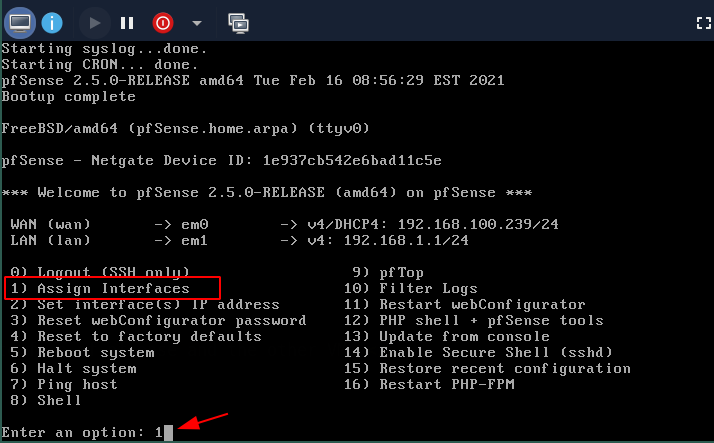
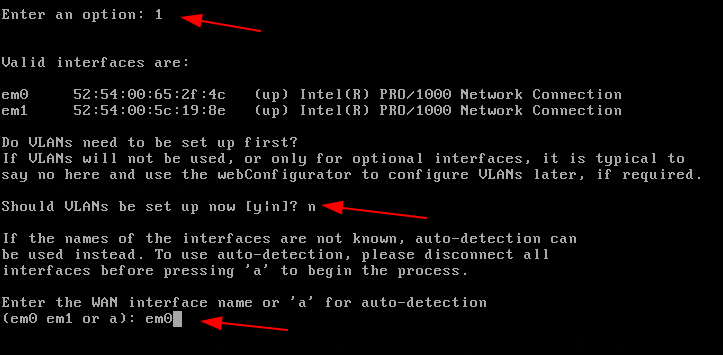
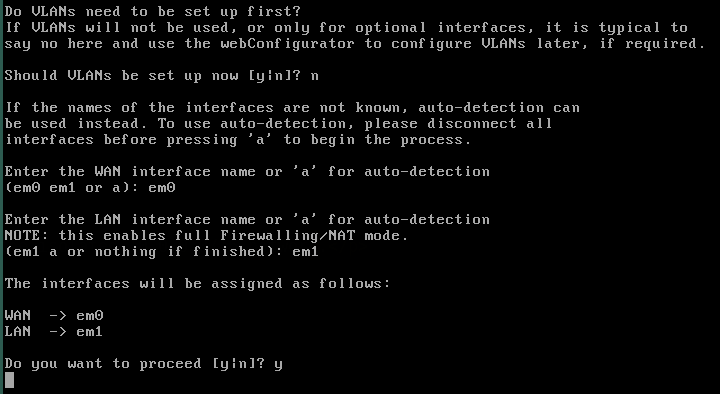
So we assign the interfaces in pfsense accordingly:
Next step, we assign static ips to both the interfaces we just setup:
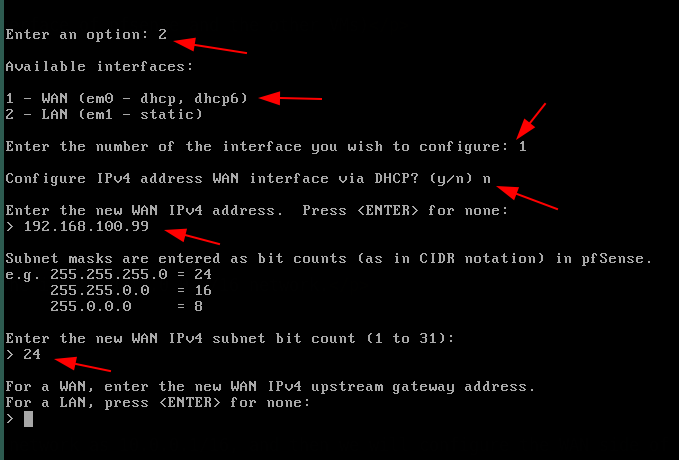
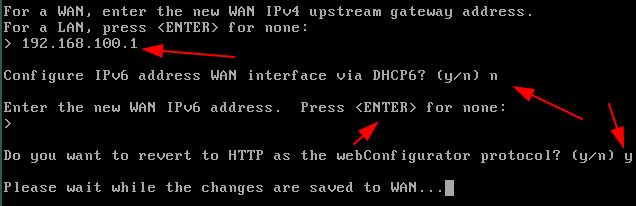
for the upstream gateway address, we will simply use our host machine ip:

Now we setup the LAN-side ip address:
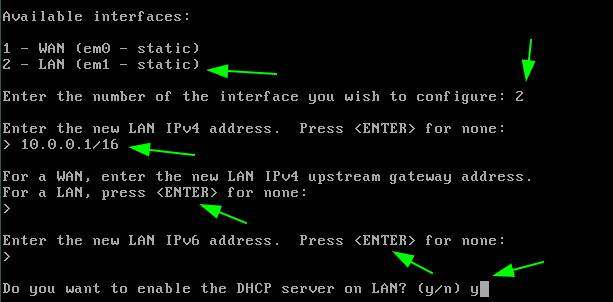
Now here we want to setup DHCP on the LAN following the settings we set earlier.

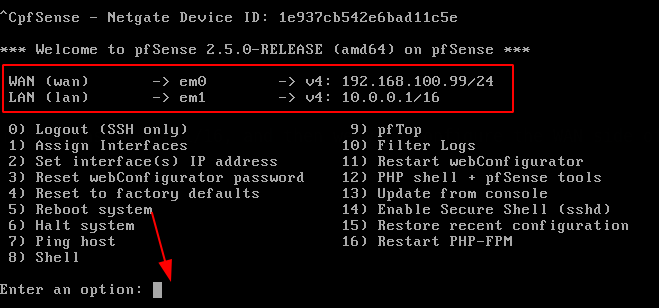
So we get the following result, and we reboot our pfsense:
now what we need here is to install a client VM to put inside of our LAN network, and from there we will be able to access the pfsense web interface.

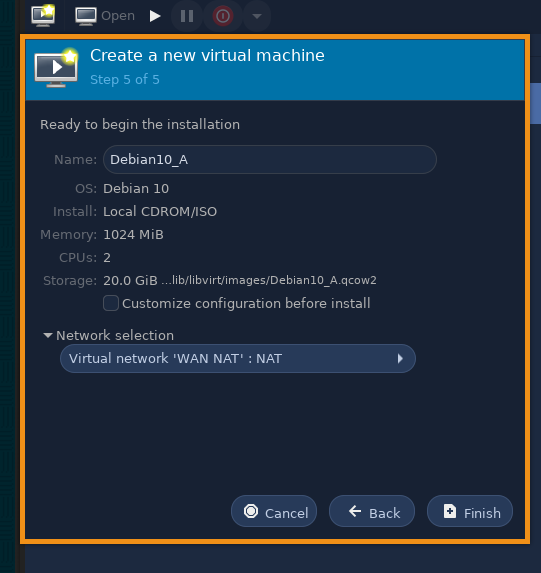
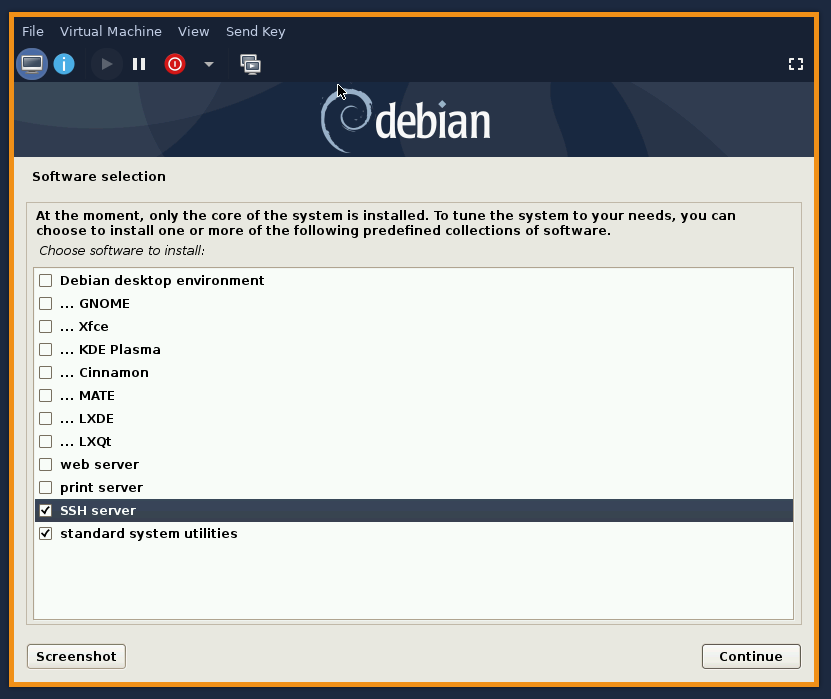
Now install debian as usual, we won't use any graphical interface to avoid the installation process to take too long, also make sure to install debian on the WAN interface to avoid any connection problems:
Once the installation is done, you get the following:
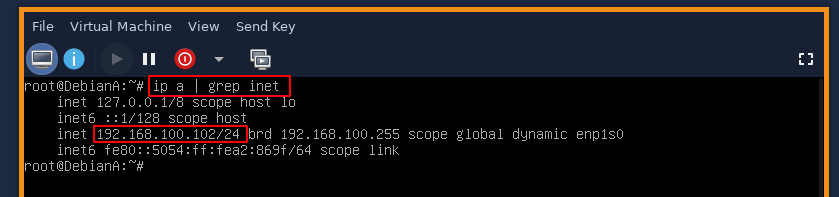
However we want our machine to be on the 10.0.0.0/16 subnet, and we also want to be able to browse the web from our debian machine, so before we shut the machine off and change the NIC, we run the following commands:
apt update -y ; apt upgrade -y ; apt install lightdm xfce4 xfwm4 lightdm firefox-esr -y
systemctl enable lightdm --now
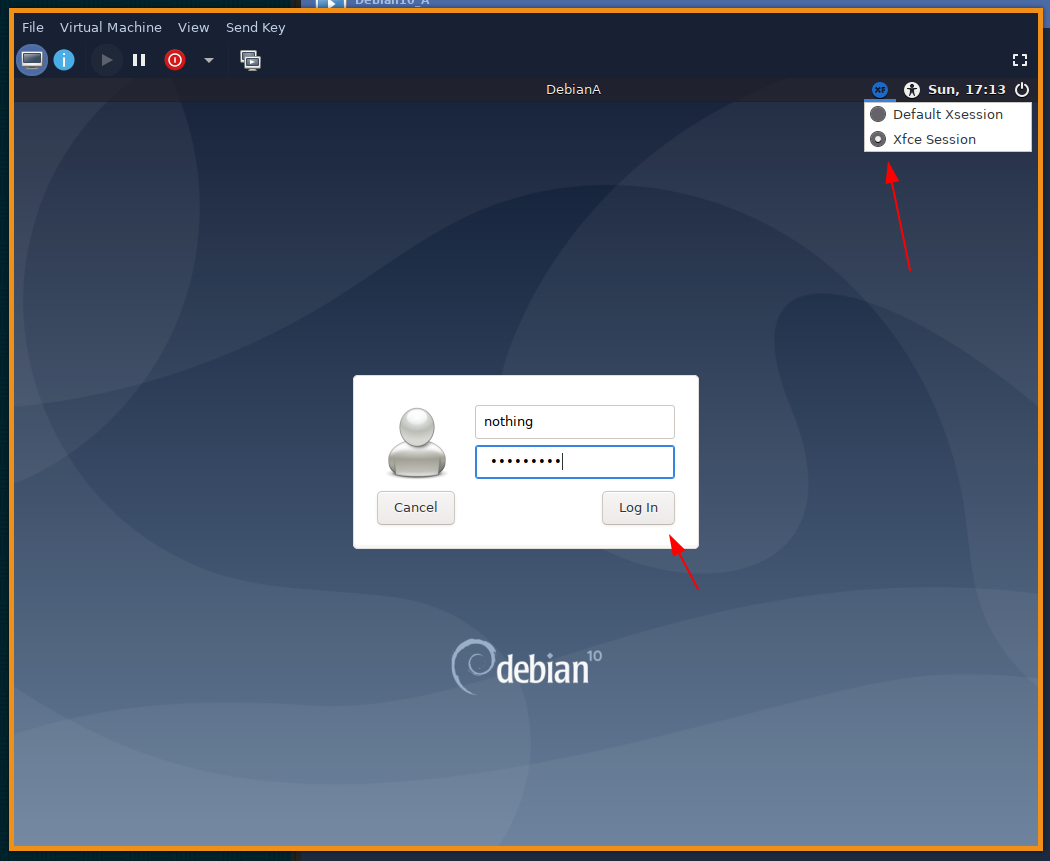
So now we have our debian VM with graphical display, but it's not on the correct subnet, so we shut it down to correct that:
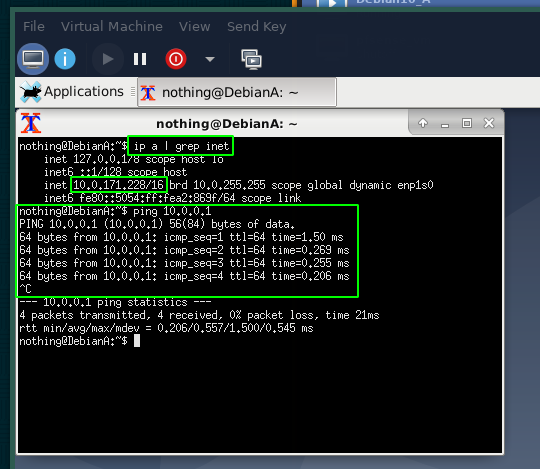
We select the LAN network, and start the VM again:
And here we see that we are on the correct subnet, and we are able to ping the LAN interface of our pfsense VM, so let's access it from the web browser:
If for some reason you can't access the pfsense web interface on 10.0.0.1, you can always re-configure it again:
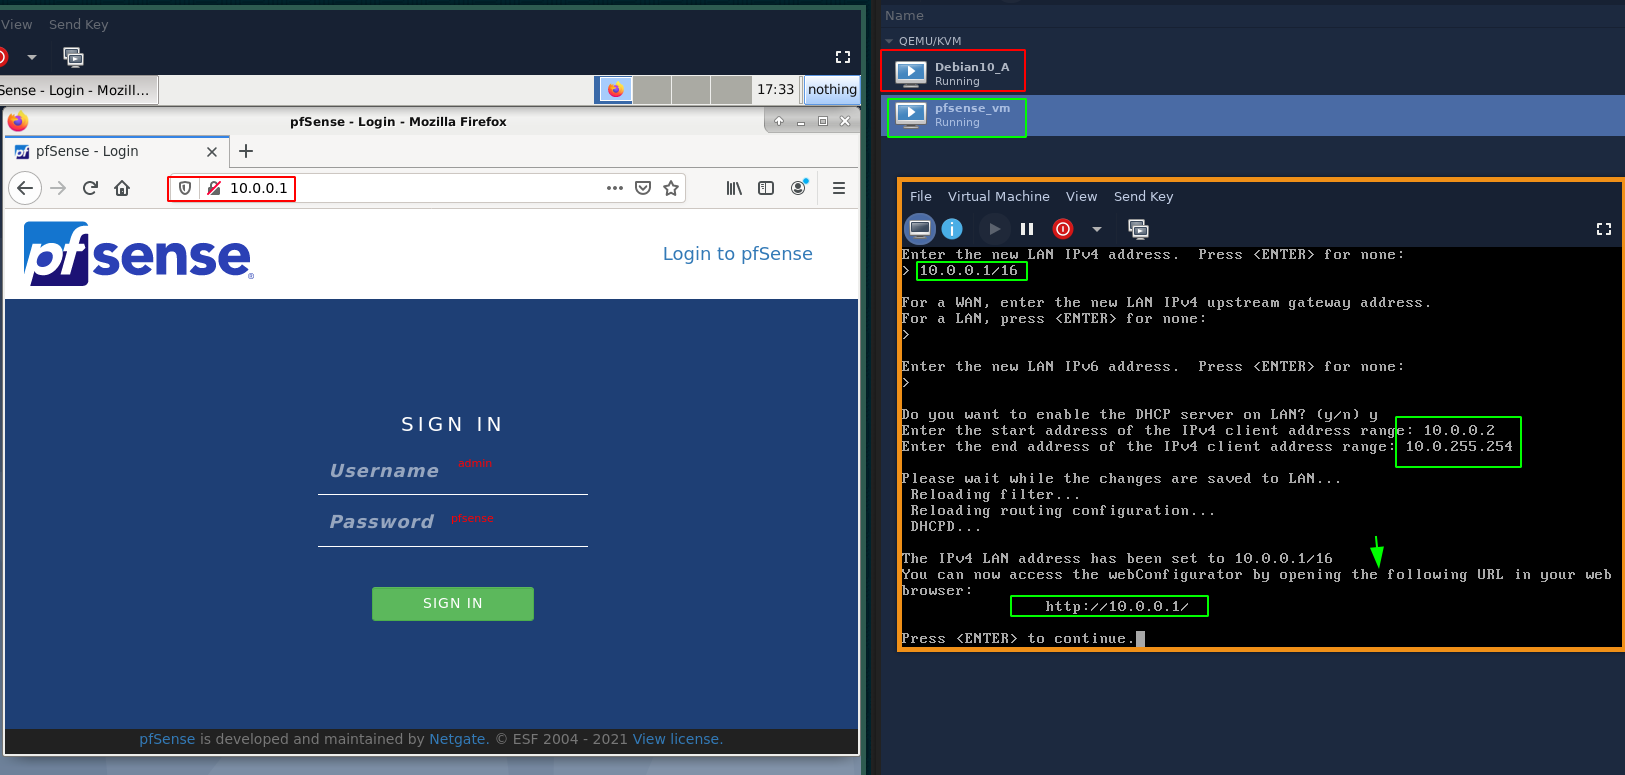
now you can login with the admin:pfsense default credentials

since our WAN network is also a private subnet
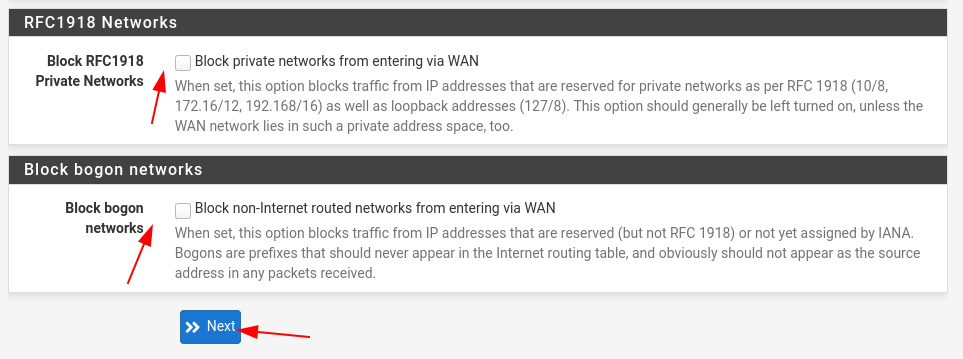
Then follow the rest of the install and you end up with the following result:
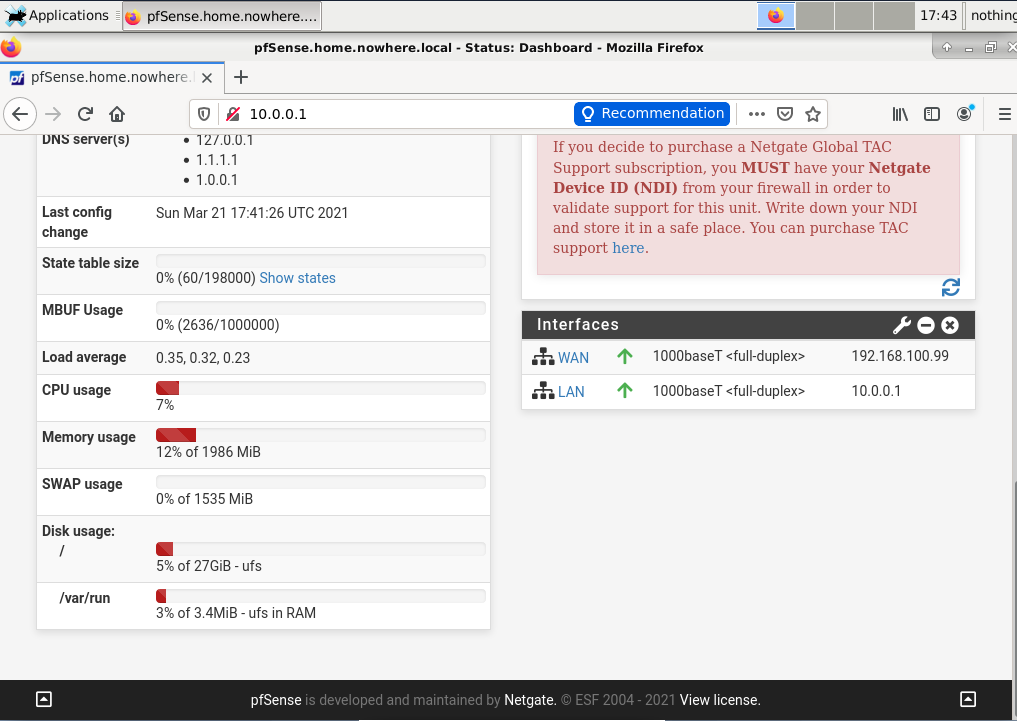
And there you have it! We have been able to install pfsense on virt-manager, with a 10.0.0.0/16 LAN network.
Some Address 67120,
Duttlenheim, France.
This cute theme was created to showcase your work in a simple way. Use it wisely.