Ech0 - 00 / 00 / 00

Pfsense on Proxmox

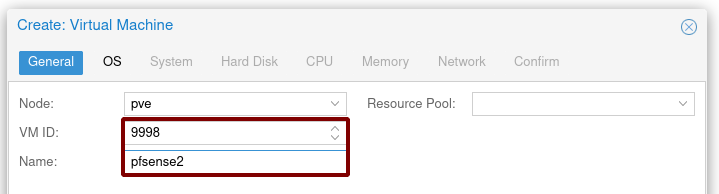
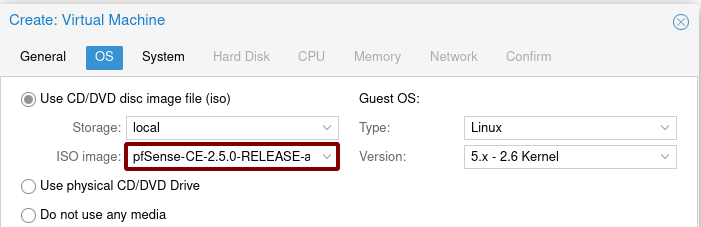
In this tutorial we will be looking at how to install pfsense on a proxmox server using one of proxmox's physical Network Interface Cards (NIC) as the WAN interface, in order to be able to link a closed LAN virtual network. We will be using the following network graph as a reference:

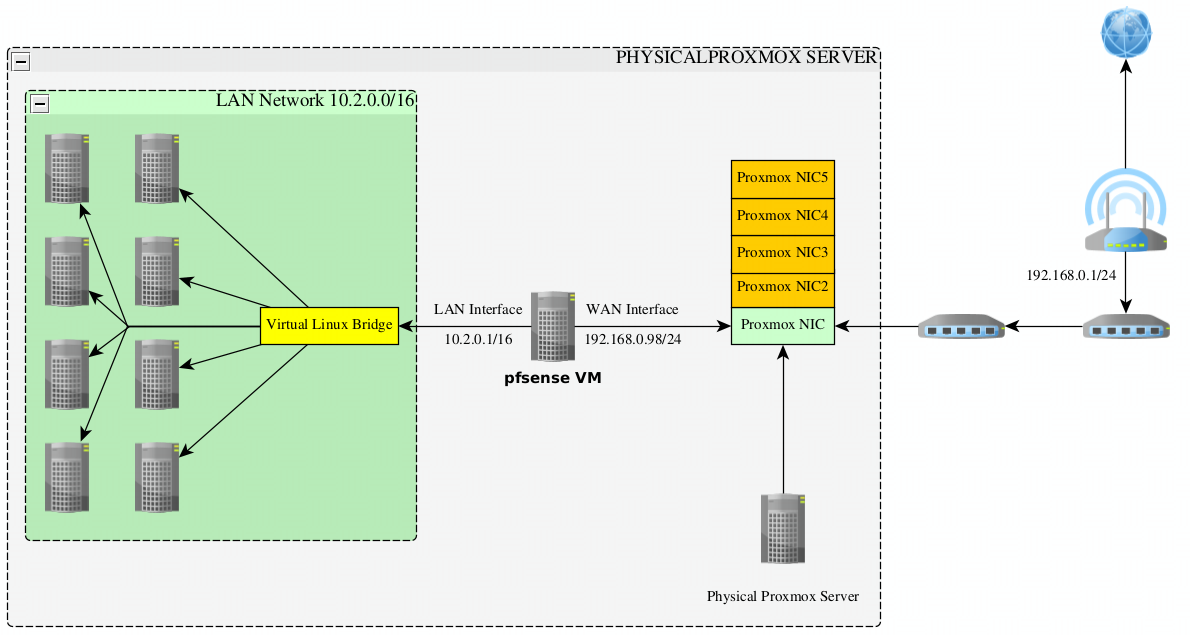
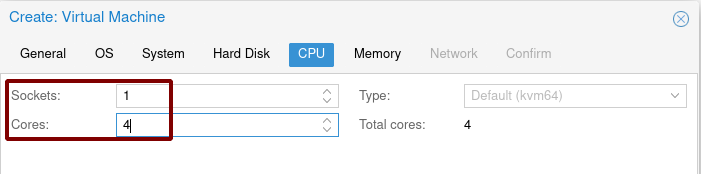
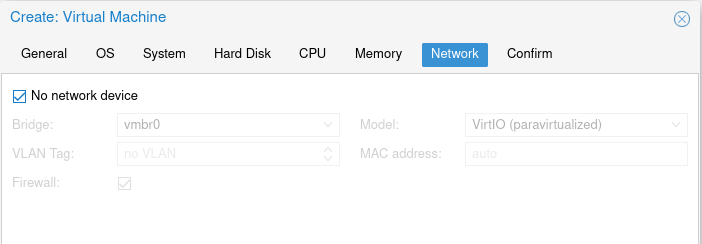
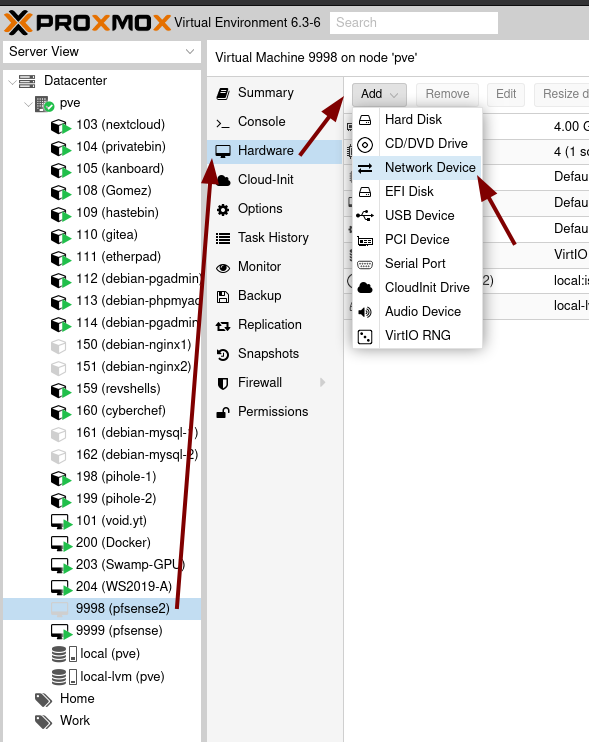
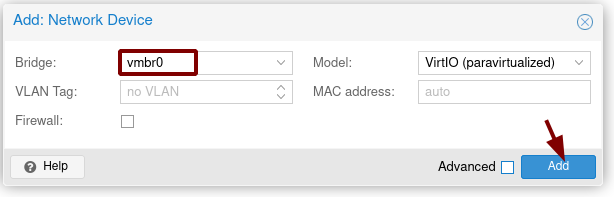
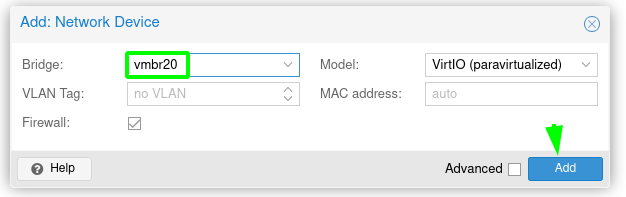
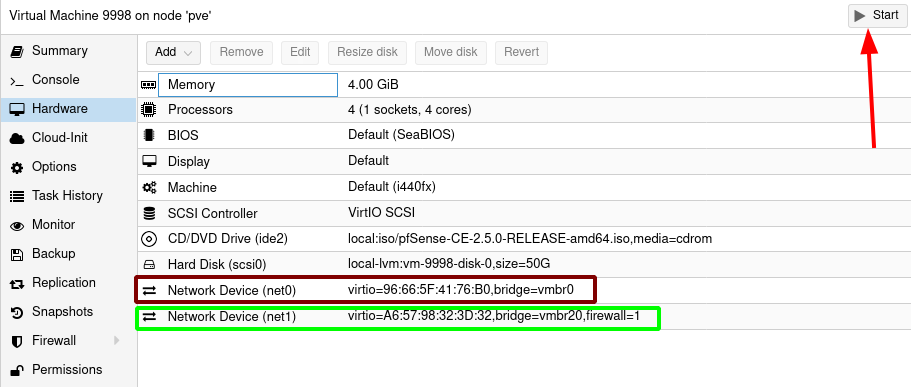
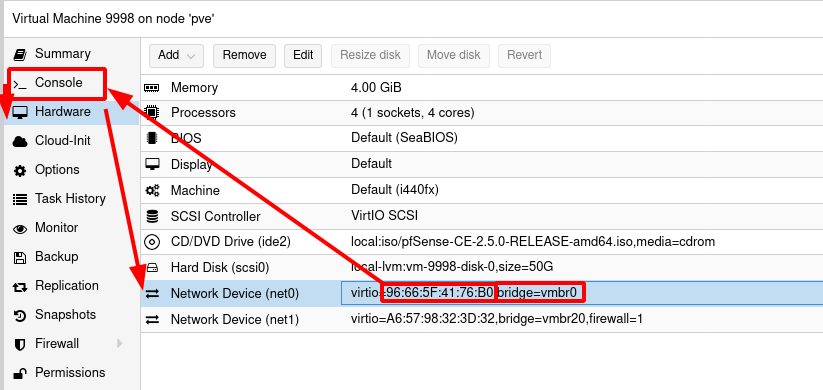
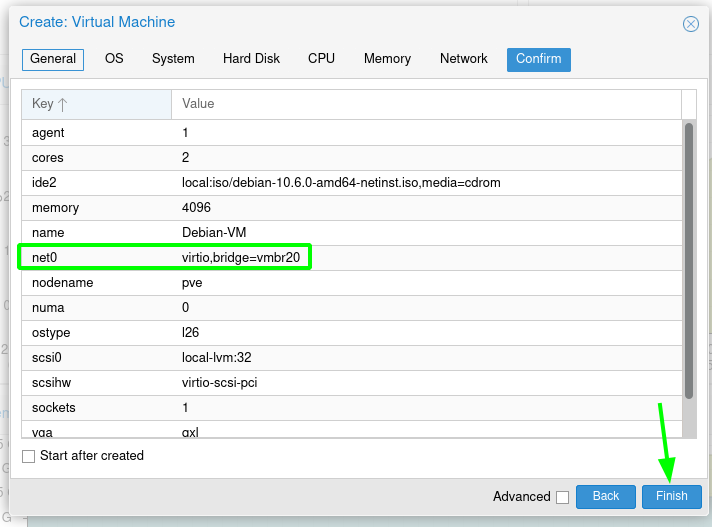
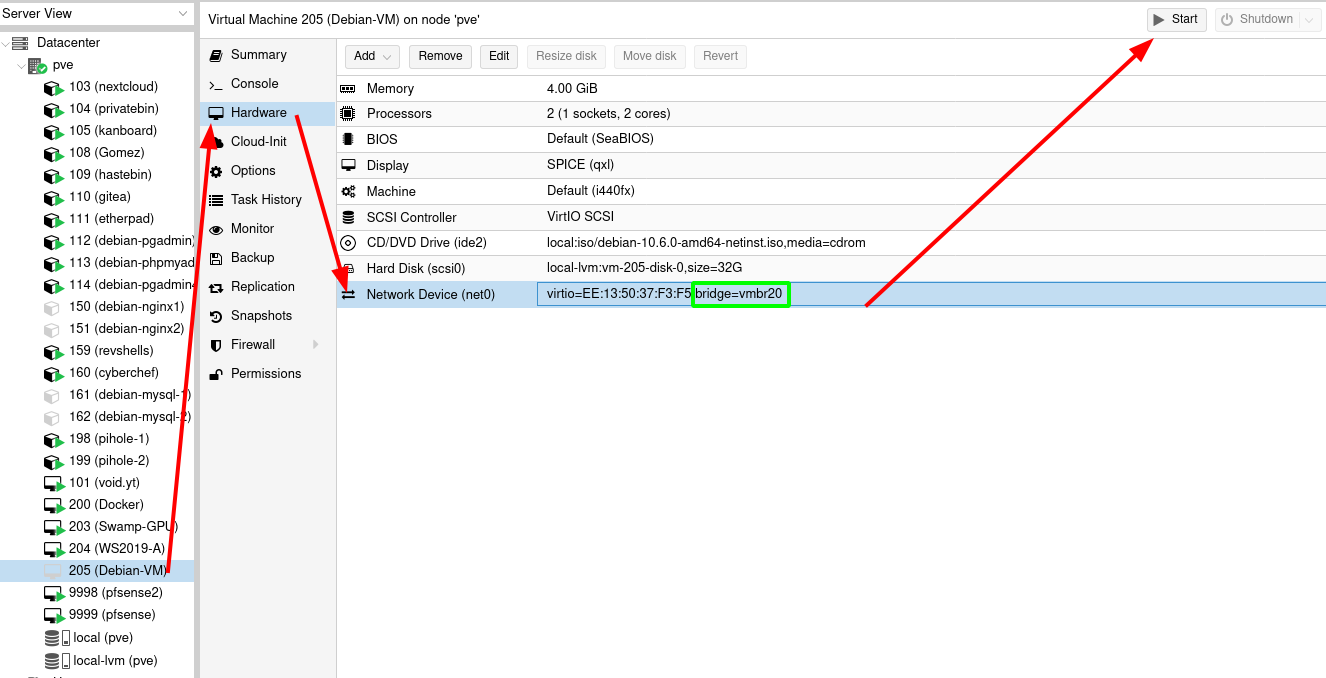
As you can see, the pfsense VM will require 2 Network interfaces, and we will also need to adapt our networking INSIDE of proxmox in order to create the virtual LAN network space for our other VMs/CTs. But why would we want to do this ? First of all this is one way of getting around subnet limitations. As you can see on that network graph above, we are being limited by our upstream router (192.168.0.1) by a /24 network mask, this means that at most we will be able to have 254 hosts on the WAN network.

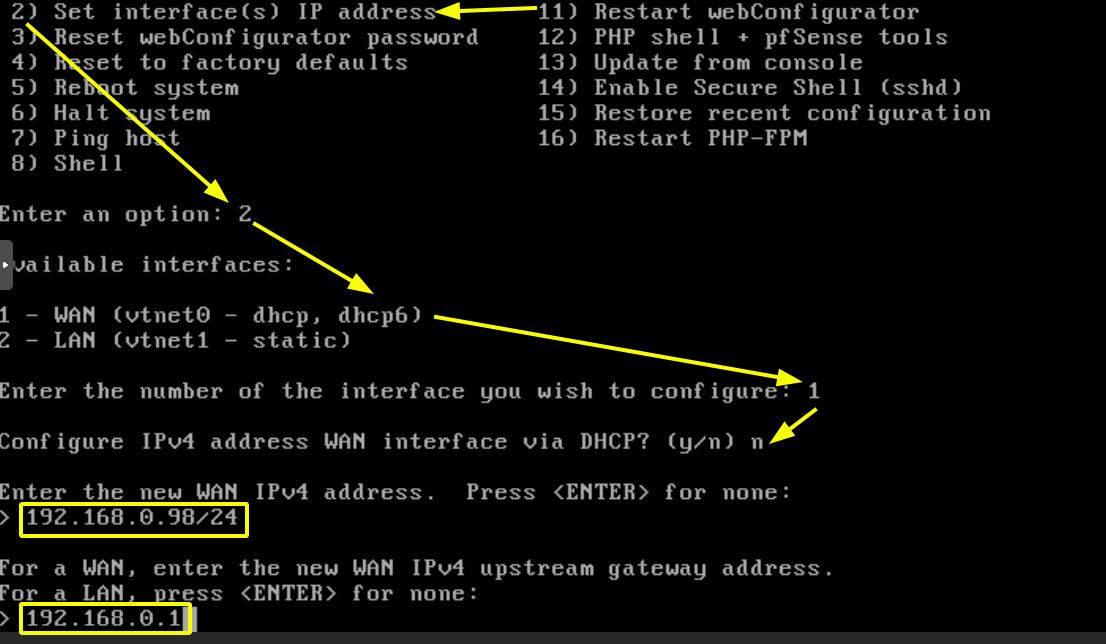
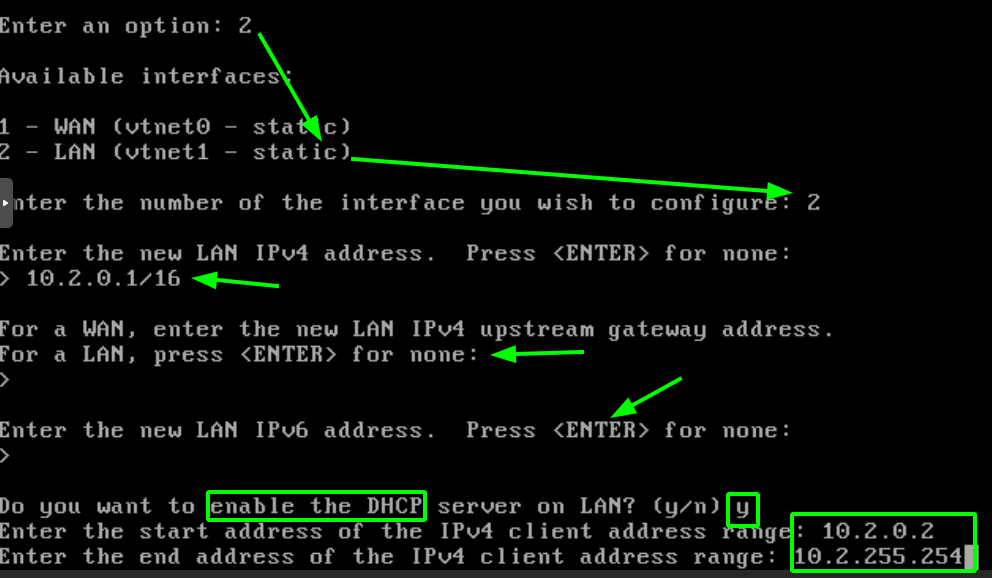
That's not ideal, we potentially want more than 255 hosts there, and therefore we create a virtual LAN behind a second router (our pfsense VM at 192.168.0.98) which will be able to contain much more hosts. Here our plan is getting a virtual LAN network that has a /16 network mask, this means that we're going to get 2^16-2 = 65534 potential hosts instead of just 254. With that being said, let's get to work:

Initial Setup

You can start by going to pfsense's download page here to get the latest pfsense ISO image, and then upload it to your proxmox server here:

Now we need to create the LAN network with the /16 mask:

As you can see below, we now have our Virtual LAN network ready (10.2.0.0/16) as vmbr20 and our WAN interface is going to be vmbr0, this is proxmox's physical interface linked to the upstream router (192.168.0.1/24). When we will setup our pfsense VM we will use it and choose a static ip (192.168.0.98/24) the other side of our pfsense VM is going to be on the vmbr20 interface at the 10.2.0.1/16 gateway ip address.

After clicking 'Apply Configuration', you can create the new VM:

For now tick 'no network device' because we will set that up manually after:

Now here make sure not to tick 'start after created' because we're going to edit the VM manually:

Let's first add our WAN interface (vmbr0):

then let's add the LAN interface (vmbr20):

Once we have our 2 NICs done we can start our pfsense VM and handle it using the noVNC console:

Setting up the Pfsense VM


After that let it install and reboot:

Here we need to pick which is the WAN interface, and as you can see the only info we have are the MAC addresses, so let's see which one is the WAN interface:

Now we know that the WAN interface's MAC address is 96:something:b0 so we know that for pfsense it is vtnet0:

After that we will configure the WAN interface's static ip to be 192.168.0.98/24 as planned:

Once that's done, we setup our LAN interface to be 10.2.0.1/16. This will be the gateway for the VMs inside of the virtual LAN network

We want our pfsense Gateway VM to be able to automatically give an ip to the other VMs inside of our virtual LAN network via DHCP. In this case we make use of the entire /16 subnet.

And that's it! We have been able to setup our pfsense VM to act as a router between the WAN network 192.168.0.0/24 and the LAN network 10.2.0.0/16.

Now from there we should be able to create a VM or a CT inside of the virtual /16 LAN network and we should be able to reach our pfsense gateway at the 10.2.0.1/16 IP address.

Hosts within the Virtual LAN


Now that our pfsense has been setup we can setup hosts within the LAN space like so:

Right now we're going to create a Debian VM with a graphical interface to be able to access a web browser and see what our pfsense web interface looks like.

However for now we're going to set it up outside of the LAN because we don't want any network issues during the installation process.

If you selected SPICE before during the VM setup you can use the SPICE console display instead of noVNC:

As we said earlier we want a graphical interface, so we're going to go with xfce:

Now to continue we're going to set the networking on our debian VM to be vmbr20 as we originally intended:

Once logged in we setup our pfsense gateway (by default the credentials are admin:pfsense):

in the WAN interface tab don't change anything except the 2 boxes need to be unticked at the bottom:

Here obviously we change the default password:

Once that's done let pfsense reload it's settings automatically and you can now access the finished dashboard:

And you can test here that internet is now accessible once the pfsense router got setup correctly:

And that's it! We have been able to setup a pfsense VM to be able to link hosts within a closed LAN network to a WAN network accessible via a physical proxmox server Network Interface.

My Bunker

Some Address 67120,
Duttlenheim, France.

About Ech0

This cute theme was created to showcase your work in a simple way. Use it wisely.