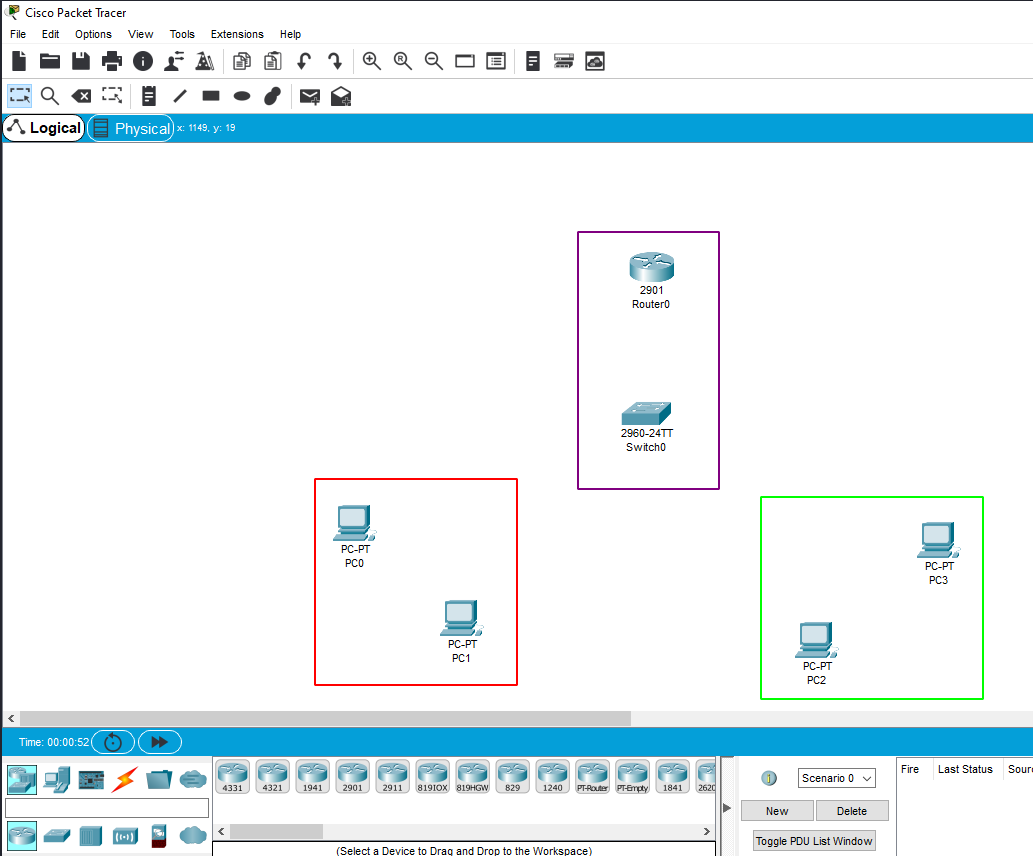
Ech0 - 19 / 08 / 2020

Virtual LANs

A Virtual LAN is any broadcast domain that is partitioned and isolated within a computer network at the data link layer (OSI layer 2). LAN is the abbreviation for "Local Area Network" and in this context virtual refers to a physical object recreated and altered by additional logic.

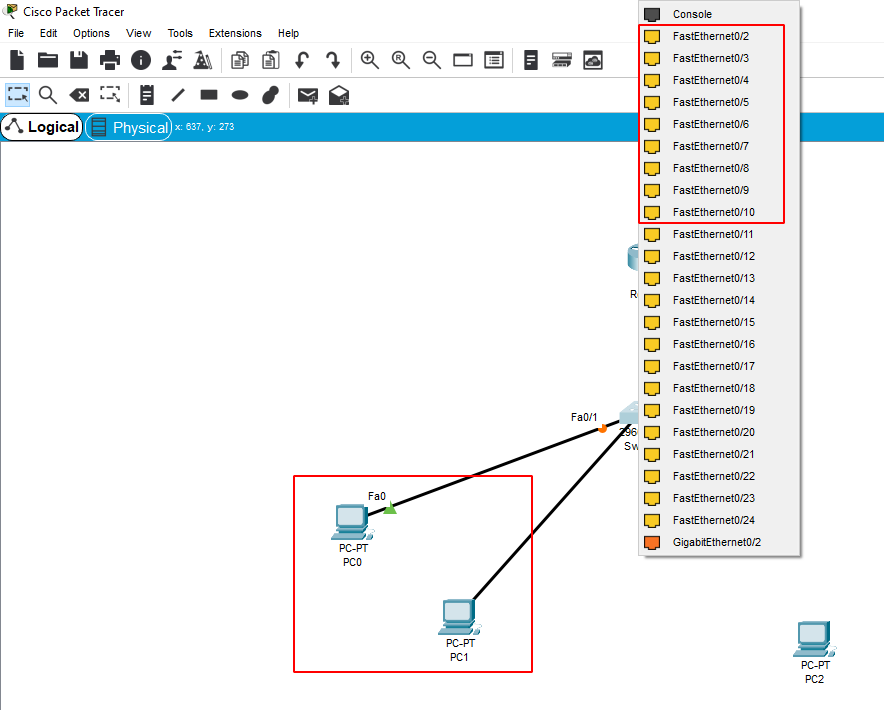
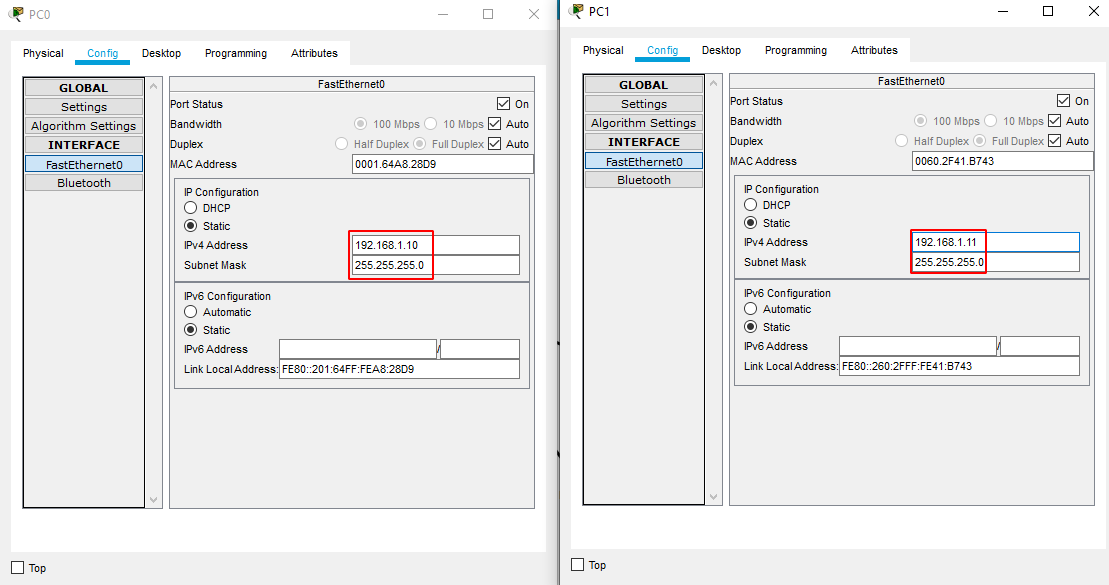
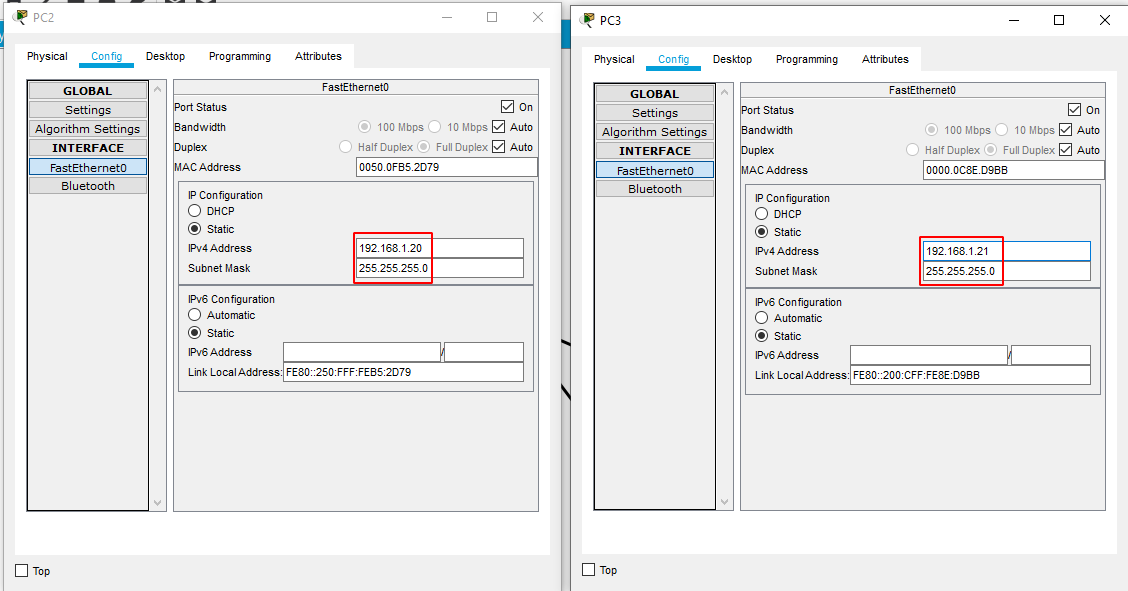
VLANs work by applying tags to network frames and handling these tags in networking systems but acts as if it is split between separate networks. In this way, VLANs can keep network applications separate despite being connected to the same physical network, and without requiring multiple sets of cabling and networking devices to be deployed.

VLANs allow network administrators to group hosts together even if the hosts are not directly connected to the same network switch. Because VLAN membership can be configured through software, this can greatly simplify network design and deployment. Without VLANs, grouping hosts according to their resource needs the labor of relocating nodes or rewiring data links. VLANs allow networks and devices that must be kept separate to share the same physical cabling without interacting, improving simplicity, security and traffic management.

Initial Setup

We will need a router, a switch, and 4 PCs:

The idea here is to link everything as usual, but we will link the PCs to the switch in a particular way:

We link the first 2 PCs on any of the switch's 0-10 interfaces and the other 2 PCs on the switch's 11-20 interfaces:

Let's configure the router:


Router>en
Router#conf t
Router(config)#int gig0/0
Router(config-if)#ip address 192.168.1.1 255.255.255.0
Router(config-if)#no shutdown
Router(config-if)#exit
Router(config)#exit
Router#copy run start
Router#exit
Router>

Once that's done, assign the correct gateway ip address (192.168.1.1) and a correct ip address (within the 192.168.1.0/24 subnet).

The first 2 pcs will have the ip addresses ending in .10 and .11:

The other 2 pcs will have the ip addresses ending in .20 and .21:

Once that's done, we have 4 PCs that can communicate with each other since they are linked to the same switch, but we want to separate them like so:

So that's where we need to configure the VLANs on the switch.

Configuring the VLANs


Arbitrarily we decided so that the switch's 0-10 interfaces to be separated from the other 11-20 interfaces.

So we will create 2 VLANs, one vlan will be on the 0-10 interfaces, and the other one will be on the 11-20 interfaces:


Switch>en
Switch#conf t
Switch(config)#vlan 10
Switch(config-vlan)#name LEFT
Switch(config-vlan)#exit
Switch(config)#vlan 20
Switch(config-vlan)#name RIGHT
Switch(config-vlan)#exit
Switch(config)#exit
Switch#copy run start
Switch#show vlan

Now we have created our 2 separate VLANs, we need to assign the interfaces to it's corresponding VLAN:


Switch#conf t
Switch(config)#int range Fa0/1 - 10
Switch(config-if-range)#switchport access vlan 10
Switch(config-if-range)#exit 
Switch(config)#int range Fa0/11 - 20
Switch(config-if-range)#switchport access vlan 20
Switch(config-if-range)#exit
Switch(config)#exit 
Switch#copy run start
Switch#show vlan

And now we see that the VLANs are active, and have the appropriate interfaces assigned to them. Which now means, that our 2 sets of PCs are separated and should not be able to communicate despite being linked to the same switch.

Let's test the connection between PC0 and PC3:

Verifying the VLAN Separation


Here we'll just verify that each pc can communicate ONLY with the other pc in the same set:


And that's it! we have been able to separate the 2 sets of PCs despite having them on the same switch thanks to the VLAN separation.

Click here to download the pkt file.

Next chapter: Inter-VLAN Routing

My Bunker

Some Address 67120,
Duttlenheim, France.

About Ech0

This cute theme was created to showcase your work in a simple way. Use it wisely.