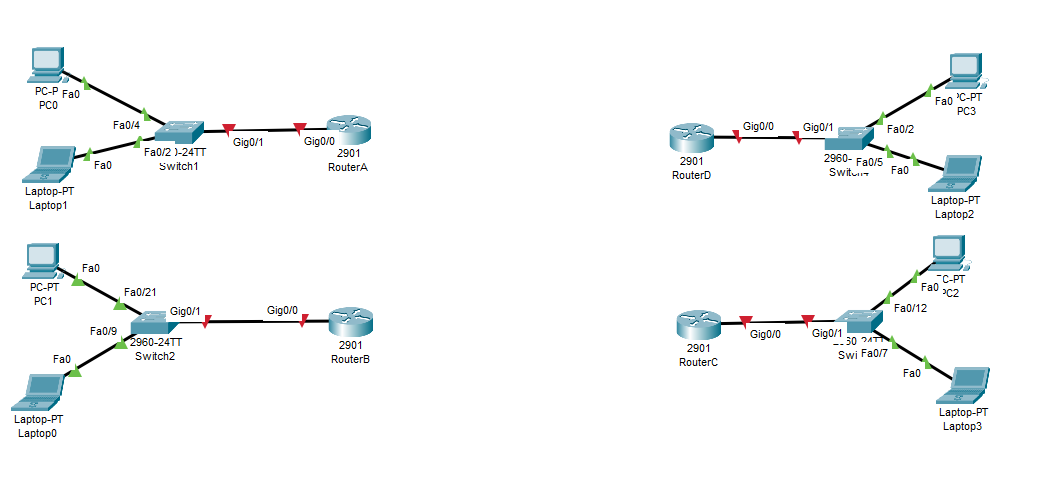
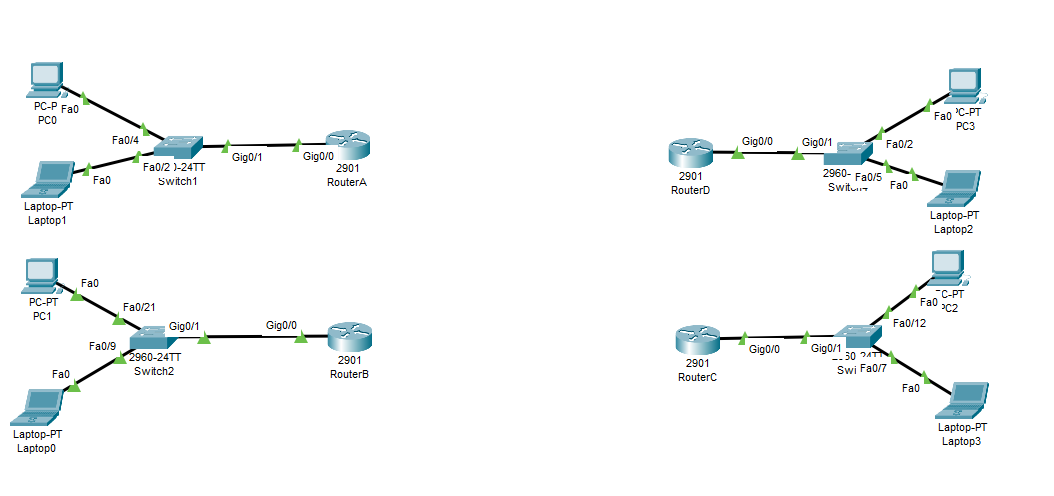
Configuring the Serial Connections
RouterA
RouterA>en
RouterA#conf t
RouterA(config)#int se0/3/0
RouterA(config-if)#clock rate 64000
RouterA(config-if)#ip address 200.100.1.1 255.255.255.0
RouterA(config-if)#no shutdown
RouterA(config-if)#exit
RouterA(config)#int se0/3/1
RouterA(config-if)#ip address 200.100.4.2 255.255.255.0
RouterA(config-if)#no shutdown
RouterA(config-if)#exit
RouterA(config)#exit
RouterA#copy run start
RouterA#exit
RouterA>
RouterB
RouterB>en
RouterB#conf t
RouterB(config)#int se0/3/0
RouterB(config-if)#clock rate 64000
RouterB(config-if)#ip address 200.100.4.1 255.255.255.0
RouterB(config-if)#no shutdown
RouterB(config-if)#exit
RouterB(config)#int se0/3/1
RouterB(config-if)#ip address 200.100.3.2 255.255.255.0
RouterB(config-if)#no shutdown
RouterB(config-if)#exit
RouterB(config)#exit
RouterB#copy run start
RouterB#exit
RouterB>
RouterC
RouterC>en
RouterC#conf t
RouterC(config)#int se0/3/0
RouterC(config-if)#clock rate 64000
RouterC(config-if)#ip address 200.100.3.1 255.255.255.0
RouterC(config-if)#no shutdown
RouterC(config-if)#exit
RouterC(config)#int se0/3/1
RouterC(config-if)#ip address 200.100.2.2 255.255.255.0
RouterC(config-if)#no shutdown
RouterC(config-if)#exit
RouterC(config)#exit
RouterC#copy run start
RouterC#exit
RouterC>
RouterD
RouterD>en
RouterD#conf t
RouterD(config)#int se0/3/0
RouterD(config-if)#clock rate 64000
RouterD(config-if)#ip address 200.100.2.1 255.255.255.0
RouterD(config-if)#no shutdown
RouterD(config-if)#exit
RouterD(config)#int se0/3/1
RouterD(config-if)#ip address 200.100.1.2 255.255.255.0
RouterD(config-if)#no shutdown
RouterD(config-if)#exit
RouterD(config)#exit
RouterD#copy run start
RouterD#exit
RouterD>
Side note: the clock speed is being set on only ONE side of the serial connection is totally intentional.
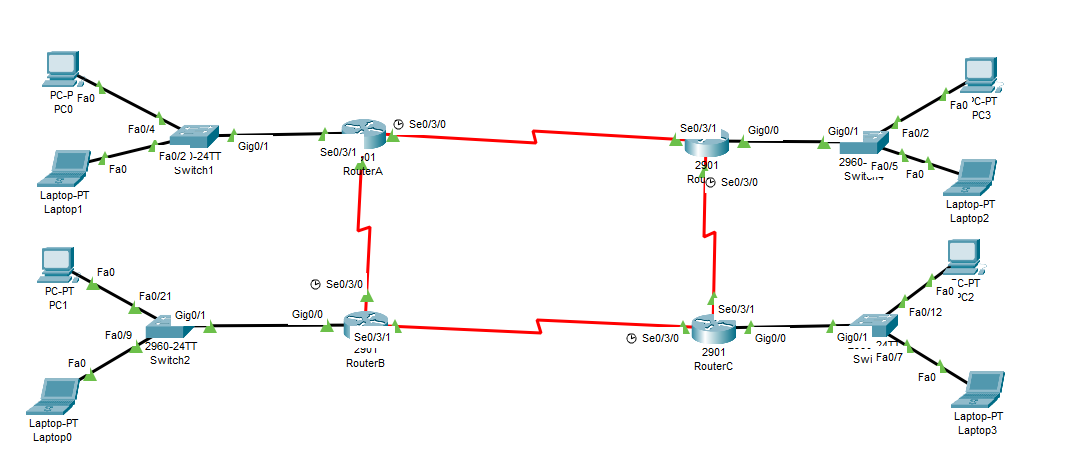
Once that's done, all we need to do is activate the dynamic routing protocol itself (RIPv2)
RouterA:
RouterA>en
RouterA#conf t
RouterA(config)#router rip
RouterA(config-router)#version 2
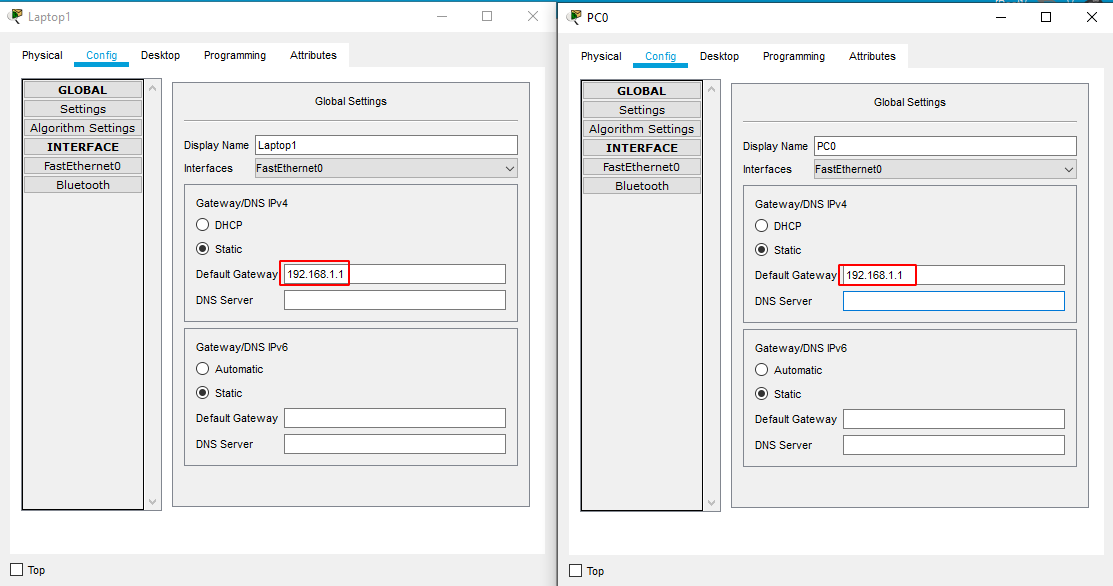
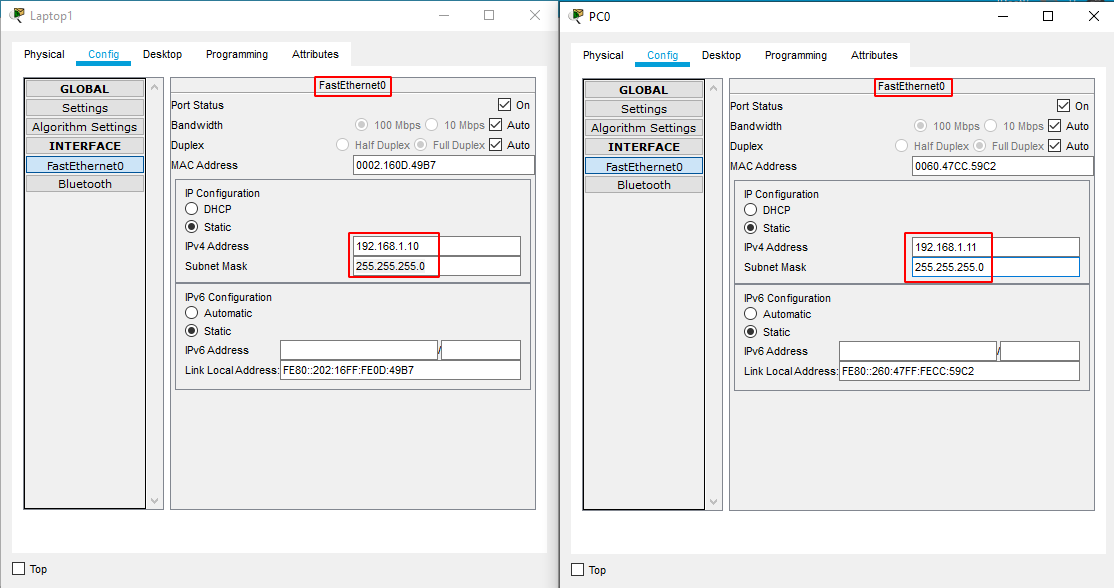
RouterA(config-router)#network 192.168.1.0
RouterA(config-router)#network 200.100.1.0
RouterA(config-router)#network 200.100.4.0
RouterA(config-router)#exit
RouterA(config)#exit
RouterA#copy run start
RouterA#exit
RouterA>
RouterB:
RouterB>en
RouterB#conf t
RouterB(config)#router rip
RouterB(config-router)#version 2
RouterB(config-router)#network 192.168.2.0
RouterB(config-router)#network 200.100.4.0
RouterB(config-router)#network 200.100.3.0
RouterB(config-router)#exit
RouterB(config)#exit
RouterB#copy run start
RouterB#exit
RouterB>
RouterC:
RouterC>en
RouterC#conf t
RouterC(config)#router rip
RouterC(config-router)#version 2
RouterC(config-router)#network 192.168.3.0
RouterC(config-router)#network 200.100.3.0
RouterC(config-router)#network 200.100.2.0
RouterC(config-router)#exit
RouterC(config)#exit
RouterC#copy run start
RouterC#exit
RouterC>
RouterD:
RouterD>en
RouterD#conf t
RouterD(config)#router rip
RouterD(config-router)#version 2
RouterD(config-router)#network 192.168.4.0
RouterD(config-router)#network 200.100.2.0
RouterD(config-router)#network 200.100.1.0
RouterD(config-router)#exit
RouterD(config)#exit
RouterD#copy run start
RouterD#exit
RouterD>
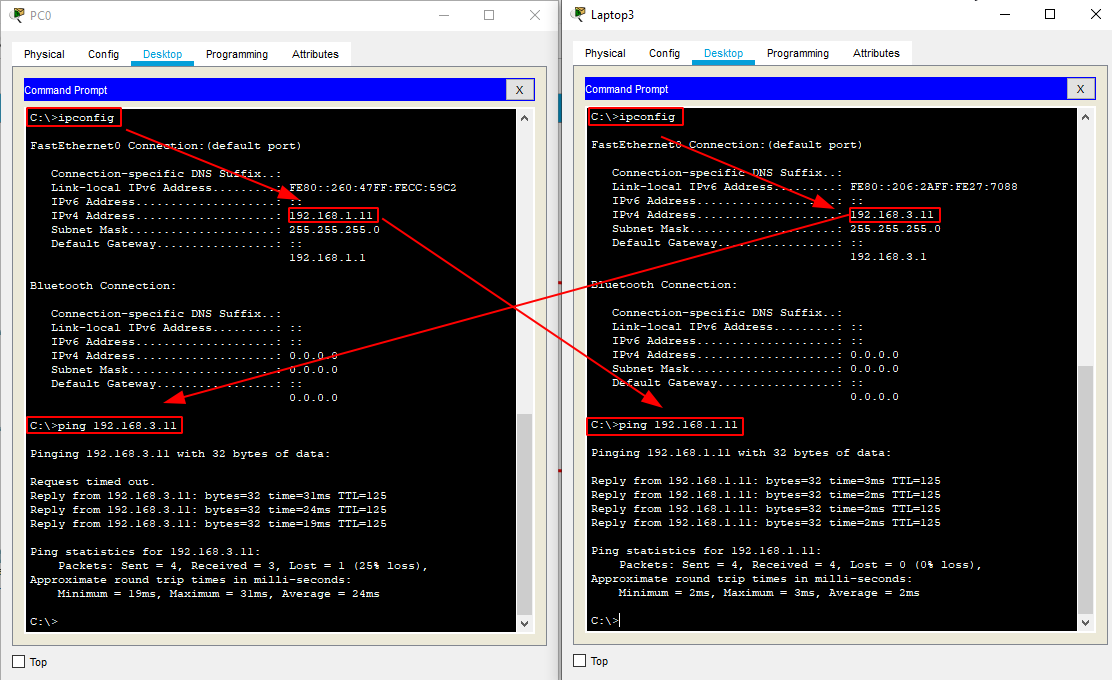
And that's all!